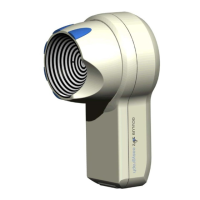
17 Imaging
60 / 106 Instruction Manual Keratograph 5M (G/77000/XXXX/EN – Rev05)
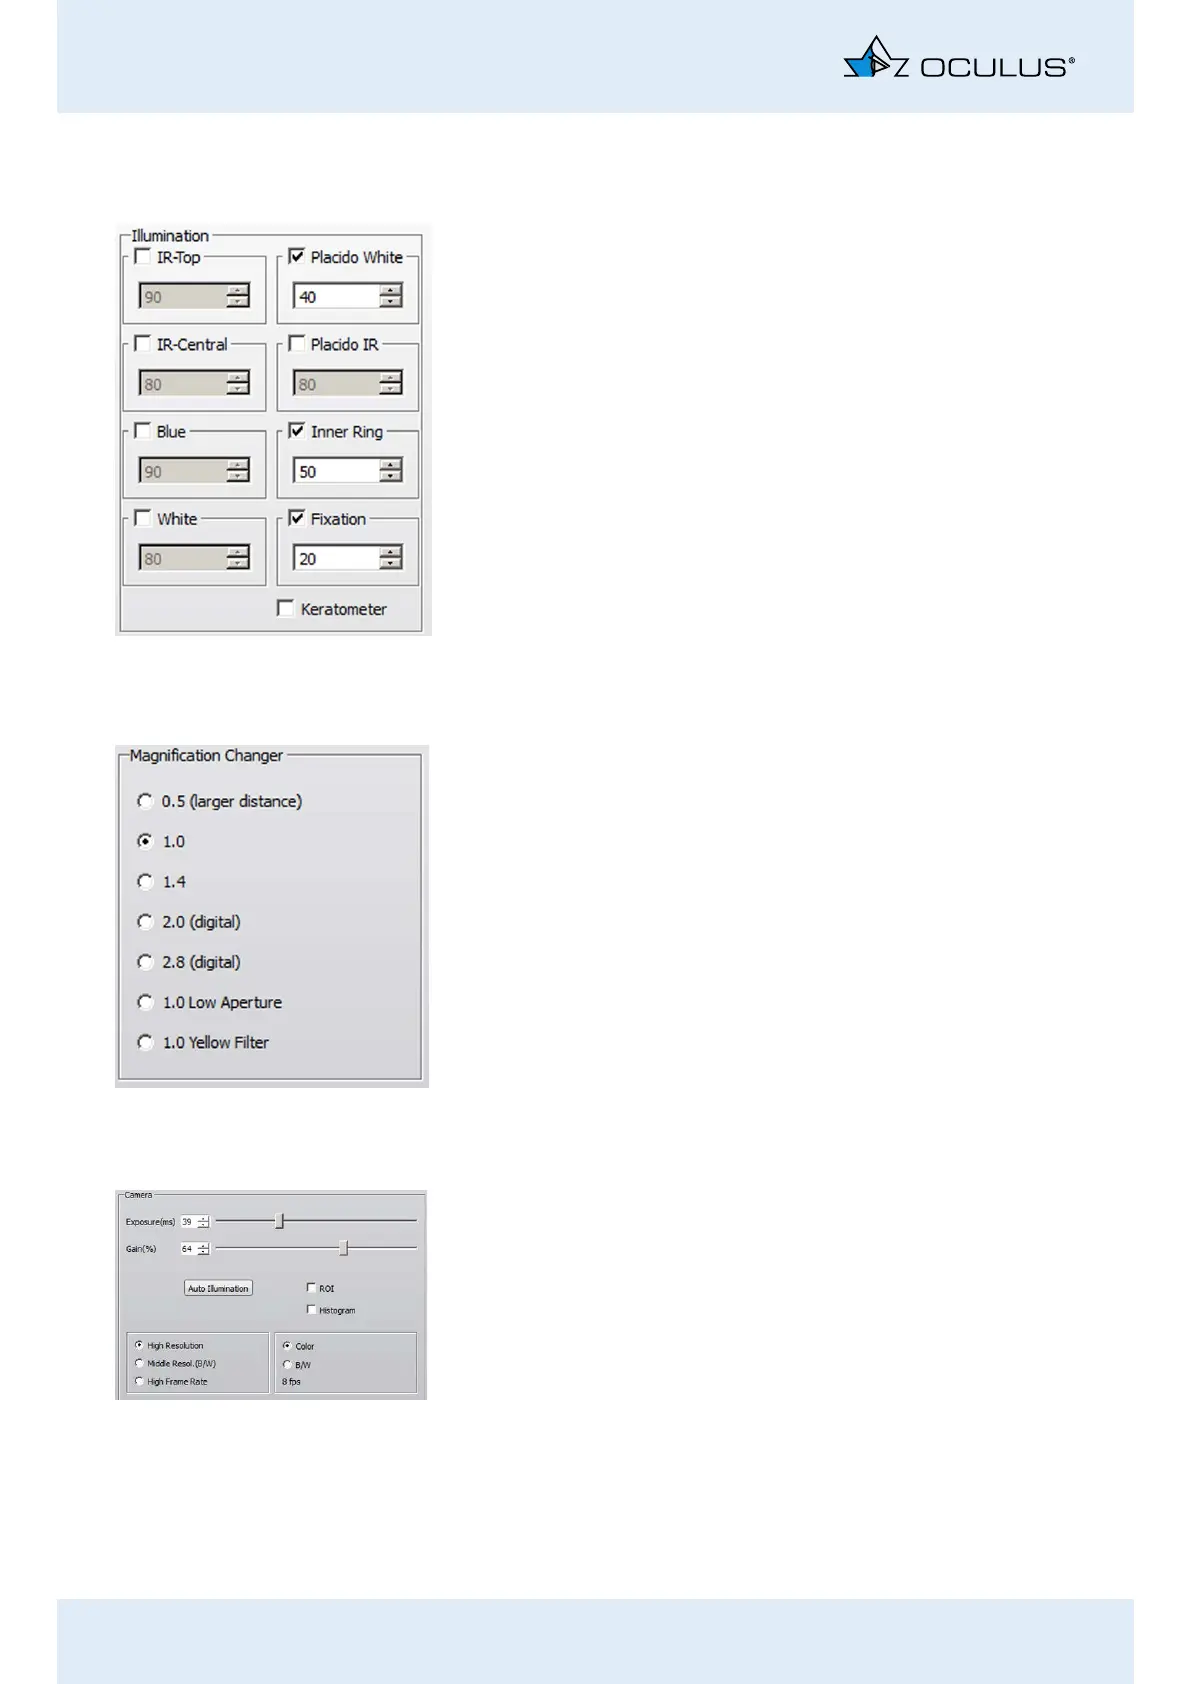
17.5.1 Adjust Illumination: [Illumination] groupbox
Activate the desired radio button.
IR-Top/IR-Central: If only the “IR-Top” and “IR-Central” checkboxes are
enabled (in a darkened room):
The fit of the contact lens can be evaluated with the pupil dilated (e.g.
for fitting multi-focal lenses).
Blue: The blue light is used for excitation of the fluorescine to fluores-
cence.
White: TF-Dynamic: Two spots in the bottom segment of the Placido
bowl are set to white.
Placido White: Topography and NIKBUT examination: The illumination
of the Placido bowl is set to white.
Placido IR: The lighting of the Placido bowl is set to infrared.
Inner Ring: The patient’s eye is subjected to minimal glare.
Fixation Used to assist the patient’s fixation.
Checkbox: [Keratometer]: Keratometry marks for aligning the topog-
raphy
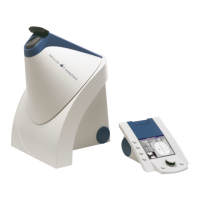
17.5.2 Magnification changer
You can set the magnification in this group box. You have a choice of
three optical and two digital zooms.
0.5 to 1.4
2.0 (digital)
2.8 (digital)
1.0 Low Aperture, for greater depth of field
1.0 Yellow Filter, for images taken with fluorescine
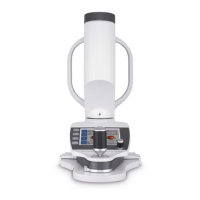
17.5.3 Adjusting the Camera: Camera groupbox
Exposure time: The longer the exposure time is, the brighter the image
will be. The image can, however, become less sharp as a result.
Change the exposure time using the slider control.
Gain: If you increase the gain value, the picture brightens. However, the
image quality suffers as a result; too much gain results in grainy images.
Change the gain setting on the slider control.
Auto Illumination: You can adjust the illumination with this function,
e.g. so as not to overexpose an image.
Press the button [Auto Illumination].
You can now adjust the illumination for the entire image capture.