19 Performing extended examinations: JENVIS Pro Dry Eye Report (optional)
68 / 106 Instruction Manual Keratograph 5M (G/77000/XXXX/EN – Rev05)
The following screen appears:
19.1 Perform the capture plan based on the worklist
The worklist shows you the first step of the capture plan with the aid of
a green and red box.
The red box shows the actual camera position and requests you to cap-
ture a photo or video.
Click on the [Capture] button to perform the requested examina-
tion.
If the [auto] button is enabled then the [Capture] button is
transformed to [Capture + Next]. This means, that after the
capturing, the software moves automatically to the next step in the
worklist.
If you do not want to capture the image you have to click on [Next].
The green box indicates which type of examination will be
administered and which of either eyes will be tested.
To work most efficiently the software recommends in which order to
capture/examine the right and the left eye consecutively.
It is suggested to start for the Tear Meniscus Height with the right eye
and switch then to the left eye. For the NIKBUT the software recom-
mends to start with the left eye and follow with the right eye.
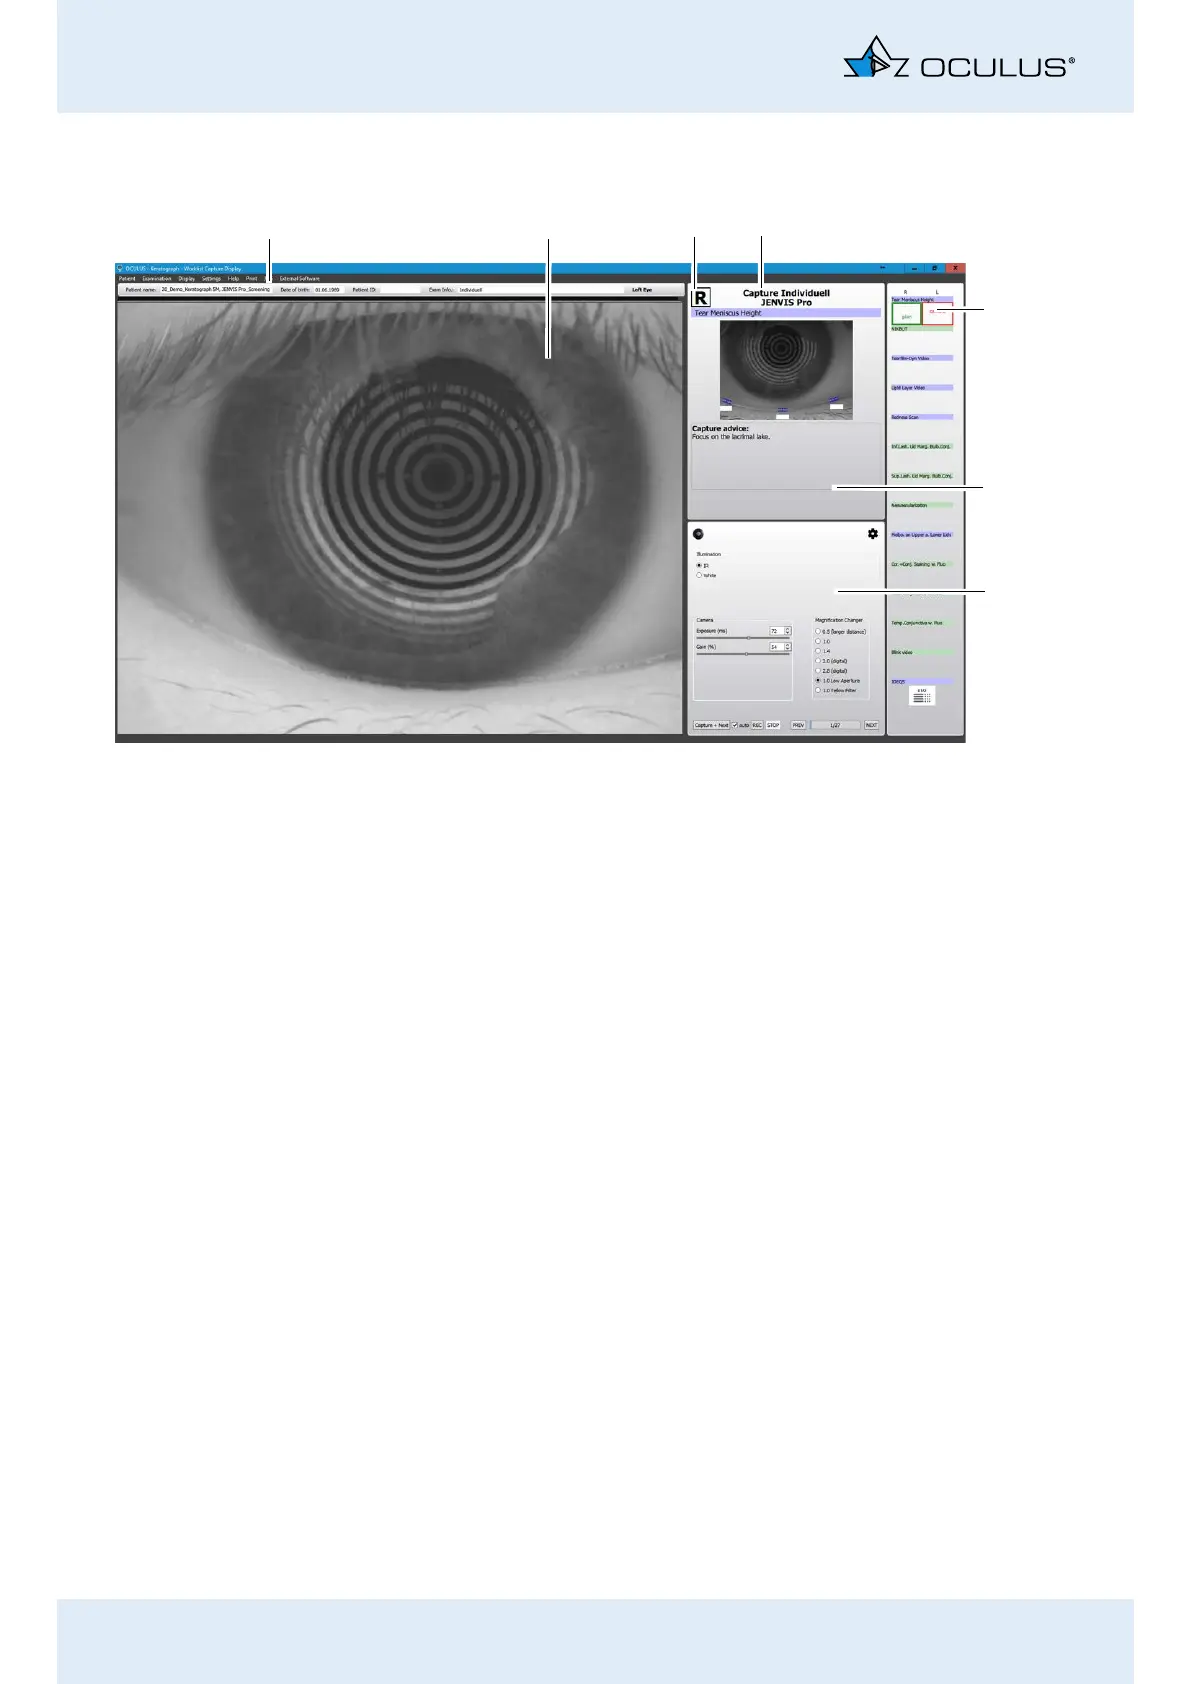
Fig. 19-2: Overview of the Dry Eye examinations
1
5
7
3
2
4
6
1 Patient and Examination Data
2 Camera live image
3 Currently examined eye (here: left eye)
4 Additional supportive information for capturing pro-
cess
5 Pre-defined examinations
6 Information on measurement
7 Camera/illumination settings