45487001TH Rev.1
3-10 /
Oki Data CONFIDENTIAL
3. Component replacement
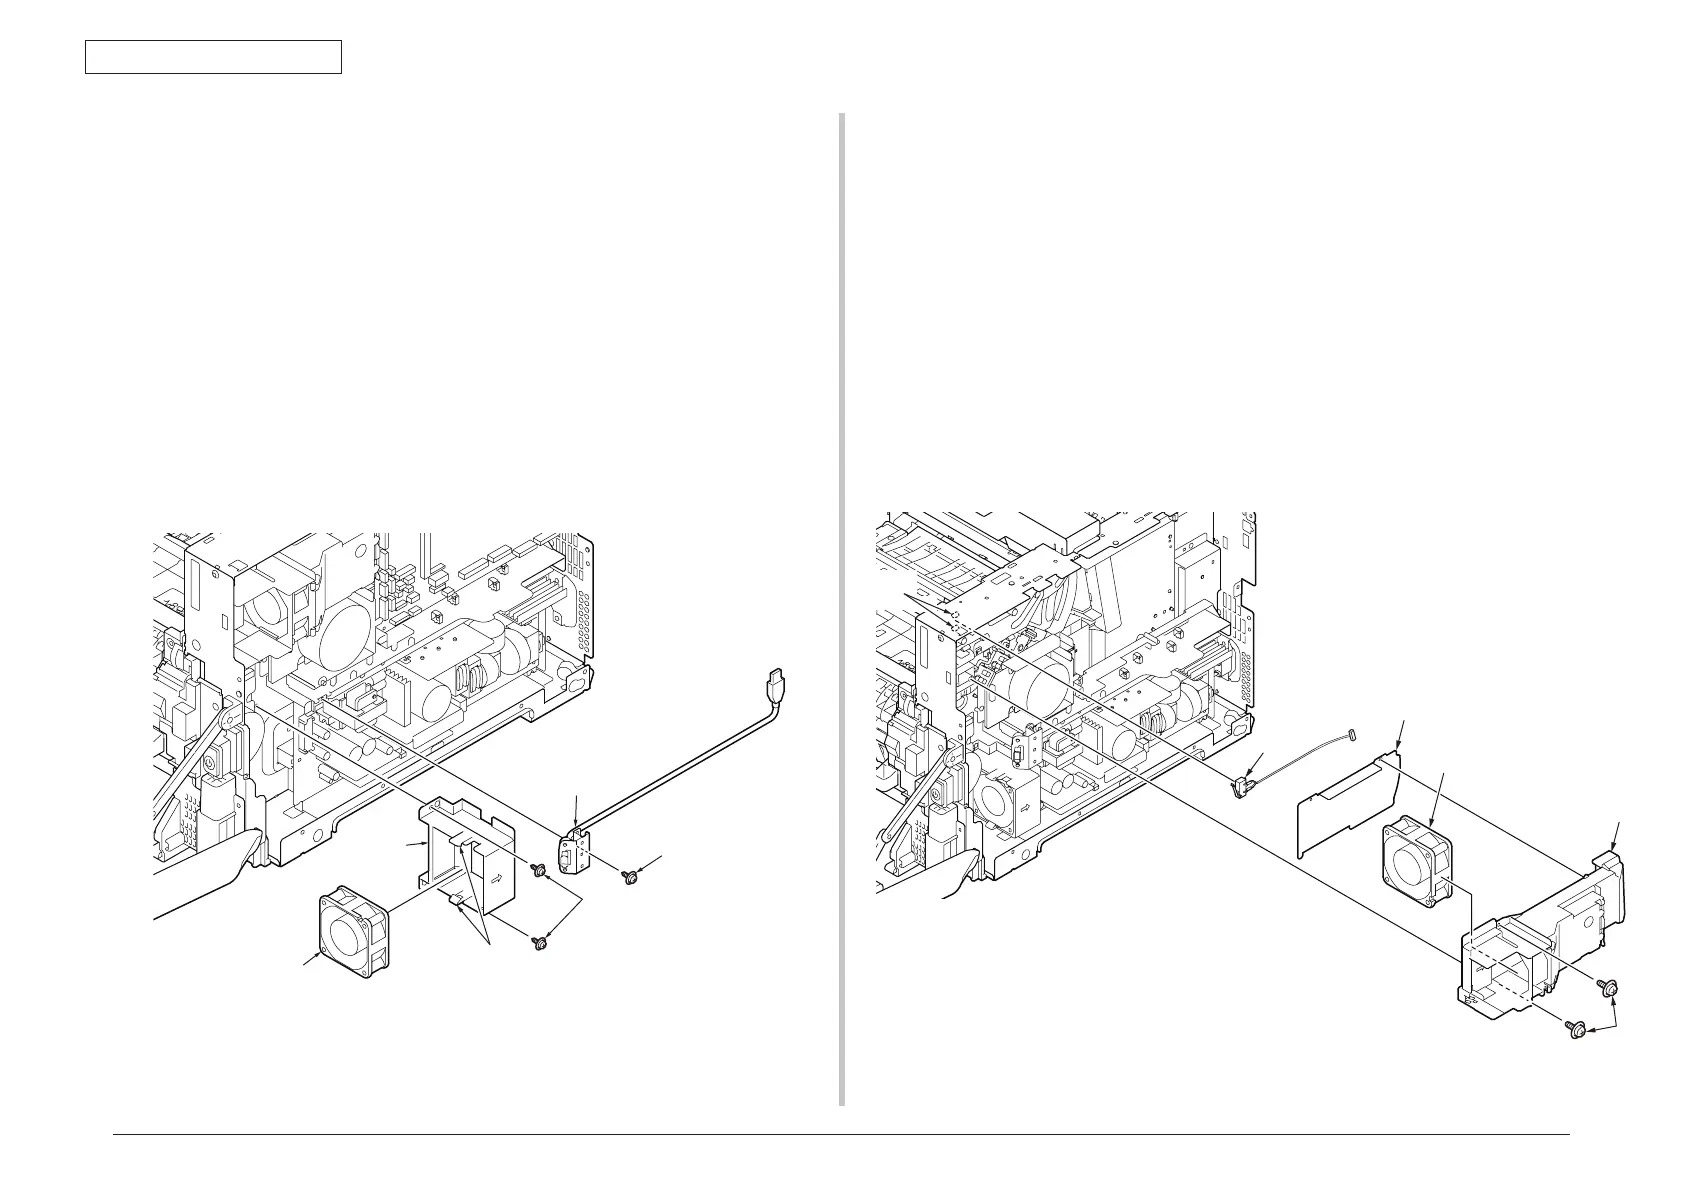
3.2.9 Motor FAN (PSU)
(1) Remove the Cover-Rear-Blind. (Refer to 3.2.3)
(2) Remove the Cover-Side-R. (Refer to 3.2.5)
(3) Remove the Plate-Shield. (Refer to 3.2.6)
(4) Disconnect the cable of the USB connector
①
from the PU/CU-Board.
(5) Remove the screw (black)
②
, and remove the USB connector
①
.
(6) Disconnect the cable of Motor FAN (PSU)
③
from the PU/CU-Board.
(7) Remove the two screws (silver)
④
, and remove the Guide-Power-FAN
⑤
.
(8) Disengage the two claws and remove the Motor FAN (PSU)
③
.
Note! Be careful to install the Motor-FAN (PSU)
③
in the proper direction.
3.2.10 Motor FAN (ID) / Micro switch
(1) Remove the Cover-Rear-Blind. (Refer to 3.2.3)
(2) Remove the Cover-Side-R. (Refer to 3.2.5)
(3) Remove the PU/CU-Board. (Refer to 3.2.6)
(4) Remove the calbes of the Motor FAN (ID)
①
, the microswitch
②
, the toner
sensor and the TAG contact from the Guide-ID-FAN
③
.
(5) Remove the two screws (black)
④
, and remove the Guide-ID-FAN
③
and the
Sheet-Guide-FAN
⑤
.
(6) Remove the Motor FAN (ID)
①
.
(7) Disengage the two claws, and remove the micro switch
②
.
Note! Be careful to install the Motor-FAN (ID)
①
in the proper direction.
②
Claw
④
③
①
⑤
①
②
④
③
⑤
Claw