4-4
4-1 Procedure for Test Run
1. Installation and Mounting
InstalltheInverteraccordingtotheinstallationconditions.Refertopage2-2.Ensure
that the installation conditions are met.
2. Wiring and Connection
Connect to the power supply and peripheral devices. Refer to page 2-11. Select
peripheral devices which meet the specifications and wire correctly.
3. Power Connection
Carry out the following pre-connection checks before turning ON the power supply.
S Alwaysensurethatapowersupplytothecorrectvoltageisusedandthatthepower
input terminals (R/L1, S/L2, and T/L3) are wired correctly.
3G3MV-A2j: 3-phase 200 to 230 VAC
3G3MV-ABj: Single-phase 200 to 240 VAC (Wire R/L1 and S/L2)
3G3MV-A4j: 3-phase 380 to 460 VAC
S Makesurethatthemotoroutputterminals(U/T1,V/T2,andW/T3)areconnectedto
the motor correctly.
S Ensure that the control circuit terminals and the control device are wired correctly.
Make sure that all control terminals are turned OFF.
S Set the motor to no-load status (i.e., not connected to the mechanical system).
S Having conducted the above checks, connect the power supply.
4. Check the Display Status
Check to be sure that there are no faults in the Inverter.
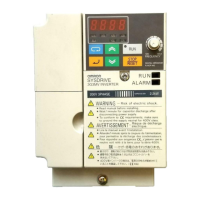
S If the display at the time the power is connected is normal, it will read as follows:
RUN indicator: Flashes
ALARM indicator: OFF
Simplified-LED (setting/monitor) indicators: FREF, FOUT, or IOUT is lit.
Data display: Displays the corresponding data of the indicator that is lit.
S When a fault has occurred, the details of the fault will be displayed. In that case,
refer to Chapter 8 Maintenance Operations and take necessary remedies.
5. Initializing Parameters
Initialize the parameters.
S Set n001 to 8 for initialization in 2-wire sequence.
Test Run Chapter 4
 Loading...
