Chapter 3 - How to...
3.
Switch ON the scan head.
l If the scan head is in standby mode the status indicator will be blue. Press the blue status
indicator to switch ON the scan head.
l
If the scan head has been shut down the status indicator will be OFF. Press the power switch
on the back of the scan head to the ON ( ) position. There will be a short delay while the
device starts up.
l The status lights on the front of the scan head cover will flicker and then settle on the green
light.
l The touch screen powers up.
4.
Wait for the scan head to start up. The following happens during start up:
l The scan head takes less than five minutes to start up.
l The system will run a series of self-tests during this time.
l The status indicator will be white while the self-tests are running.
l The imaging procedures will be available when the self-tests have completed and the status
indicator is green.
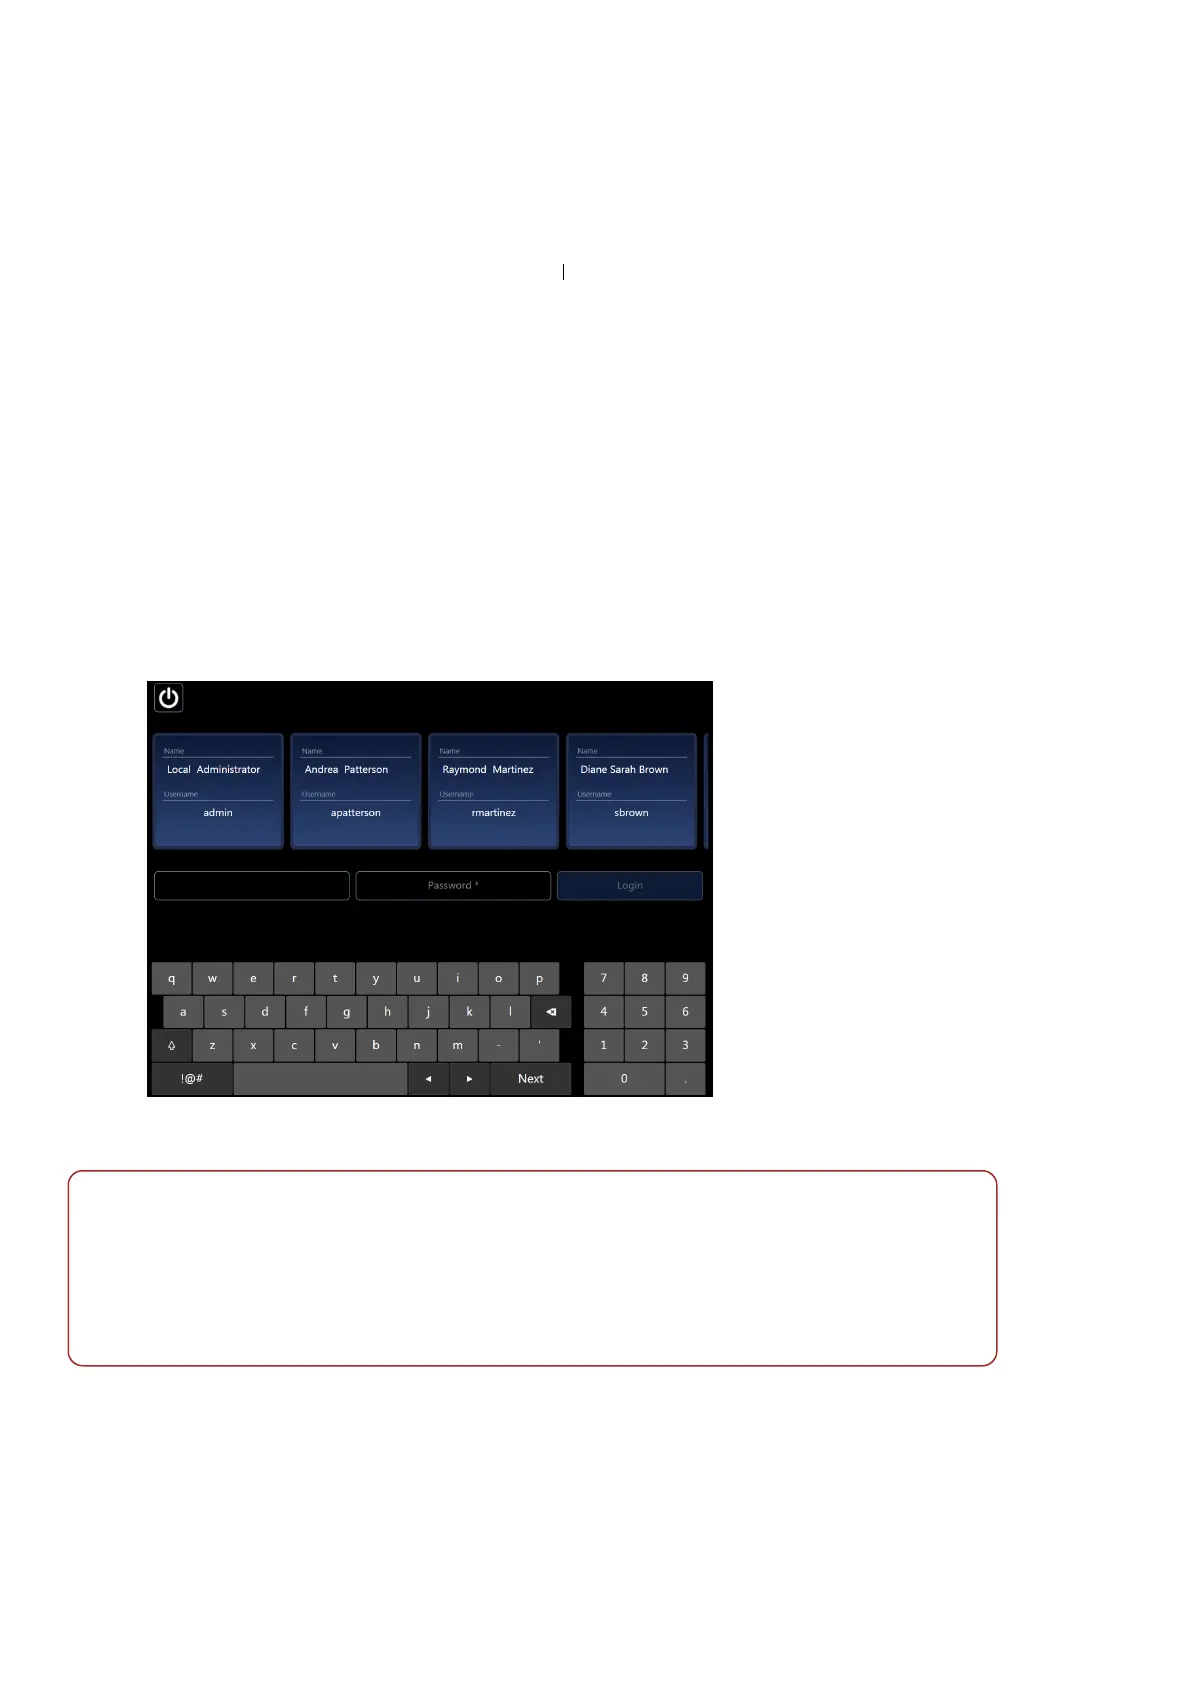
5.
Enter your username and password on the touch screen when prompted. Usernames and passwords
are assigned by your System Administrator, see Managing user details on page53 (all passwords are
case sensitive).
FIGURE 2: Login page
Note
l If there is a network error when starting the scan head it is likely that there is a temporary problem
with the image server. You can attempt to clear problems by restarting the image server, see How
do I restart the image server? on page62.
l
You will be unable to capture images if the self-tests have NOT been successful. Please restart the
scan head. If the problem persists please contact your Optos representative, see Contact us on
page71.
3.1.1.3 Switch on browser-based review clients
Captured images can be reviewed using the OptosAdvance software. You need to login to OptosAdvance to
access the patient details and images stored on the system.
Page 30 of 75 Part Number: G108707/8GME
English Copyright 2018, Optos plc. All rights reserved.