80 Netra SPARC T4-1B Server Module Service Manual • June 2012
2. (If needed) Prepare for service.
See “Preparing for Service” on page 51.
3. Press the Remind button on the motherboard.
While the Remind button is pressed, an LED next to the faulty DIMM illuminates,
enabling you to identify the faulty DIMM. See “DIMM Configuration” on page 77.
Tip – The DIMM Fault LEDs are small and difficult to identify when they are not
illuminated. If you do not see any illuminated LEDs in the area of the DIMM LEDs,
assume that the DIMMs are not faulty.
4. Remove the faulty DIMM.
See “Remove a DIMM” on page 80.
Related Information
■ “DIMM Configuration” on page 77
■ “Remove a DIMM” on page 80
▼ Remove a DIMM
1. (If needed) Prepare for service.
See “Preparing for Service” on page 51.
2. (If needed) Locate the faulty DIMM.
See “Locate a Faulty DIMM” on page 79.
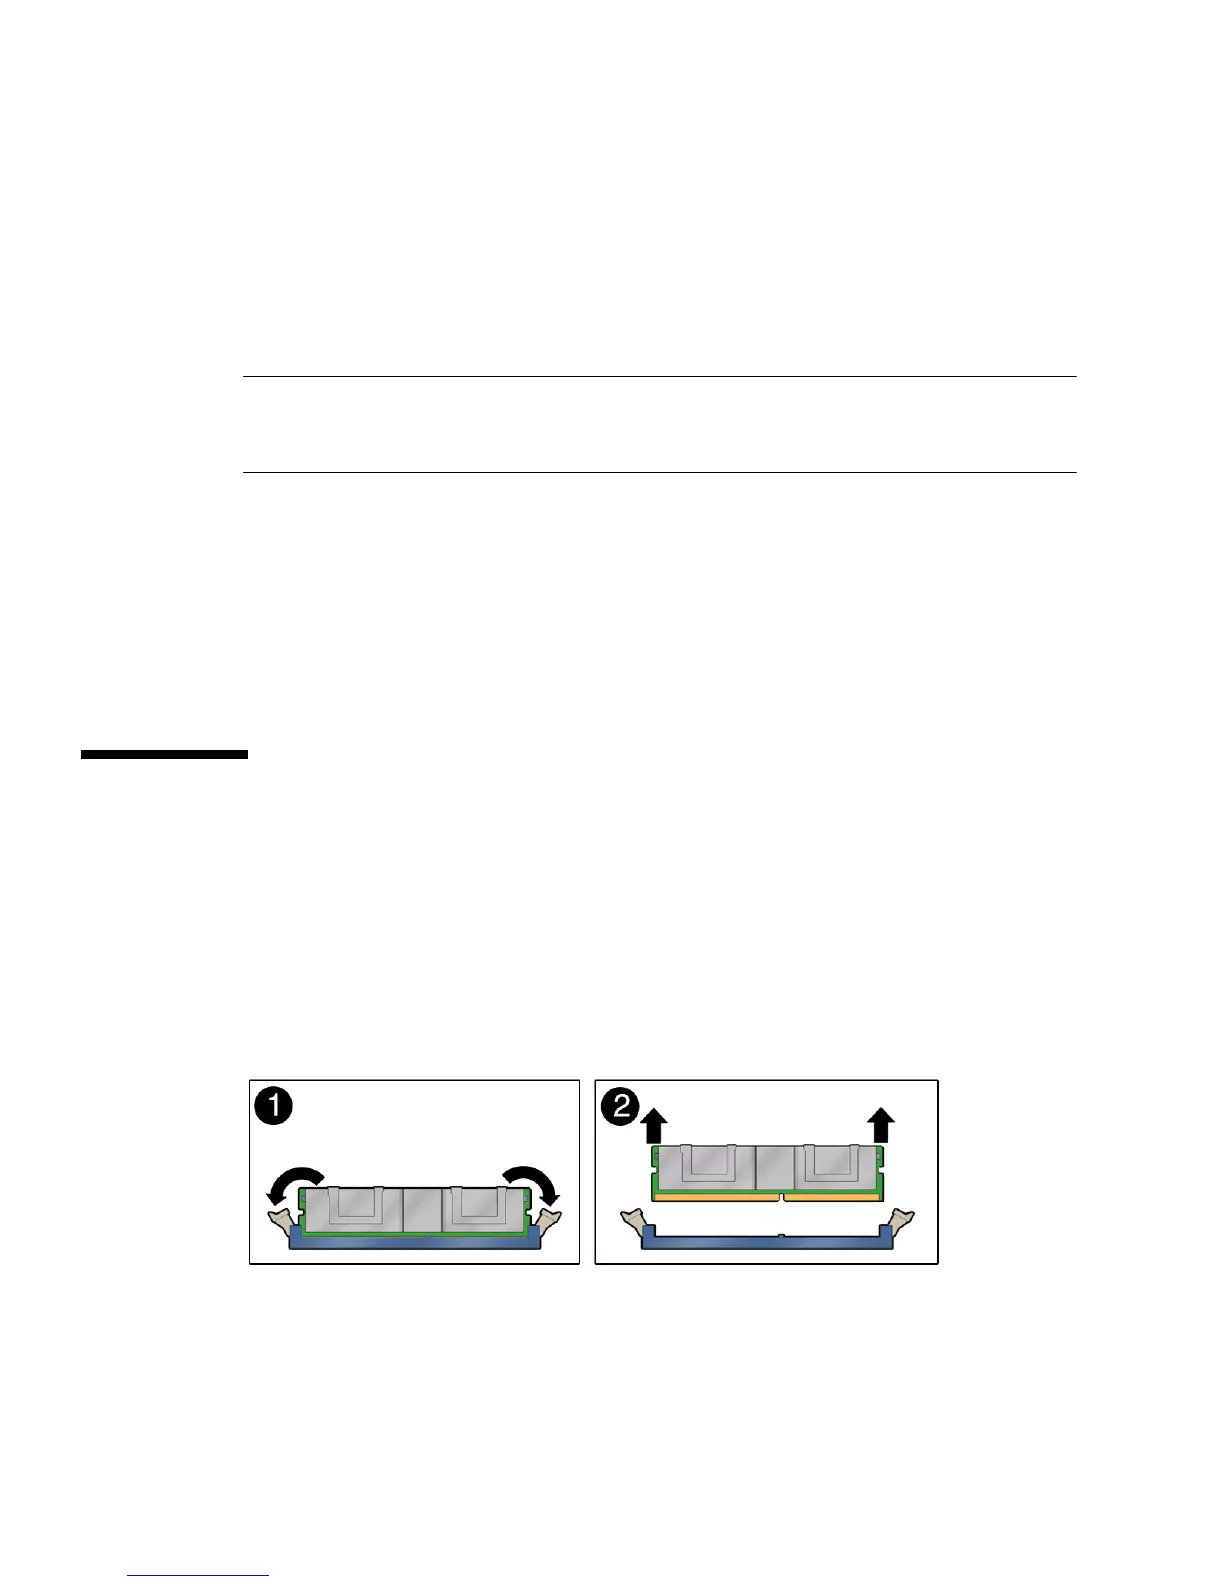
3. Remove the DIMM from the motherboard.
a. Push down on the ejector tabs on each side of the DIMM until the DIMM is
released (panel 1).

 Loading...


