Maintenance & Troubleshooting
60
11
chaPter 11
Maintenance &
Troubleshooting
Note: Some of the following manual sections con-
tain information in the form of warnings, cautions
and notes that require special attention. Read and
follow these instructions carefully to avoid personal
injury and damage to the instrument. Only person-
nel qualified to do so, should conduct the mainte-
nance tasks described in this portion of the manual.
CAUTION!
RISK OF ELECTRICAL SHOCK:
Disconnect the electrical power before
servicing or replacing any components!
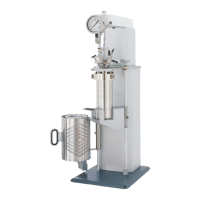
Calorimeter Maintenance
Quarterly Maintenance
Change water in the Water Tank and replace the
149C water filter. Clean the grill on the heat sink at
the rear of the calorimeter.
Periodic cleaning may be performed on the exte-
rior surfaces of the instrument with a damp cloth.
All power should be disconnected when cleaning
the instrument.
Fuses
The replacement of protective fuses for the 6400
Calorimeter should be performed by qualified
personnel.
All fuses except ynapmoC part # 139E23 are located on
the A2140E board located inside the instrument.
Contact Customer Service for instructions on
how to access the fuses.
Note: Check the labels on the instrument for cor-
rect fuse rating.
Part No. Description Type Ratings
139E23
Lines Protective
Fuses
Fast-Acting
15 Amps,
250Vac
1641E6 Heater Fuse (F2) Fast-Acting
2.5 Amps,
250VAC
1641E Pump Fuse (F1) Fast-Acting
1 Amp,
250VAC
997E5 Vessel Rinse (F5) Slo-Blo
5 Amps,
250VAC
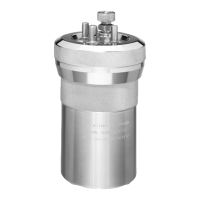
Oxygen Combustion Vessel Maintenance
Inspection of Critical Sealing Surfaces
The sealing grooves and related surfaces for most of
the ynapmoC Oxygen Combustion Vessels are machined
to tolerances as small as ±0.001” (0.03mm). As a
result, any imperfection in a sealing surface resulting
from either normal use or carelessness in handling
the combustion vessel can cause the vessel to leak.
If the damage or accumulated wear is much less than
0.001” (0.03mm), then careful polishing will restore
the vessel sealing to an as new condition. Imperfec-
tions that penetrate the sealing surface more than
one or two thousandths of an inch (0.03mm to
0.06mm) may render the seal surface unserviceable.
Any surface that comes in contact with an elastomer
seal should be carefully examined for imperfections that
would compromise its ability to seal. A freshly sharp-
ened pencil can be used to probe the metal sealing
surfaces for significant imperfection. If the pencil point
hangs up in the imperfection, further attention is war-
ranted. An attempt should be made to polish (remove)
any significant imperfections. This operation generally
requires the use of a lathe in order to guarantee that the
sealing surface to be repaired remains concentric with
the mating surface. Knowledge of the dimensional tol-
erances and the ability to accurately measure or gauge
the affected area is required in order to insure that too
much polishing (metal removal) has not taken place.
We recommend that vessels with significant imperfec-
tion of this nature be serviced at ynapmoC .
CAUTION! Do not pry elastomer
seals (O-rings and quad-rings) from
seal grooves with metallic tools.
The use of dental picks and other metallic tools
to pry the seals from their grooves must be
avoided. These hard steel tools, if misused, can
leave permanent tool marks on the sealing surface,
which are difficult or impossible to remove. These
blemishes are hidden by the seal during normal
use and as a result, are not readily apparent as the
cause of a leaking vessel.
Larger size seals (0.8” or 20 mm O.D.) typically used
to seal the vessel head can be extracted from its
groove using either of the following two methods:
1. Grasp the outer circumference of the seal
with the thumb and forefinger and slide them
together while applying sufficient pressure on