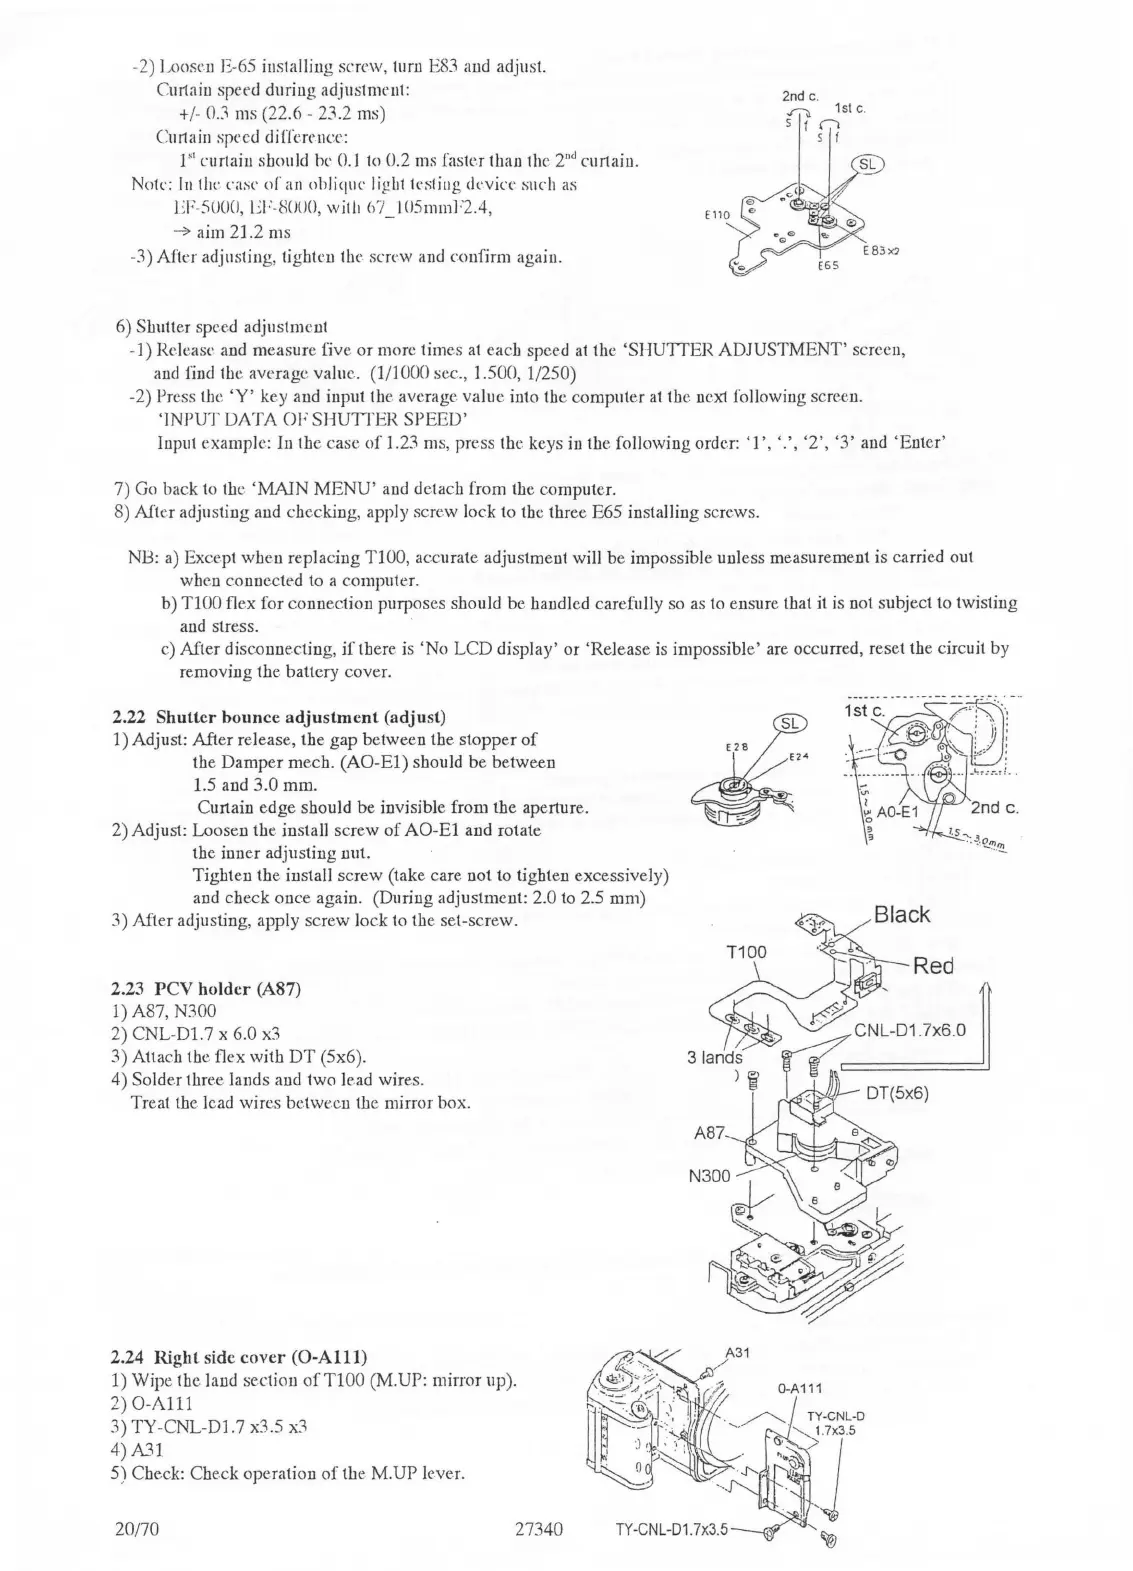
-2) Looscu E-65 installing screw, turn E83 and adjust.
Curtaiu speed during adjustment:
+
/-
0.3 ms (22.6 - 23.2 ms)
Curtain speed differrncc:
1"
curtaiu should he 0.1 lo 0.2 ms faster lhau the
2"<l
curtaiu.
Note:
lu
thc case
or
an oblique light tcstiug device such
as
JFSUOCJ,
1J
,.-8CJUO,
witli 67_105mmF2.4,
-»
aim
21
.2 ms
-
3)
After adjusting, tighten the screw and confirm again.
6) Shutter speed adjustment
2nd c .
...-.
1stc
.
s 1 n
s f
-
1)
Release and measure five
or
more times
at
each speed
at
the
'SHUTTER
ADJUSTMENT' screen,
and
find the average value. (1/1000
sec_,
1.500, 1/250)
-2) Press the
'Y'
key and input the average value into the computer
at
the uexl following screen.
'
lNPUT
DATA
OF
SHUTTER
SPEED'
luput example: In tbe case
of
1.23 ms, press the keys iu tbe following order:
'1
',
'.',
'2',
'3'
and
'Enter'
7)
Go
back to tbc
'MAJN
MENU'
and detach from the computer.
8) After adjusting and checking, apply screw lock to the three E65 installing screws.
NB:
a)
Except when replacing TlOO, accurate adjustment will be impossible uuless measurement is carried out
when
connected to a computer.
b)
TlOO flex for connection purposes should be bandied carefully so
as
to ensure that it is not subject to twisting
and stress.
c) After disconnecting,
iftbere
is
'No
LCD
display'
or
'Release is impossible' are occurred, reset the circuit by
removing
the battery cover.
2.22
Shutter
bounce
adjustment
{adjust)
1) Adjust: After release, the gap between the stopper
of
the
Damper
mech.
(AO-El)
should
be
between
1.5 and
3.0
mm.
Curtain edge should be invisible from the aperture.
2) Adjust: Loosen the install screw
of
AO-El
and rotate
the inner adjusting nut.
Tighten the install screw (take care not to tighten excessively)
aud check once again. (During
adjustmc.nt: 2.0 to 2.5 rum)
3) After adjusting, apply screw Jock to the set-screw.
2.23
PCV
holder
(A87)
1)
A87, N300
2)
CNL-Dl.7
x 6.0
x3
3) Attach the flex with
DT
(5x6).
4) Solder three lands and two lead wires.
Treat the lead wires
between
th
e mirror box.
2.24
Right
side
cover
(0-Alll)
1) Wipe the land section
ofTlOO
(M.UP: mirror up).
2)
0-Alll
3)
TY-CNL-Dl.7
x3
.5 x3
4) A31
5) Check: Check operation
of
the M.UP lever.
20/70
27340
Red
31ands
) 'i
A87-

 Loading...