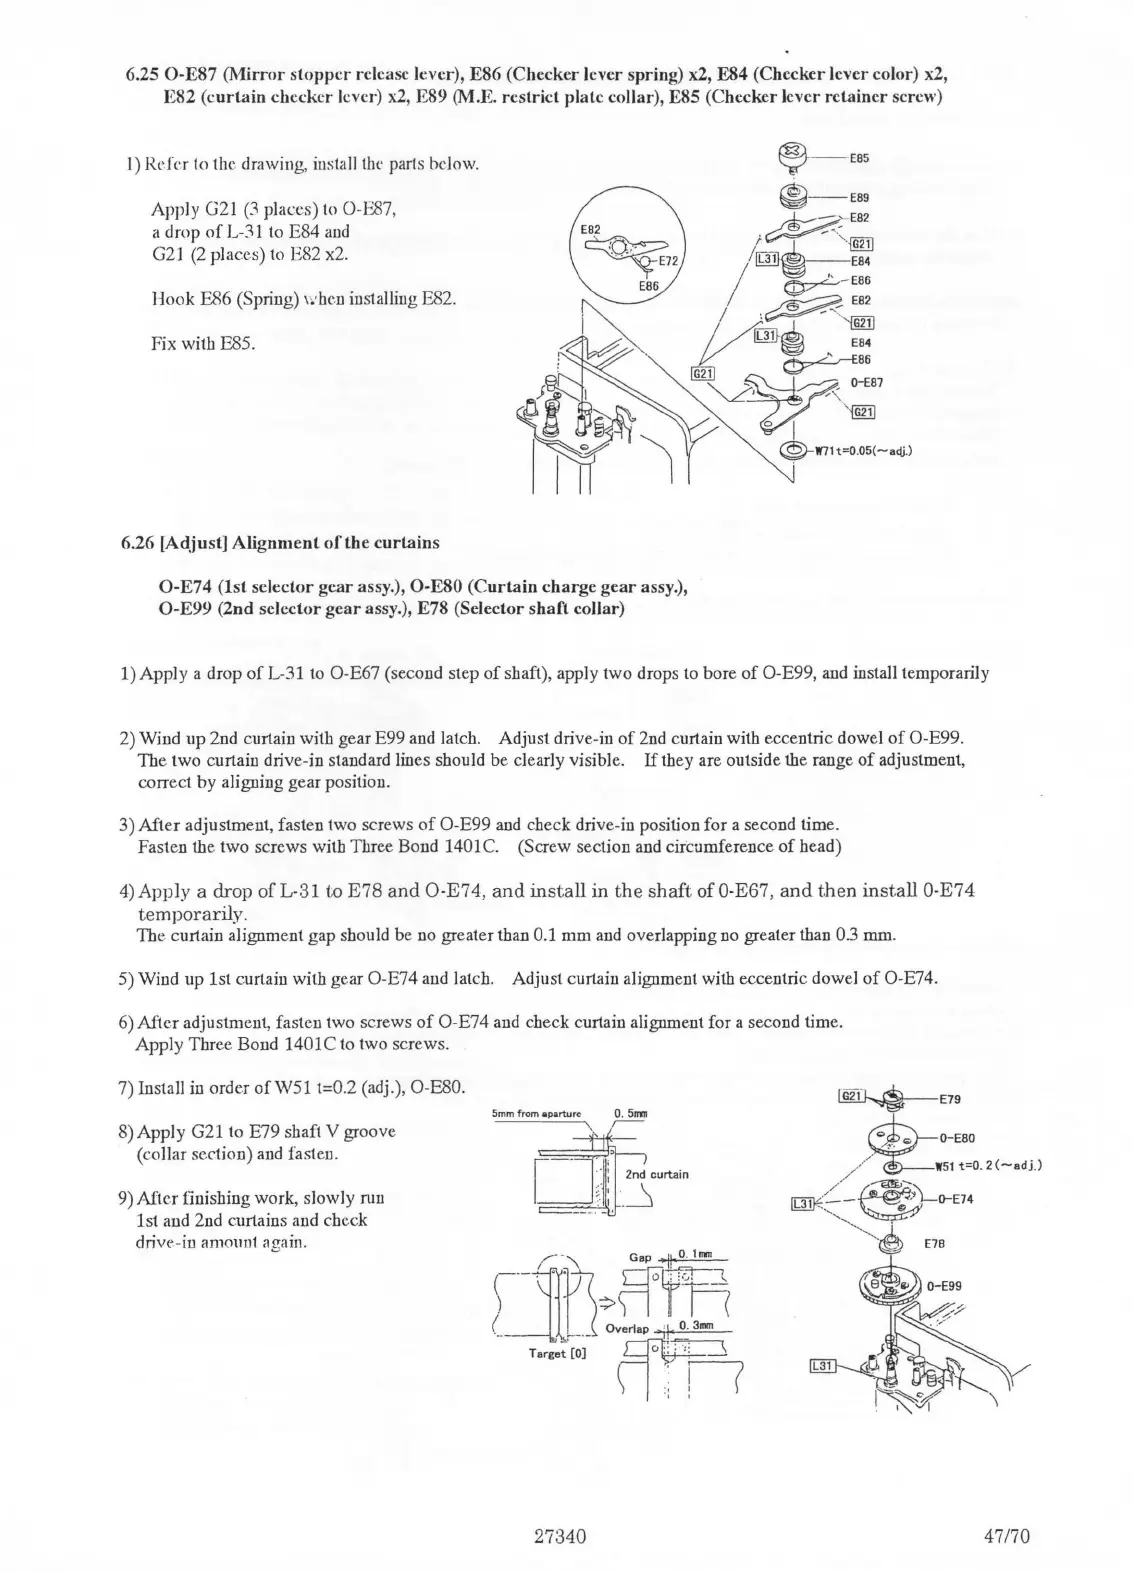
6.25
0-E87
(Mirror
stopper
release lever), E86 (Checker lever spring) x2, E84 (Checker lever color) x2,
E82
(curtain
checker lever)
x2
, E89 (M.E. restrict plate collar), ESS (Checker lever retainer screw)
1)
Refer
to
the drawing, install
the
parts below.
Apply G21
(3
places) to O-E87,
a drop
of
L-31 to E84
and
G21
(2
places)
to
E82 x2.
Hook E86 (Spring) when installing E82.
Fix with E85.
6.26 [Adjust]
Alignment
of
the
curtains
~
~1
O-E74 (1st selector gear assy.), 0-ESO
(Curtain
charge
gear
assy.),
O-E99 (2nd selector
gear
assy.), E78 (Selector
shaft
collar)
@!)
--
E85
®--E89
,.J;....-::;;..
~
E82
;~,<
:...
filj)
Im - -
E84
I " -
E86
I
~E82
/
/~/
-<
~
y
~86
~
>~-
-
O-E87
'L...}
-
'"-
'filj)
0 I
($)-W71
t=0
.
05(-
acij.)
1) Apply a drop
of
L-31
to
O-E67 (second step
of
shaft), apply two drops to bore of O-E99,
and
install temporarily
2) Wind up 2nd curtain with gear E99
and
latch. Adjust drive-in
of
2nd
curtain with eccentric dowel
of
O-E99.
The two curtain drive-in standard lines should be clearly visible.
If
they are outside the range
of
adjustment,
correct by aligning gear position.
3) After adjustment, fasten two screws
of
O-E99
and
check drive-in position for a second time.
Fasten the two screws with Three Bond 1401C. (Screw section
and
circumference
of
head)
4)Apply a drop ofL-31 to E78
and
O-E74,
and
install
in
the
shaft
of0-E67,
and
then
inst.all O-E74
temporarily.
The curtain alignment gap should be no greater than 0.1 mm
and
overlapping
no
greater than 0
.3
mm.
5) Wind up 1st curtain with gear O-E74
and
latch. Adjust curtain alignment with eccentric dowel
of
O-E74.
6) After adjustment, fasten two screws
of
O-E74
and
check curtain alignment for a second time.
Apply Three Bond 1401C
to
two screws.
7) Install in order
ofW51
t=0.2 (adj.), O-E80.
8)Apply
G21 to E79 shaft V groove
(collar section)
and
fasten.
9) After finishing work, slowly nm
1st and 2nd curtains
and
check
drive-in amouut again.
~E79
~O-E80
//
~W51t=O.2(-adj.)
/
~-
""71L~-~
-
~O-E74
(_]/~~
(_
l.
_{~v~rlap
II
Op
Target[O]
~
\ (
\ I
::
!
27340
&!!lf
..............
~
'--,.,
,,!.,
--~
E78
47/70
 Loading...