76 KENR6932
Disassembly a nd Assembly Section
Note: The crankshaft rear seal and the housing are
manufactured a
s one assembly.
Note: Do not lubricate the crankshaft rear seal or
the crankshaf
t flange. The crankshaft rear seal
must be installed dry.
NOTICE
Keep all parts
clean from contaminants.
Contaminants may cause rapid wear and shortened
component lif
e.
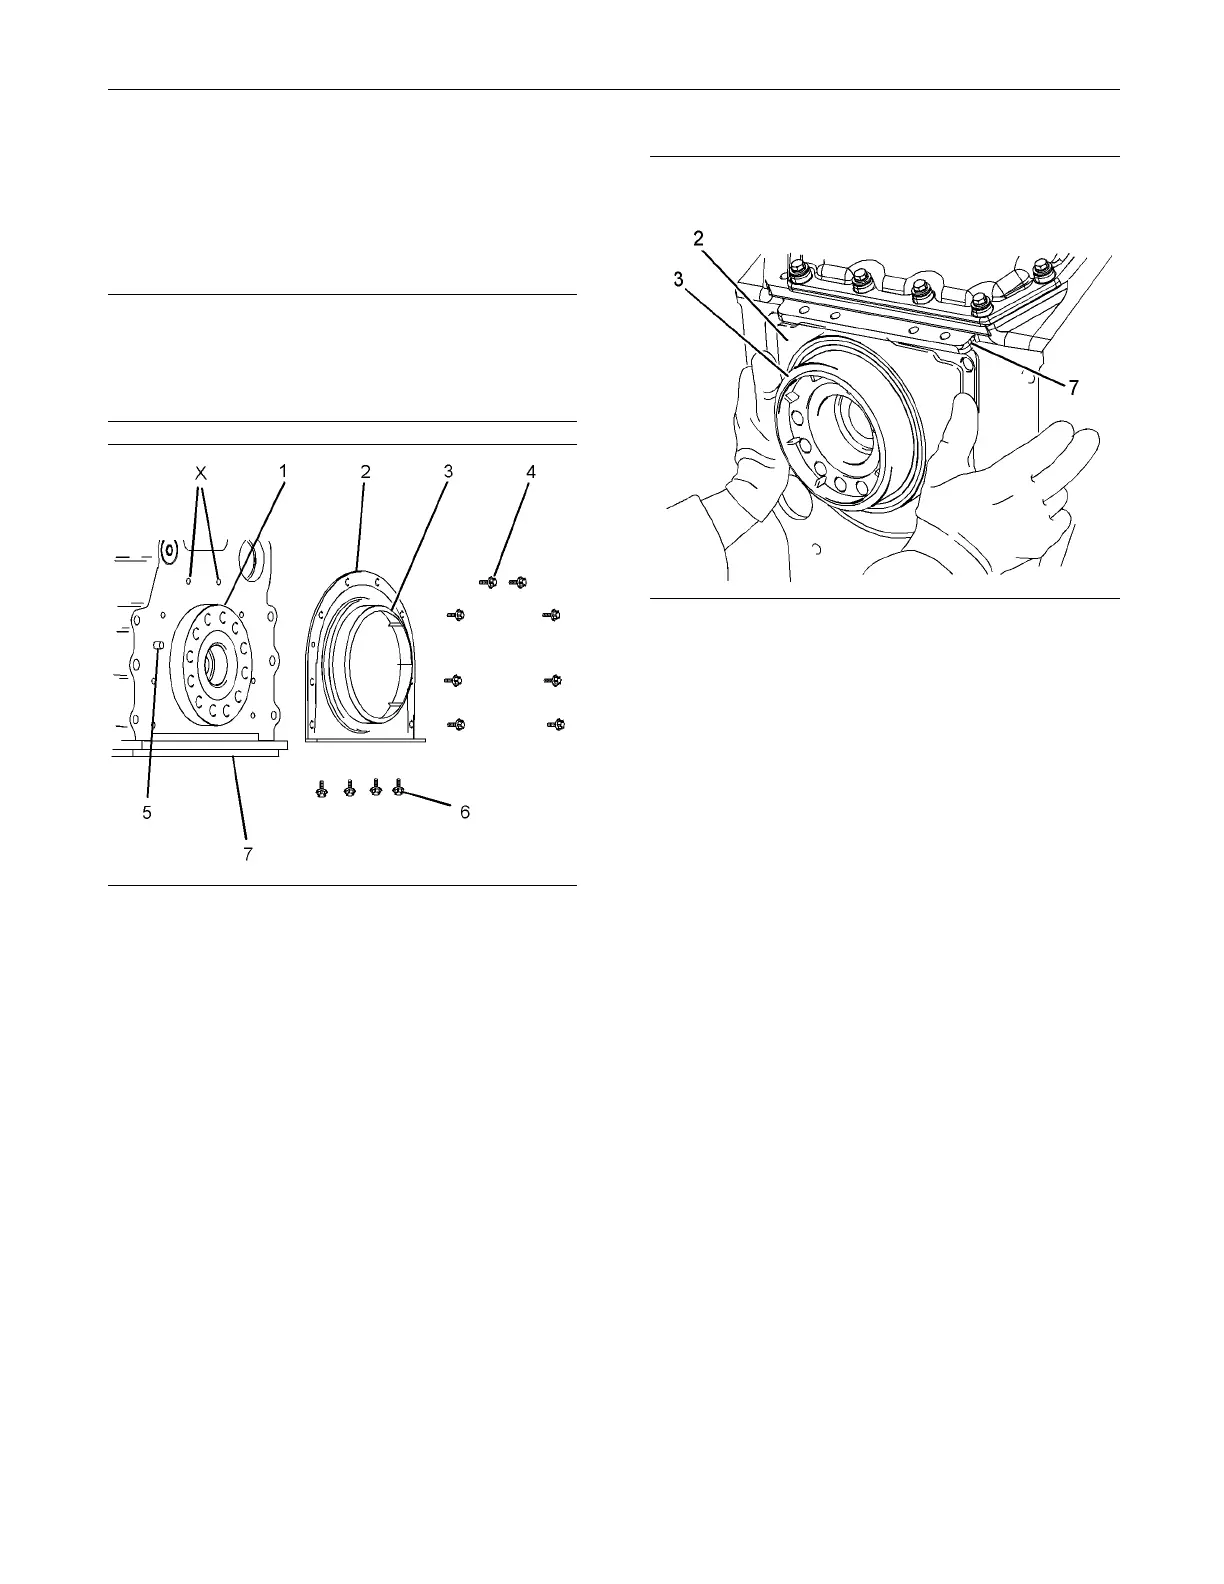
g01337512
Illustration 132
Typical exam p le
1. Ensure that crankshaft flange (1) is clean, dry and
free from damage.
2. Ensure that the mating surface of the cylinder
block is clean and dry. Ensure that the mating
surface of isolating frame (7) is clean and dry.
3. Ensure that plastic sleeve (3) is squarely installed
within new crankshaft rear seal (2).
Note: The plastic sleeve is included in order to
protect the lip of the seal as the crankshaft rear seal
is pushed over crankshaft flange (1). Do not attempt
to install a crankshaft rear seal without the plastic
sleeve.
g01337513
Illustration 133
Typical example
4. Place the assembly of the crankshaft rear seal
over crankshaft flange (1). Align dowel (5) with the
slot in crankshaft rear seal (2).
5. Ensure that plastic sleeve (3) is engaged on
crankshaft flange (1). Push crankshaft rear seal
(2) squarely onto the crankshaft. Ensure that the
crankshaft rear seal is seated against the cylinder
block. During this process, plastic sleeve (3) will
be forced out of the crankshaft rear seal. Discard
the plastic sleeve.
Note: Ensure that dowel (5) is engaged in the slot in
the crankshaft rear seal.
6. Use Tooling (A) in order to install two outer Torx
bolts (6) at the base of crankshaft rear seal (2).
TightenTorxbolts(6)toatorqueof15N·m
(11 lb ft).
7. Use Tooling (B) in order to install two Torx bolts (4)
to crankshaft rear seal (2) at position (X). Tighten
Torx bolts (4) to a torque of 22 N·m (16 lb ft).
8. Use Tooling (A) in order to unscrew Torx bolts (6)
by one complete turn.
9. Use Tooling (B) in order to install remaining Torx
bolts (4). Tighten Torx bolts (4) to a torque of
22 N·m (16 lb ft).
10. Use Tooling (A) in order to install remaining Torx
bolts (6). Tighten all Torx bolts (6) to a torque of
22 N·m (16 lb ft).

 Loading...


