18
2.7 Attach and Remove a Lens
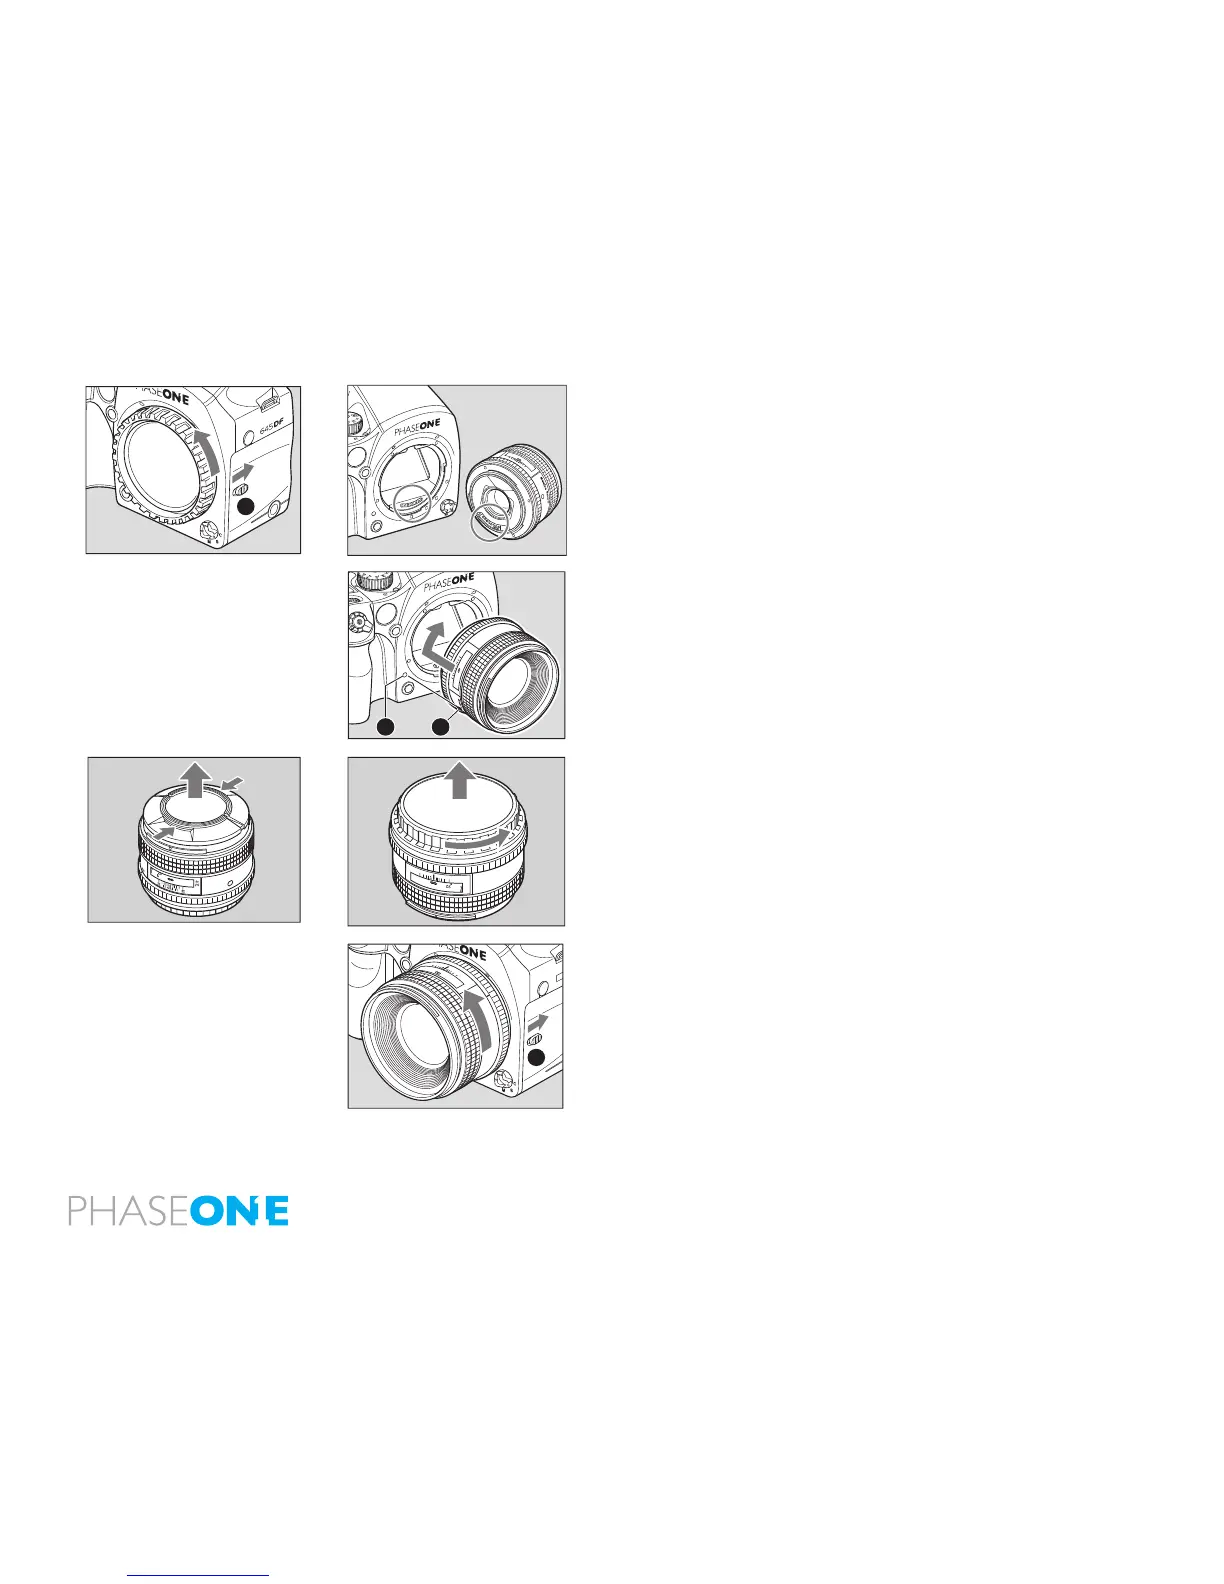
1. Remove the front body cap in the same way that you would remove a lens;
push the lens release button [A] backward and then turn the front body cap
or the lens itself counter clockwise and lift out.
2. Align the white alignment dot of the lens [B] (on the shiny ange) with the
camera’s white dot [C]. Mount the lens and rotate it clockwise until it clicks
into place.
3. To remove the front lens cap, squeeze the shiny sections together and lift
out. (See image far left). To remove rear lens cap turn it counterclockwise.
Remove a Lens
While sliding the lens release button[A] back, rotate the lens counter
clockwise until it stops, and lift it o. After removing the lens from the camera
body, protect both ends by attaching the caps.
N.B. Oil, dust, ngerprints or water on the electronic contacts could result
in malfunction or corrosion. Wipe such impurities o with a clean piece of
cloth. Do not tap the distance ring or other rotating parts when attaching
the lens. When installing a lens, do not press the lens release button.
MF
80mm
1:2 8
AF
22
22
11
11
4
4
ft
m
A