X-Series Hyperconverged Nodes Powered by Acuity
Setup & User Guide, v1.0
13
|
DOC-246-GDE-Pivot3 Acuity 2.3 Setup & User Guide-v1.0.docx
Section 3 Configure ESXi for VMware Access
VMware ESXi is the hypervisor for the Acuity software platforms. As ESXi patches and updates become available,
functionalities may change; patching or updating ESXi past the level recommended for the currently released
Acuity software platform version is a calculated risk. Pivot3 recommends using only the version of ESXi supported
by the current Acuity software platform version.
This section describes how to:
• Configure the Management Network settings for ESXi on new Pivot3 X-Series Nodes
• Allow X-Series nodes to be accessed by VMware management tools
VMware documentation:
More information on getting started with ESXi is available from VMware.
Required items for this section:
• Pivot3 Nodes that have been installed as detailed in Section 1 and are powered on
• A keyboard and monitor or KVM connection to each node
Configure the IP Addresses for the VMware Management Network
The Management Network must be configured before VMware management tools can manage the nodes.
NOTE:
When using DHCP, the IP address is automatically determined and displayed on the console. Make a note of
the IP address assigned and skip to Section 4.
Connect the node to a KVM or connect a keyboard and monitor. The monitor shows the VMware ESXi direct
console.
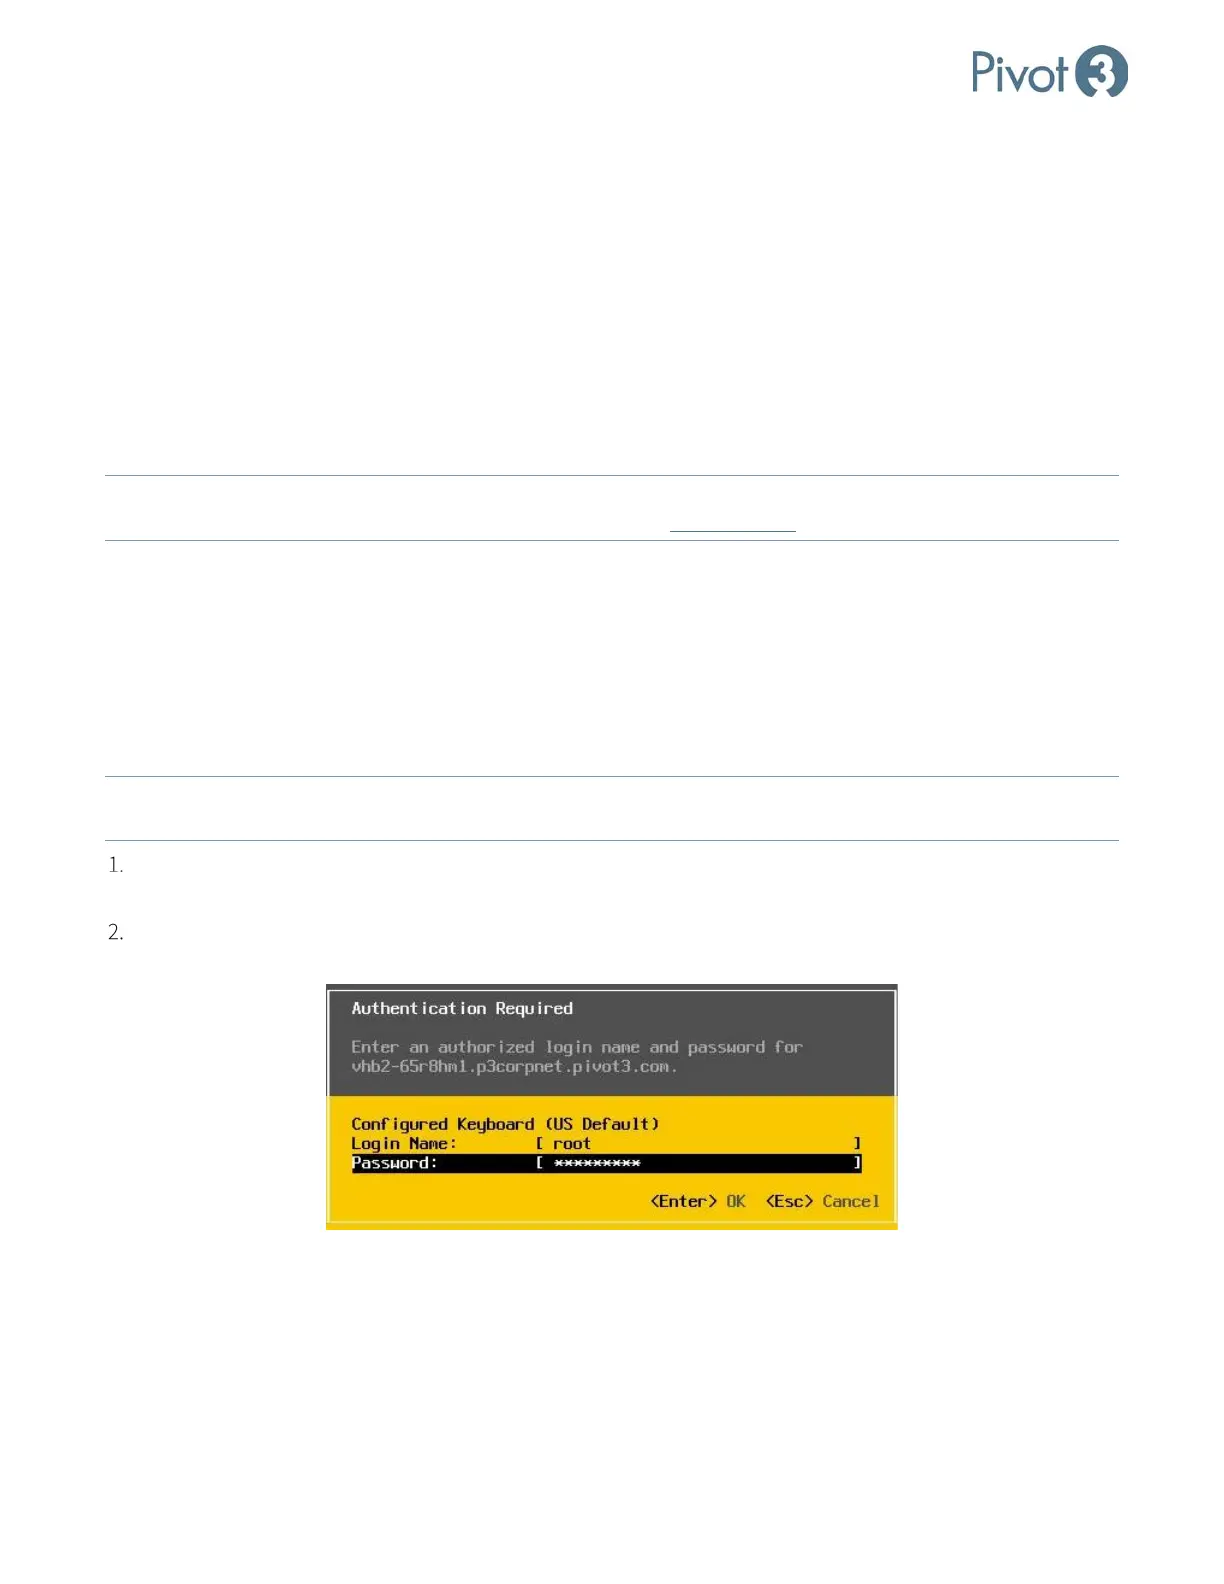
Press <F2> to login to the ESXi console. The default user name is root and the default password is
vSphereP3. Press <Enter>.