Setup & User Guide
| 64
DOC-246-GDE-Pivot3 Acuity 2.3 Setup & User Guide-v1.0.docx
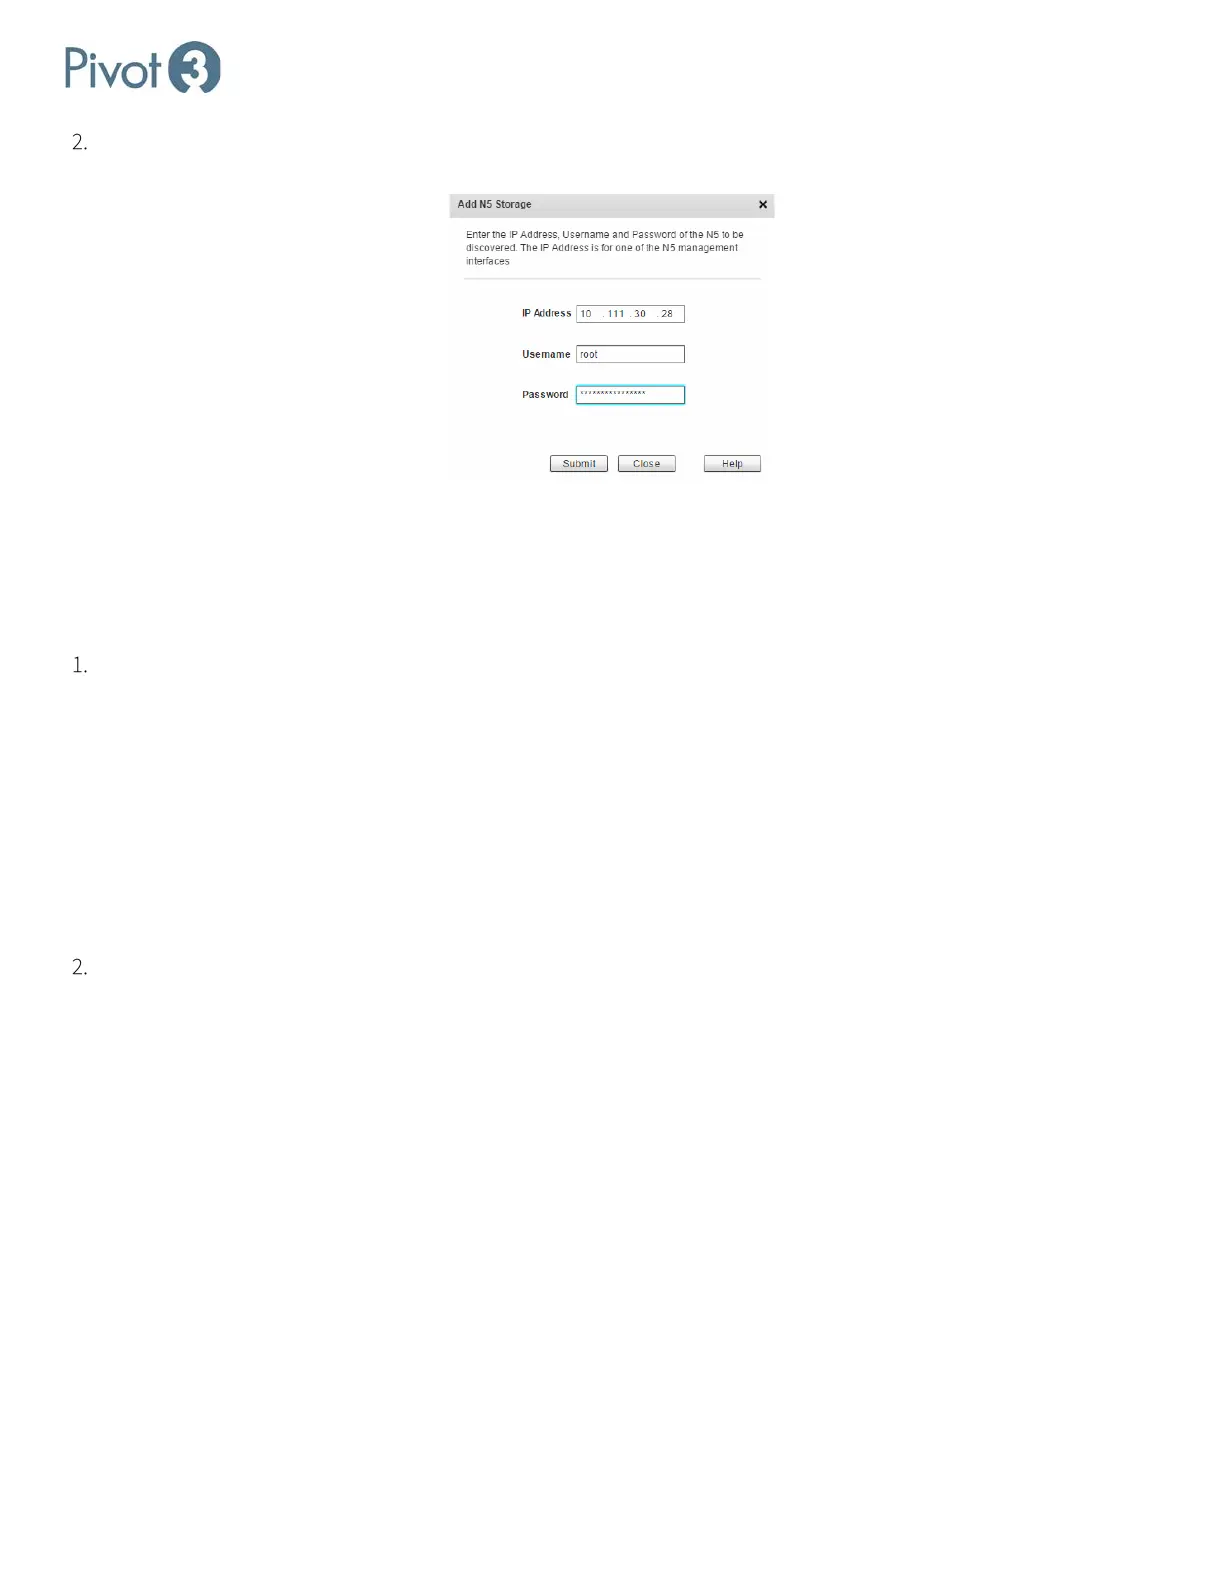
Enter the IP Address, Username, and Password for the desired node and click Submit. If the information entered is
accurate, the N5 Node will now be visible in the Physical view of the Configure tab.
Assign IP Addresses for iSCSI Connectivity
At this point, static IP addresses must be assigned to the nodes so that the iSCSI initiator can connect to Pivot3 logical
volumes and send I/O. Each storage NIC on every member node must be assigned a unique static IP address. If the static
IP addresses have been preconfigured, this step is used to validate the IP addresses of all nodes in the expected subnets.
This requires each IP address to be manually assigned to each NIC in every node (preferred). Values must be entered
in the subnet information table for each SAN Network. The Pivot3 Acuity Plugin will automatically fill in the following
values if any node has a static or DHCP address:
• Subnet Mask –by default is assigned the common Class C value of 255.255.255.0 for each subnet. This value
may be changed based on the IP address requirements of the local SAN Networks.
• Network Address – enter a unique value for each subnet. This is the value of the Network Portion of a full IP
address after applying the Subnet Mask value.
• Default Gateway – set only if a SAN Network is routable to another IP subnet. In most configurations, this field
will be left blank.
For IP address manual entry, click to activate the field, then enter the desired (and verified available) IP addresses into
each NIC for every node until all IP addresses have been entered. Ensure that the IP addresses are valid and available
on the network.