ENGINE
3.34
CRANKSHAFT
INSTALLA
TION
Lubricate all bearings with clean engine oil before
assembly.
1. Install the crankshaft into the PT O side
crankcase.
2. Install the proper shim on the magnetoend of the
crankshaft.
CRANKCASE OIL STRAINER
INSPECTION
1. Removebolt securingoilstrainertotheMAG side
crankcase.
2. Remove oil strainer and visually inspect for any
rips, tears or obstructions in screen.
3. Replace oil strainer if it fails visual inspection.
CRANKCASE REASSEMBLY
1. Apply Crankcase Sealant (PN 2871557)tothe
crankcase mating surfaces. Be sure the
alignment pins are in place.
2. Set the crankcase in position carefully. Mate the
crankcase halves by tapping lightly with a soft
faced hammer . Continually check alignment of
the cases during installation, closing the gap
equally until the surfaces are tightly sealed.
3. Install the crankcase flange bolts and tighten to
specifiedtorquein3stepsaccordingtothetorque
pattern. See Page 3.4.
Crankcase Bolt Torque:
14-15 ft. lbs. (19-21 Nm)
Crankcase Sealant :
(PN 2871557)
OIL PUMP INSTALLATION
1. Inspect the oil pump sealing surface on the
crankcase. Apply a light film of engine oil to the
surfaces. Install outer and inner rotors over
crankshaft .
2. Installoilpumpcover. Torquescrewstospecified
torque.
Oil Pump Cover Screw Torque:
4-5 ft. lbs. (5-7 Nm)
NOTE: Do not usegasket sealer on thepumpmating
surfaces.
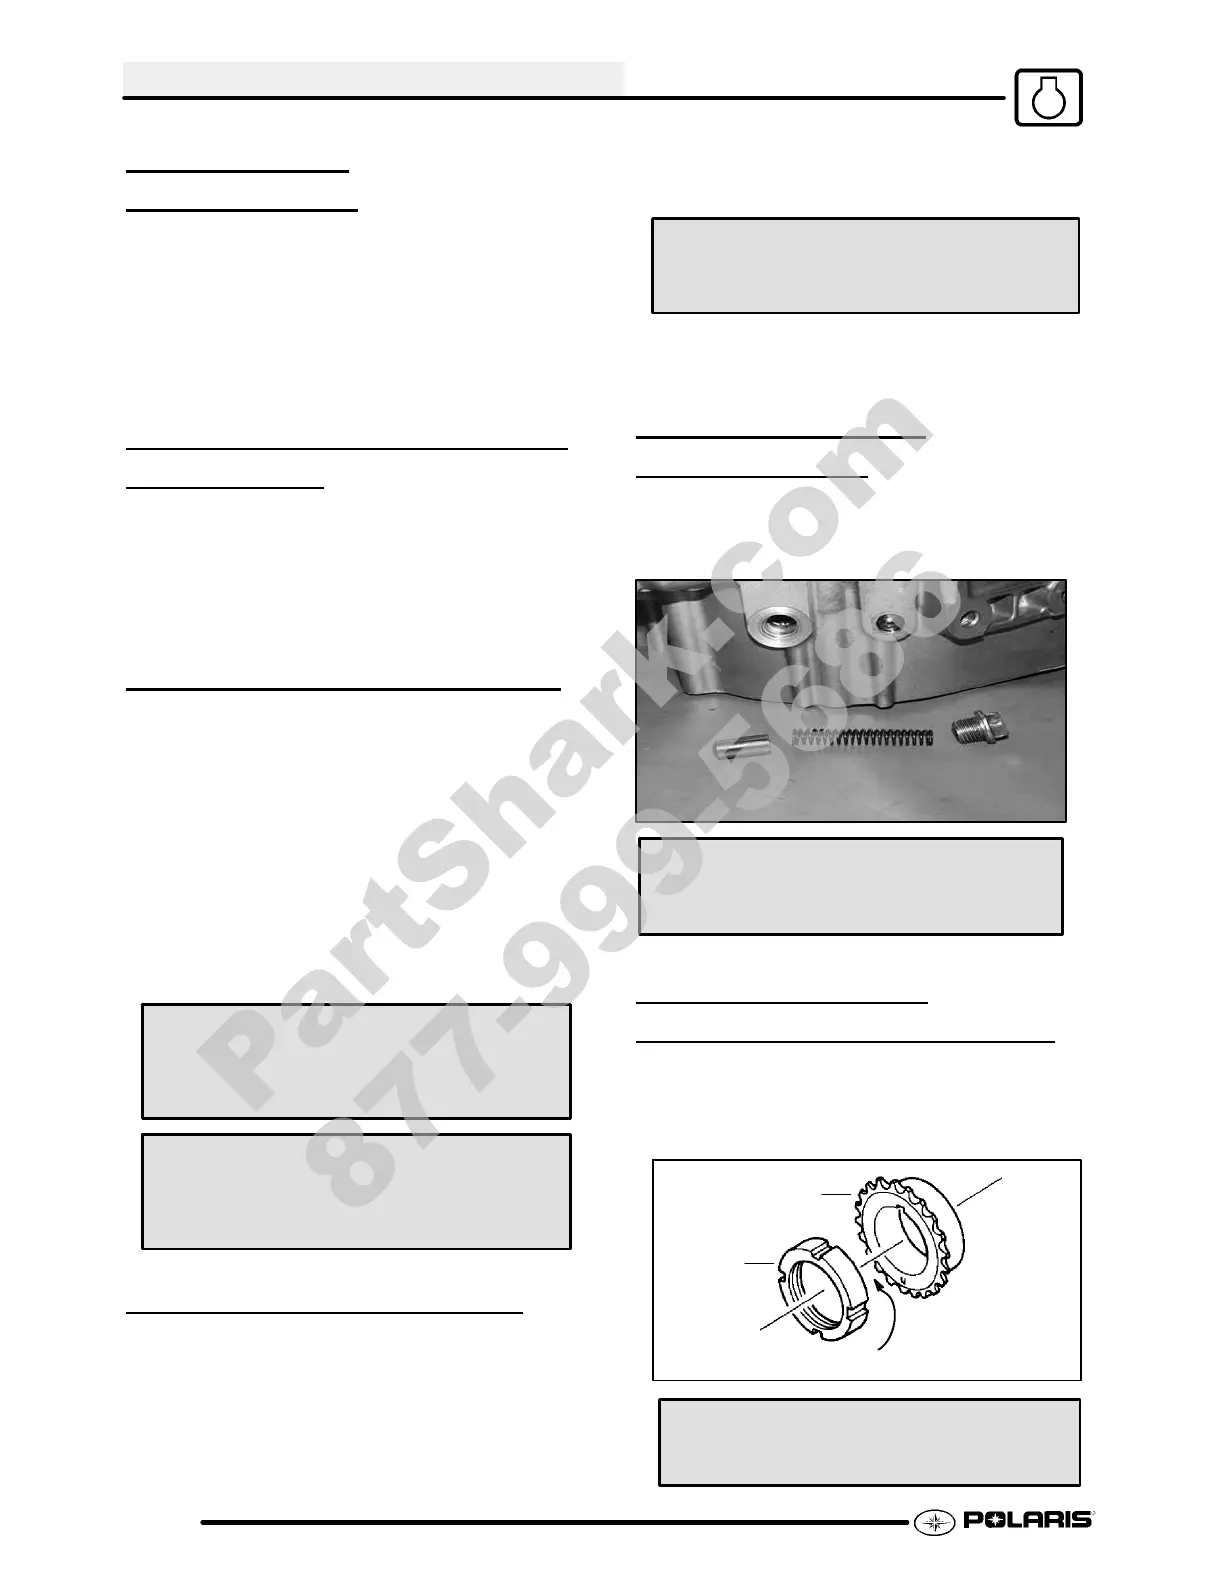
OILRELIEFVALVE
INSTALLA
TION
Installtheoil relief valve, spring, and plugusing anew
sealing washer.
Oil Relief Valve Plug Torque:
14-17 ft. lbs. (19-23 Nm)
CAM CHAIN DRIVE
SPROCKET INSTALLA
TION
1. Install the Woodruff key, drive sprocket, and
slotted nut. Using the Slotted Nut Socket (PN
2871293), tighten the nut to the specified torque.
A
B
T ighten
Slotted Nut Torque:
45 ft. lbs. (61 Nm)
PartShark.com
877-999-5686
 Loading...