81
Polyend Tracker Mini Manual
80
Polyend Tracker Mini Manual
NOTESNOTES
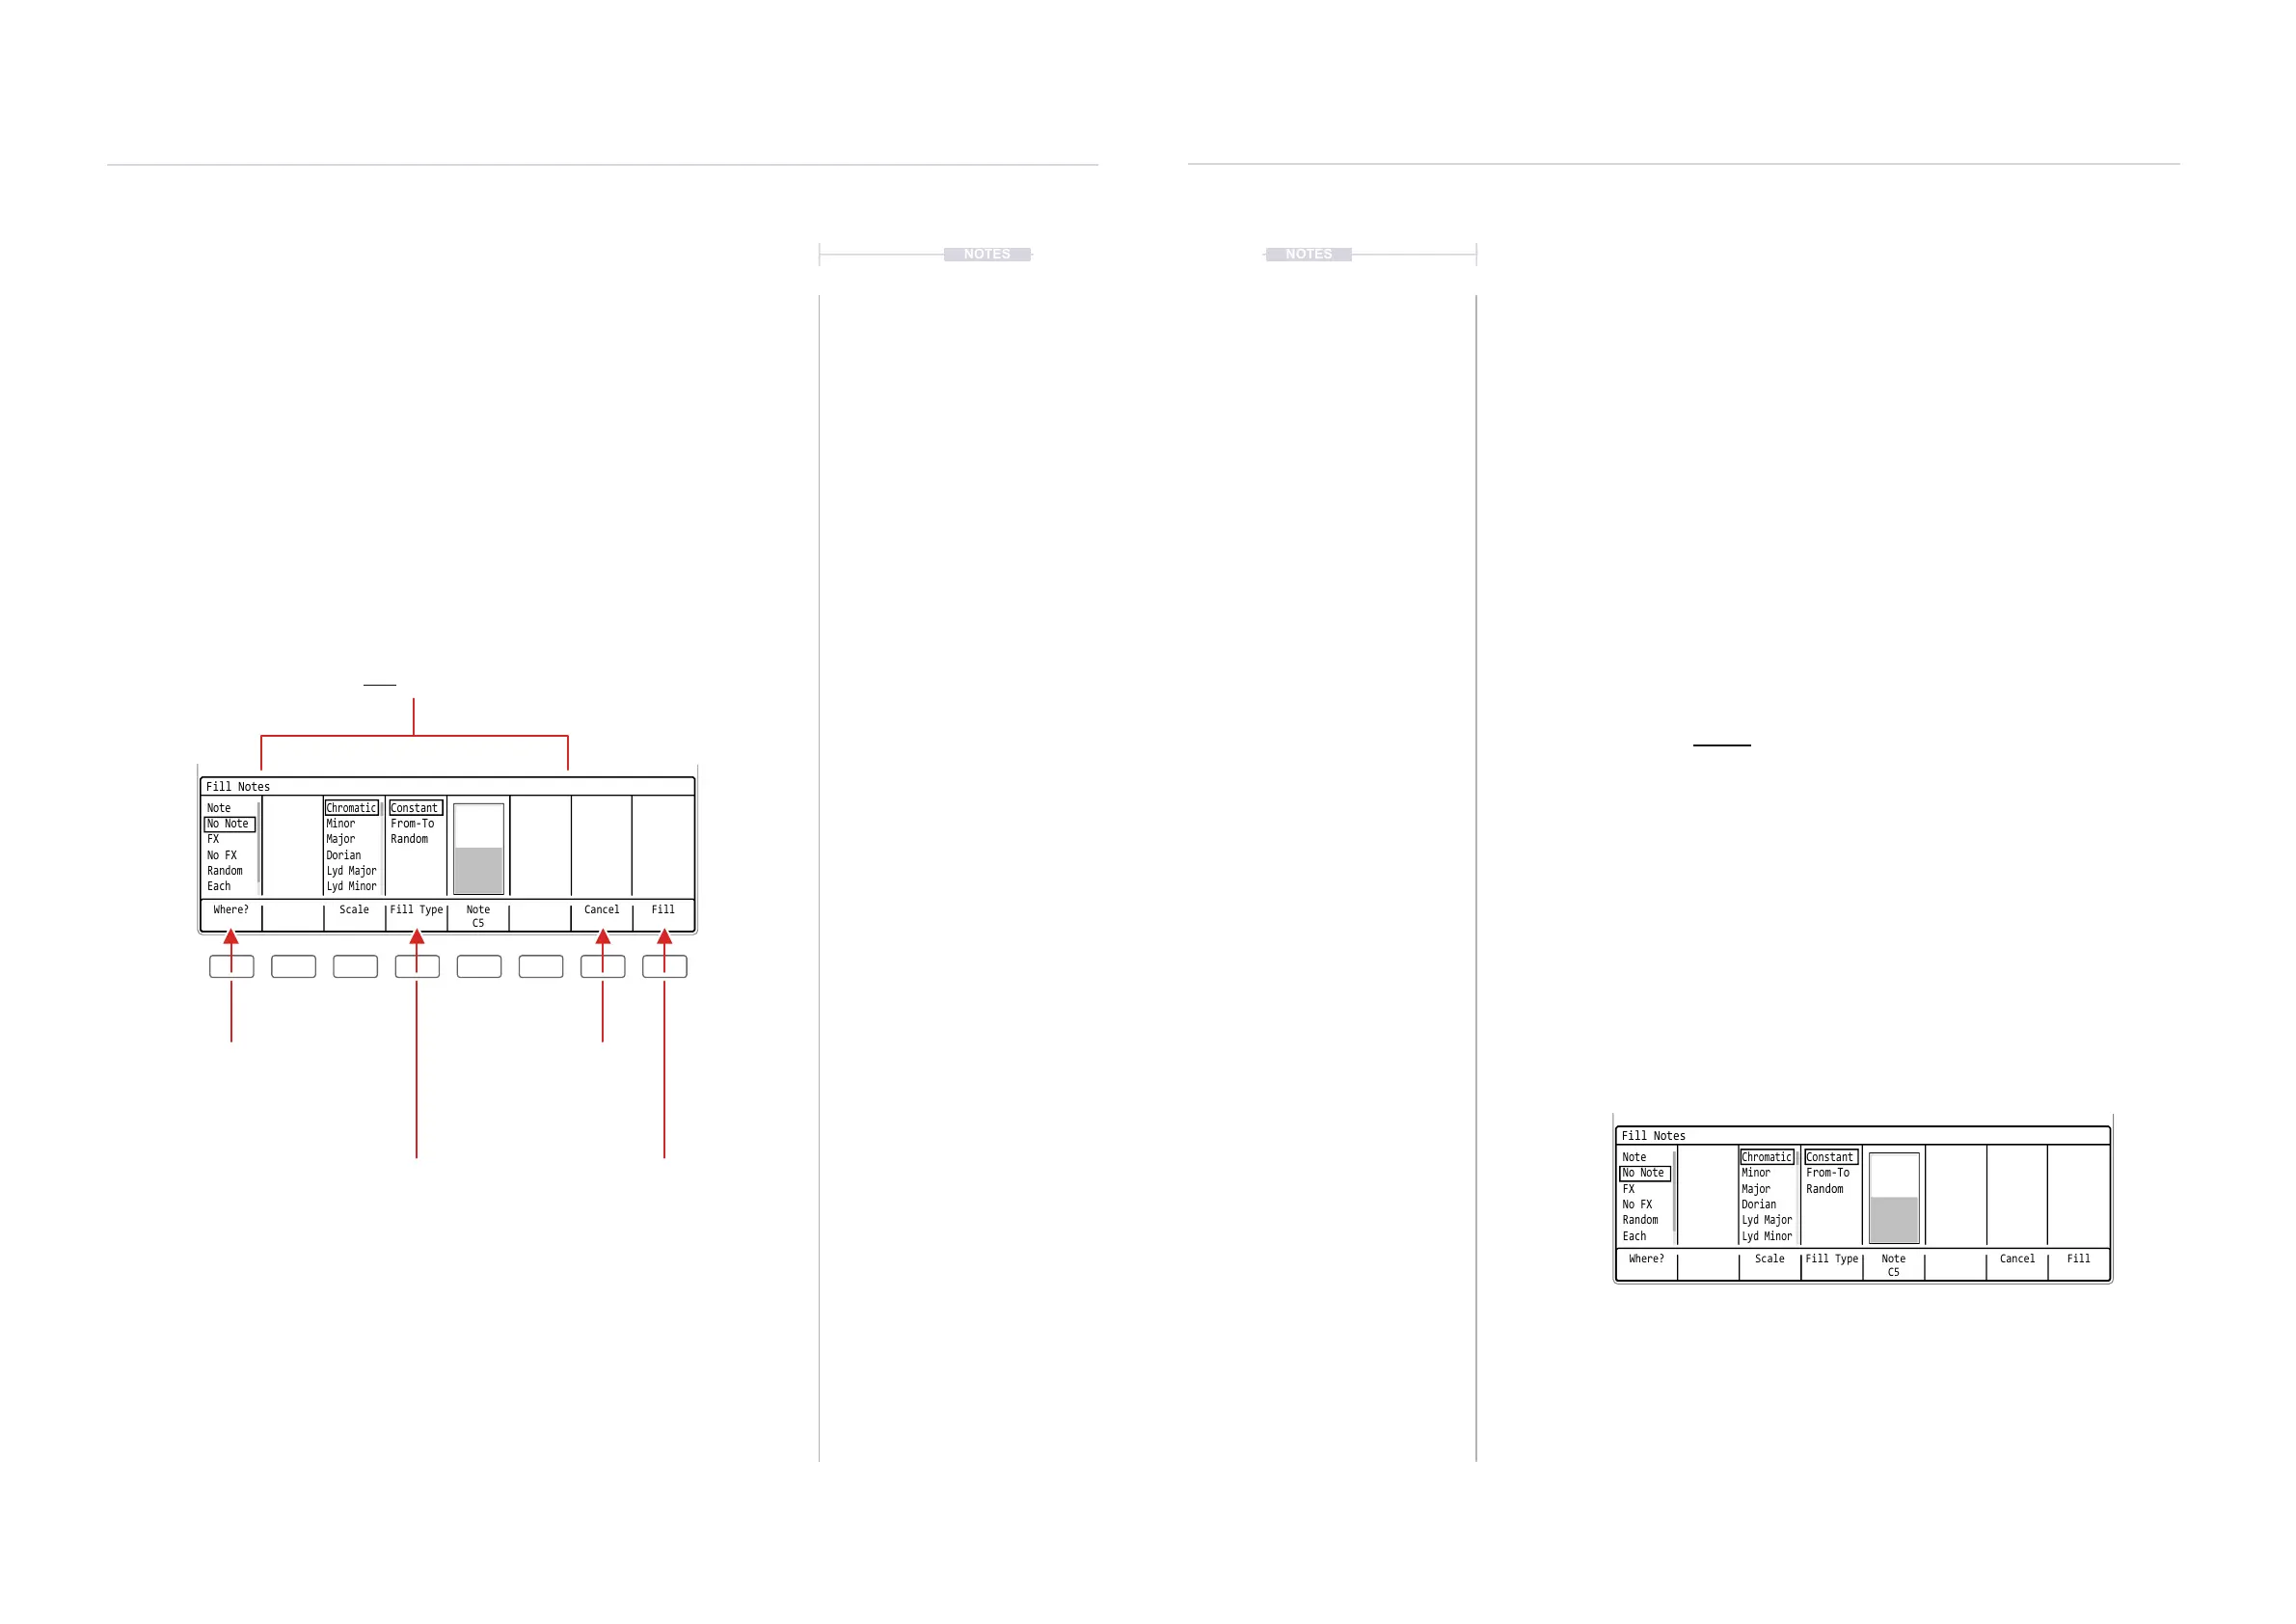
Fill Utility Window
The window layout is similar for the step range and parameters selected.
However the content and features for ll will change depending on the
context of the selection and the options chosen. A typical Fill window is
shown below with a summary of common features. The Fill utility is mainly
controlled using the dynamic screen buttons under the Tracker Mini screen.
To access Fill:-
Press [Fill] - Screen Button, when in [Rec] Mode of the pattern page [1].
Sequencing Steps
5
Sequencing Steps
5
Example of using a basic Fill
As a quick start introduction to creating lls and example to populate an
empty range with notes followed by lling the FX1 for the series of notes
with a pan variation effect. This will play a percussion segment,
▌ CREATING A NOTE FILL
1. Press [1] to select the Pattern Mode page.
2. Press [Instrument] and select a percussive sound. The ‘606-ClosedHat’
sample, numbered instrument ‘6’, has been loaded into the project
instrument list and will be used for this example.
3. Press [Rec] to switch to recording mode. The step bounding box will
turn red and allow editing of steps.
4. Select a range of empty steps: Hold [Shift] + (Up), (Down), (Left) or
(Right). For this example select 8 step rows on a single track. The
option for selecting multiple rows and tracks is possible.
5. Ensure the notes step parameter is selected in the pattern range
selected: Press [Note], which will be highlighted solid red.
6. Press [Fill], 4
th
Screen button. This will open the Fill utility pop-up
window.
7. Press [Where?], 1
st
Screen button. Repeat presses will cycle through
the options. Also, with the ‘Where?’ section highlighted, (Up), (Down) or
[+] / [-] will scroll through and select options.
Dynamic area of 5 features containing the criteria specically required for 1) Parameter
selected, 2) Step range selected and 3) Options chosen in ‘Where’ & ‘Fill Type’.
Example Illustration shows a range of notes selected with the ‘note’ and ‘constant’ selections.
Ensure a range of steps is selected and the step parameter also selected before opening
the Fill utility. This range and parameter will be what determines the ll application.
Where?
Option of where to apply the ll
within the selected step range.
Example: Note would apply a note
ll to all steps containing a note.
Fill Type
Option of how to apply the parameter
within the selected step range.
Example: Constant would apply a
constant note value C2 into the range.
Fill
Activates the ll command.
Applies dened criteria into the
selected range.
Cancel
Exit without
applying.
Where? Scale Fill Type CancelNote
C5
Fill
Fill Notes
Note
Chromatic
Constant
No Note
Minor
From-To
FX
Major
Random
No FX
Dorian
Random
Lyd Major
Each
Lyd Minor
Where? Scale Fill Type CancelNote
C5
Fill
Fill Notes
Note
Chromatic
Constant
No Note
Minor
From-To
FX
Major
Random
No FX
Dorian
Random
Lyd Major
Each
Lyd Minor