83
Polyend Tracker Mini Manual
82
Polyend Tracker Mini Manual
NOTESNOTES
Sequencing Steps
5
Sequencing Steps
5
8. Select in the bounding box ‘No Note’. This option will select all steps
that do not have a note set. As the selected range is empty all 8 steps
will be lled with this option.
9. Press [Scale] - 3
rd
Screen Button. Repeat presses will cycle through the
options. Also the (Up), (Down) or [+] / [-] will scroll through and select
options. Select ‘Chromatic’. As this is a percussion instrument the scale
is less important.
10. Press [Fill Type] - 4
th
Screen Button. Repeat presses will cycle through
the options. Select ‘Constant’. As this is a percussion pattern the
instrument does not require scale or note ranges so constant will repeat
the note.
11. Press [Note] - 5
th
Screen Button. Repeat presses will cycle through the
options. Also the (Up), (Down) or [+] / [-] will scroll through and select
options. Set to C5, the root note for the sample.
12. Press [Fill], 8
th
Screen button. This will activate the ll command and
populate the selected range.
The default note value is C5 which plays a sample at its original pitch value. The rst slice of
a beat slice sample will be triggered using note C2.
Track 4 Track 4 Track 4Track 3
1
5
3
7
2
6
4
8
D6 03
----
V 10
D6 01
----
V 20
D6 01
----
V 20
D6 01
----
V 20
---- ------- ---
---- ------- ---
---- ------- ---
---- ------- ---
---- ------- ---
---- ------- ---
---- ------- ---
---- ------- ---
E6 03
----
D5 03
----
----
----
----
----
--- ---
--- ---
V 50
V 30
C5 06
---- ----
C5 06
---- P-50
C5 06
---- ----
C5 06
---- P-36
C5 06
---- ----
C5 06
---- P-22
C5 06
---- ----
C5 06
---- P -8
C5 06
---- ----
C5 06
---- P 7
C5 06
---- ----
C5 06
---- P 21
C5 06
---- ----
C5 06
---- P 50
C5 06
---- ----
C5 06
---- P 35
Note Fill FX Fill
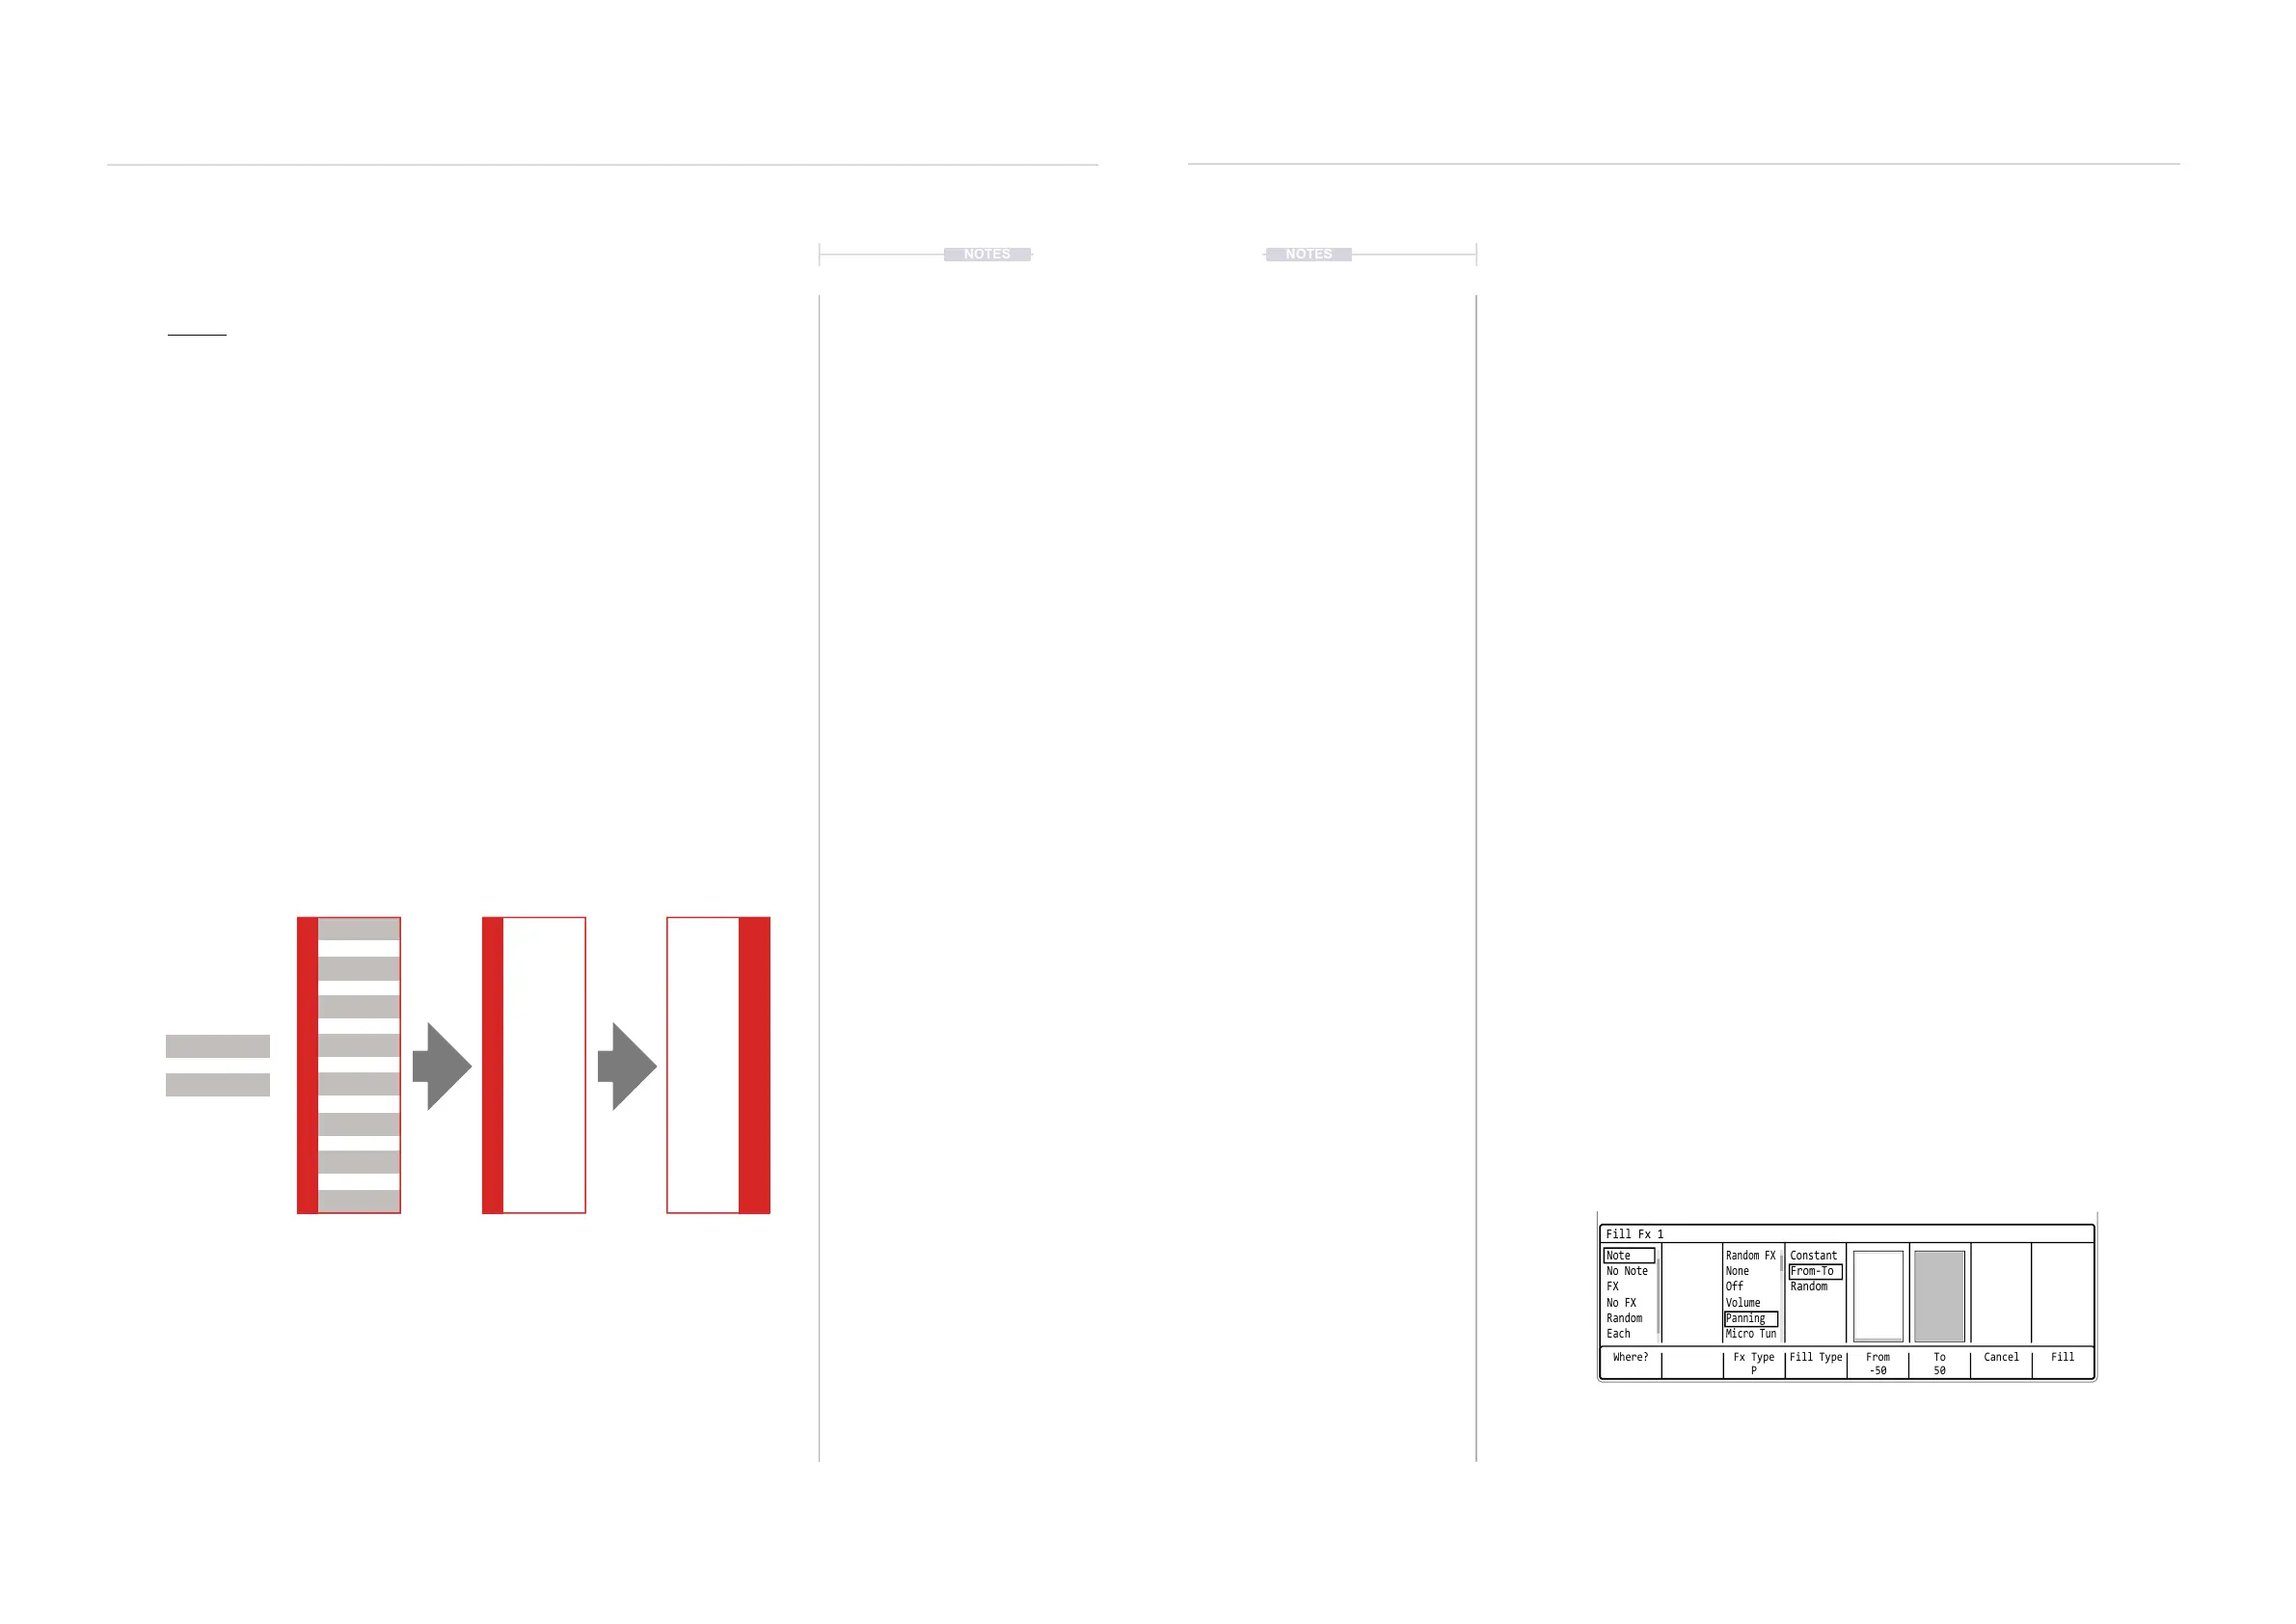
▌ ADDING THE PAN VARIATION USING FILL
1. Following from the previous example; In Pattern Mode [1] with [Rec]
On, ensure the previous step range is still selected.
2. Press [FX2]. This selects the effect column FX2 which is highlighted
solid red.
3. Press [Fill] Screen Button. This will open the Fill utility pop-up window.
The display will now be different as the ll utility is now FX, not Note Fill.
4. Press [Where?] - First Screen button. Repeat presses will cycle through
the options. Also the (Up), (Down) or [+] / [-] will scroll through and
select options.
5. Select in the bounding box ‘Note’. This option will select all steps that
have a note set. This is effectively the range of notes recently created.
6. Press [Fx Type], 3
rd
Screen button. Repeat presses will cycle through
the options. Also the (Up), (Down) or [+] / [-] will scroll through and
select options. Select ‘Panning’, as the effect to ll into the selected
range.
7. Press [Fill Type], 4
th
Screen button. Repeat presses will cycle through
the options. Select ‘From-To’ to allow a range of pan values to be lled.
8. Press [From], 5
th
Screen button. Press (Up), (Down) or [+] / [-] to set the
value. Set this to -50.
9. Press [To], 6
th
Screen button. Press (Up), (Down) or [+] / [-] to set the
value. Set this to 50.
10. Press [Fill], 8
th
Screen Button. This will activate the ll command and
populate the selected range. This will create a percussive pattern which
will pan left to right in the stereo image. The values are automatically
assigned in equal intervals across the range.
Where? Fx Type
P
To
50
Fill Type CancelFrom
-50
Fill
Fill Fx 1
Note
Random FX
Constant
No Note
None
From-To
FX
Off
Random
No FX
Volume
Random
Panning
Each
Micro Tun