Automation
Electronic Devices and Systems
3.9.1 Calibrating the REA ScanCheck 3n for 6, 8 and 10 mil Apertures
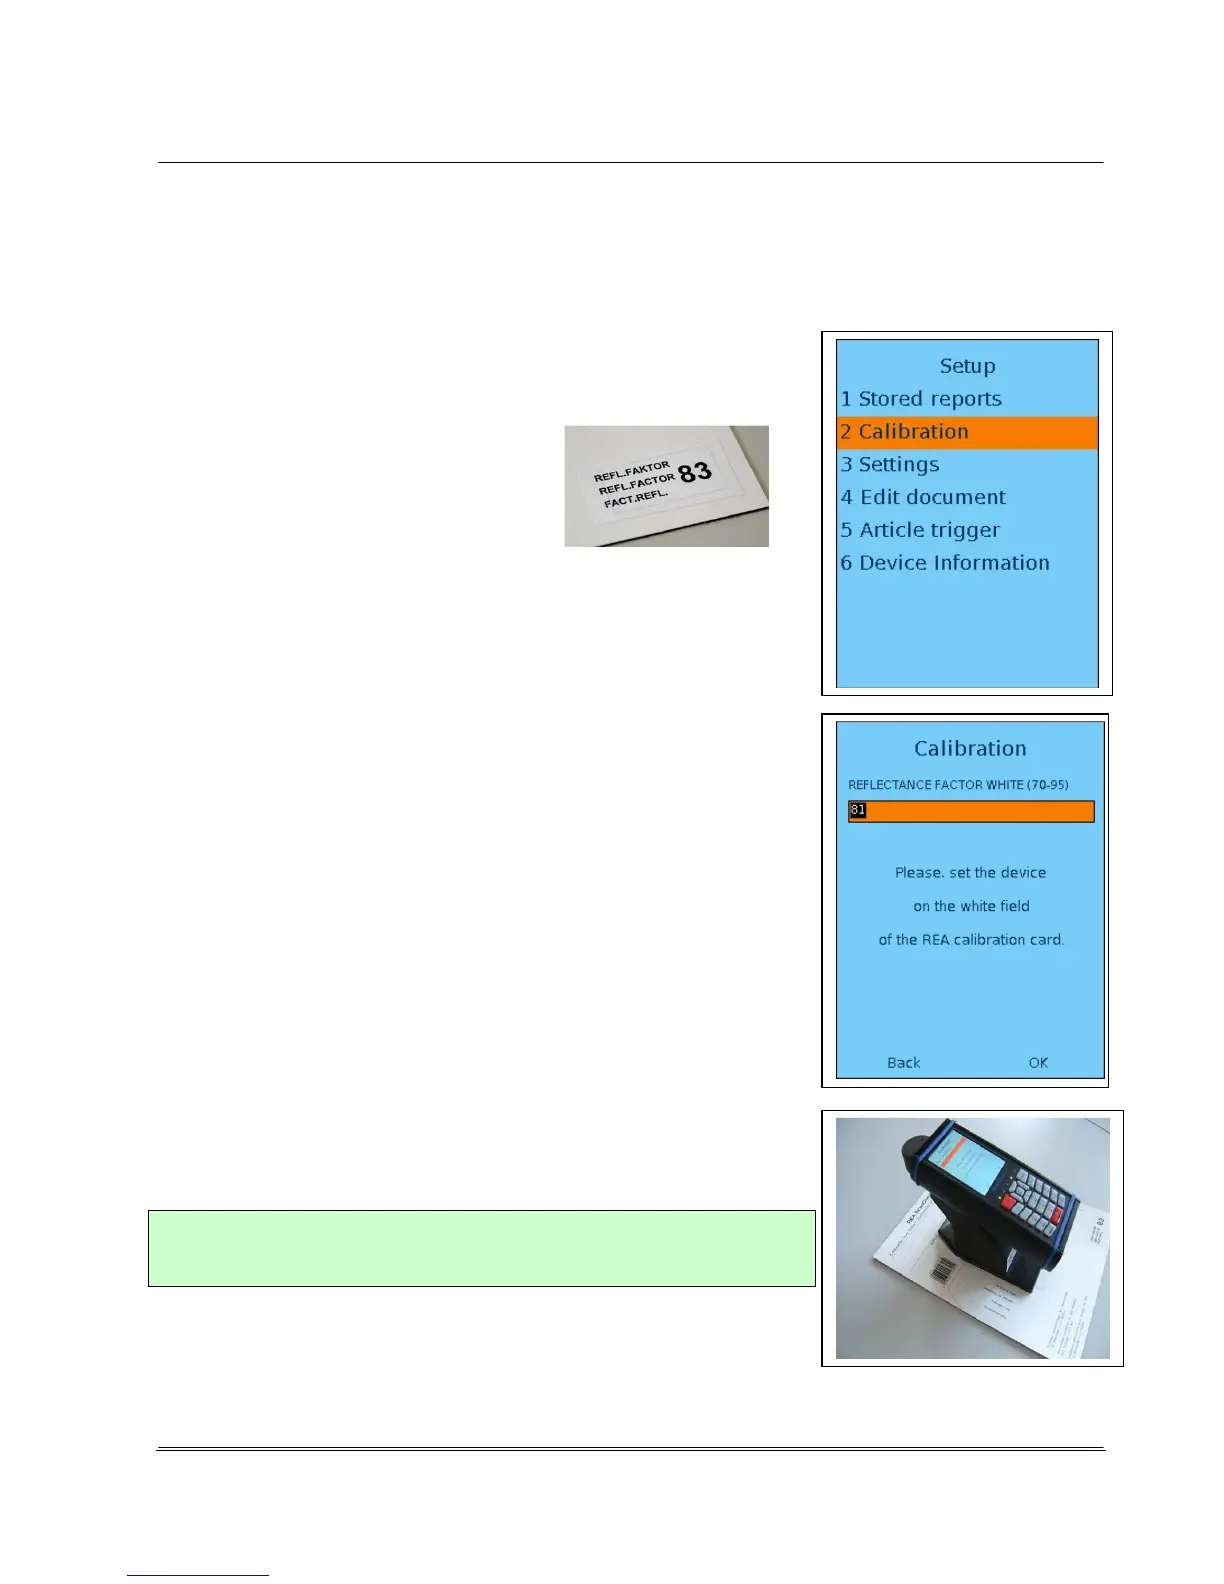
The calibration process can be selected from the Setup Menu. The key sequence <Setup>,
<Calibration> with the arrow buttons and <OK Enter> or the buttons <Setup> and <2> opens the
Calibration input window.
1. The value printed at lower right on the calibration card used
must be entered in the orange-colored field "reflection factor."
By pressing the <Store> button
or moving the active orange-
colored input field with the arrow
buttons to the field OK and then
pressing the <OK ENTER> button, the entered reflection factor
for the white value of the calibration card is accepted into the
unit settings.
2. The REA ScanCheck 3n must be positioned on the marked
unit silhouette on the calibration card as shown in the figure
below so that the illuminated laser beam can pass over the
unprinted white field of the calibration card unhindered.
Pressing <Store> activates the laser beam. Please check
whether the laser beam fully lands in the white field.
3. Pressing the <OK ENTER> button starts the actual calibration
process for the white reflection value.
The laser beam then deactivates when the calibration is
complete. The completed calibration is effective immediately
for the 6, 8 and 10 mil apertures.
Fig.: REA ScanCheck 3n with white value calibration on the calibration
card
Good to know
A special calibration must be made for the use of the 20 mil aperture
(with the additional adapter foot).
 Loading...