Automation
Electronic Devices and Systems
3.9.3 Verification Tool Monitoring
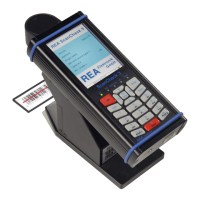
Regular monitoring of the verification tool is indispensable in order to ensure that the comparability of
all measurement results. Through regular measurements and comparison of the evaluation results of
measurements of the same reference code sample with the calibrated REA ScanCheck 3n, you can
inspect whether the verification unit is still operating within the specifications indicated by the
manufacturer.
For this purpose, there are two test codes on the REA ScanCheck 3 calibration card that were printed
there with high precision.
The left-hand EAN-13 code, with a nominal size of 100%, should always be used for the verification
tool monitoring. This EAN code must always be calibrated in the same manner with the aperture of
6 mil and under consideration of the handling instructions (see Chapter 4.1). The REA calibration cards
have a serial number on the rear side and are always supplied together with the related REA reference
measurement report that bears the same serial number. The measurement results of the
REA ScanCheck 3n on site must be regularly compared with the measurements of this reference
report. As long as the deviations found in the comparison lie within the specified tolerances, the
following measurements are also comparable within the indicated specifications.
3.9.3.1 Allowable Unit Tolerances
The individual values of the control measurement must each be
compared to one another.
ISO/IEC evaluation, summary
(1st screen of evaluation)
Symbol Good 4/06/670
Code Type EAN13
Code content
4008654123454
ISO/IEC 15416 Parameters (1st screen of the evaluation)
(The values in the diagram are examples; use the reference report)
Parameter % Grade Allowable Tolerance
Decoding 4 Always Grade 4
Symbol contrast 80% 4 +/-8 %
Edge contrast 62% 4 +/-8 %
Modulation 79% 4 +/-8%
Rmin/Rmax 1% 4 +/-8%
Defect: 5% 4 +/-8%
Decodability 87% 4 +/-8%
Optional Parameters (2nd Screen of Evaluation)
Bar Width Deviation Allowable Tolerance Grade
Average Bar Width Deviation: +/- 5% (absolute +/-5 µm) 4
Maximum Bar Width Deviation: +/- 10% (absolute +/-10µm)

 Loading...