Automation
Electronic Devices and Systems
13. Appendix - Conformity Confirmation for Verifier Calibration Card
Conformity Confirmation
for the
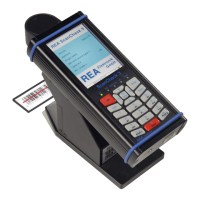
Calibration and Test Card of the REA ScanCheck 3n
The white balance values of the calibration card as well as the applied test code were verified by a
REA PC-Scan reference unit. The corresponding reference verification report is supplied together with
the card.
The REA PC-Scan reference unit was adjusted in accordance with ISO/IEC 15426-1 with primary
calibration standard, produced by the company Applied Image INC., USA. The contrast values were
adjusted with the corresponding primary calibration standard for the contrast values. The metric
calibration is based on the size determination of the UPC code of the aforementioned primary
calibration standard.
The calibration card was produced photographically as a copy of a glass master. The photographic
process requires that the card is light sensitive. The calibration card must therefore be stored protected
from daylight. Scratches, dirt and other negative influences make the calibration card unusable.
It should be replaced no later than 2 years after delivery by a new original calibration card.
Verification Tool Monitoring
The REA ScanCheck 3n must be inspected in connection with a verification tool monitoring regularly
every 4 to 8 weeks. This should be done using the reference code on this calibration card, directly after
a calibration and in reference and comparison to the enclosed reference verification report.
The additionally supplied verification report shows the respective measurement values of the unit and
the calibration card in a new state upon delivery.
The permissible tolerances for this verification unit are specified in Chapter 3.9.3, Verification Tool
Monitoring. Upon exceeding the tolerances, a factory inspection and repair as necessary with factory
calibration at the manufacturer is required.
Verification Tool Calibration
Calibration of the verification unit must be made at least every 4 to 8 weeks and using the reference
values for white balance and code size on this calibration card.
It is always required when verifying at changing measurement locations and under severely differing
lighting conditions. Sunlight and other light sources with high infrared ratios especially influence the
reflectance values. If the unit reports calibration errors, it must be sent to the manufacturer for
inspection and repair as required and new factory calibration.
Technical changes reserved
June, 2010
REA Elektronik GmbH ● D-64367 Mühltal-Waschenbach

 Loading...