Section 2: Installation
Page 2-12 CG2 Series Operator Manual
2.5 CONNECTIONS (cont’d)
2.
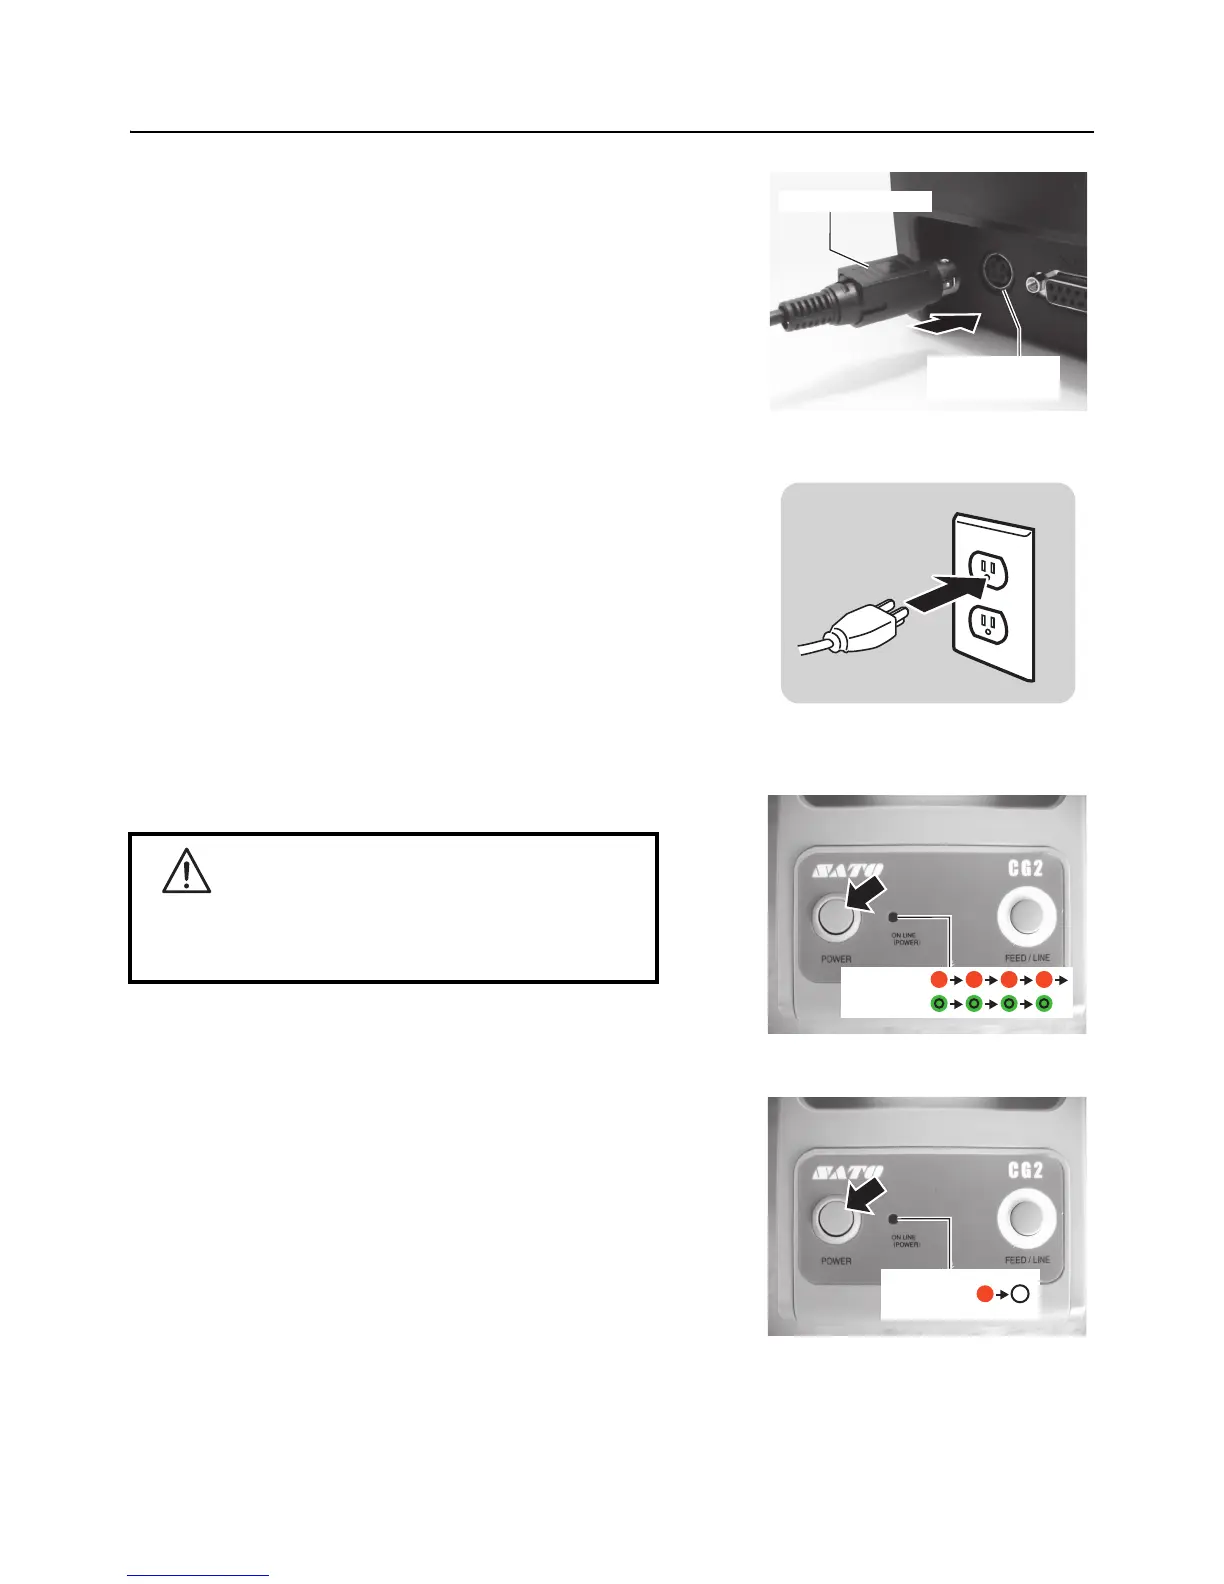
Connect the DC power plug from the AC adapter to the
DC input power terminal on the back of the printer.
Make sure the flat side of the DC power plug is facing
upward. Secure the printer with one hand, and insert the
cable firmly.
3. Insert the AC power plug into a AC power outlet.
Make sure that the AC voltage of your region is within
the range of AC 100 to 240V, 50/60 Hz.
A 3-pin plug is attached to the power cord provided with
your printer. One of these pins is the ground wire.
You must use a 3-pin power outlet. The plug will not
work with a 2-pin power outlet.
* The shape of the power plug may vary depending on
the location where the printer was purchased.
2.5.4 Turning On the Power
Press the POWER on the operation panel of the unit.
The ON LINE (POWER) indicator displays red, then green.
2.5.5 Turning Off the Power
When you have completed the printing job, turn the printer
off.
Be sure to confirm that the printer is in the offline status.
Press and hold the POWER button until the ON LINE
(POWER) indicator displays red and then turns off.
If there is any printed paper remaining in the printer,
cut it off.
Warning
Do not operate the power switch or insert/remove the
power cable while your hands are wet. Doing so may
cause an electric shock.
Flat side faces up
DC input power
terminal

 Loading...


