© 2019 Safe Fleet | All rights reserved | Part #: 700-1123 R4
p. 43
TH8 Installation and Conguration Guide
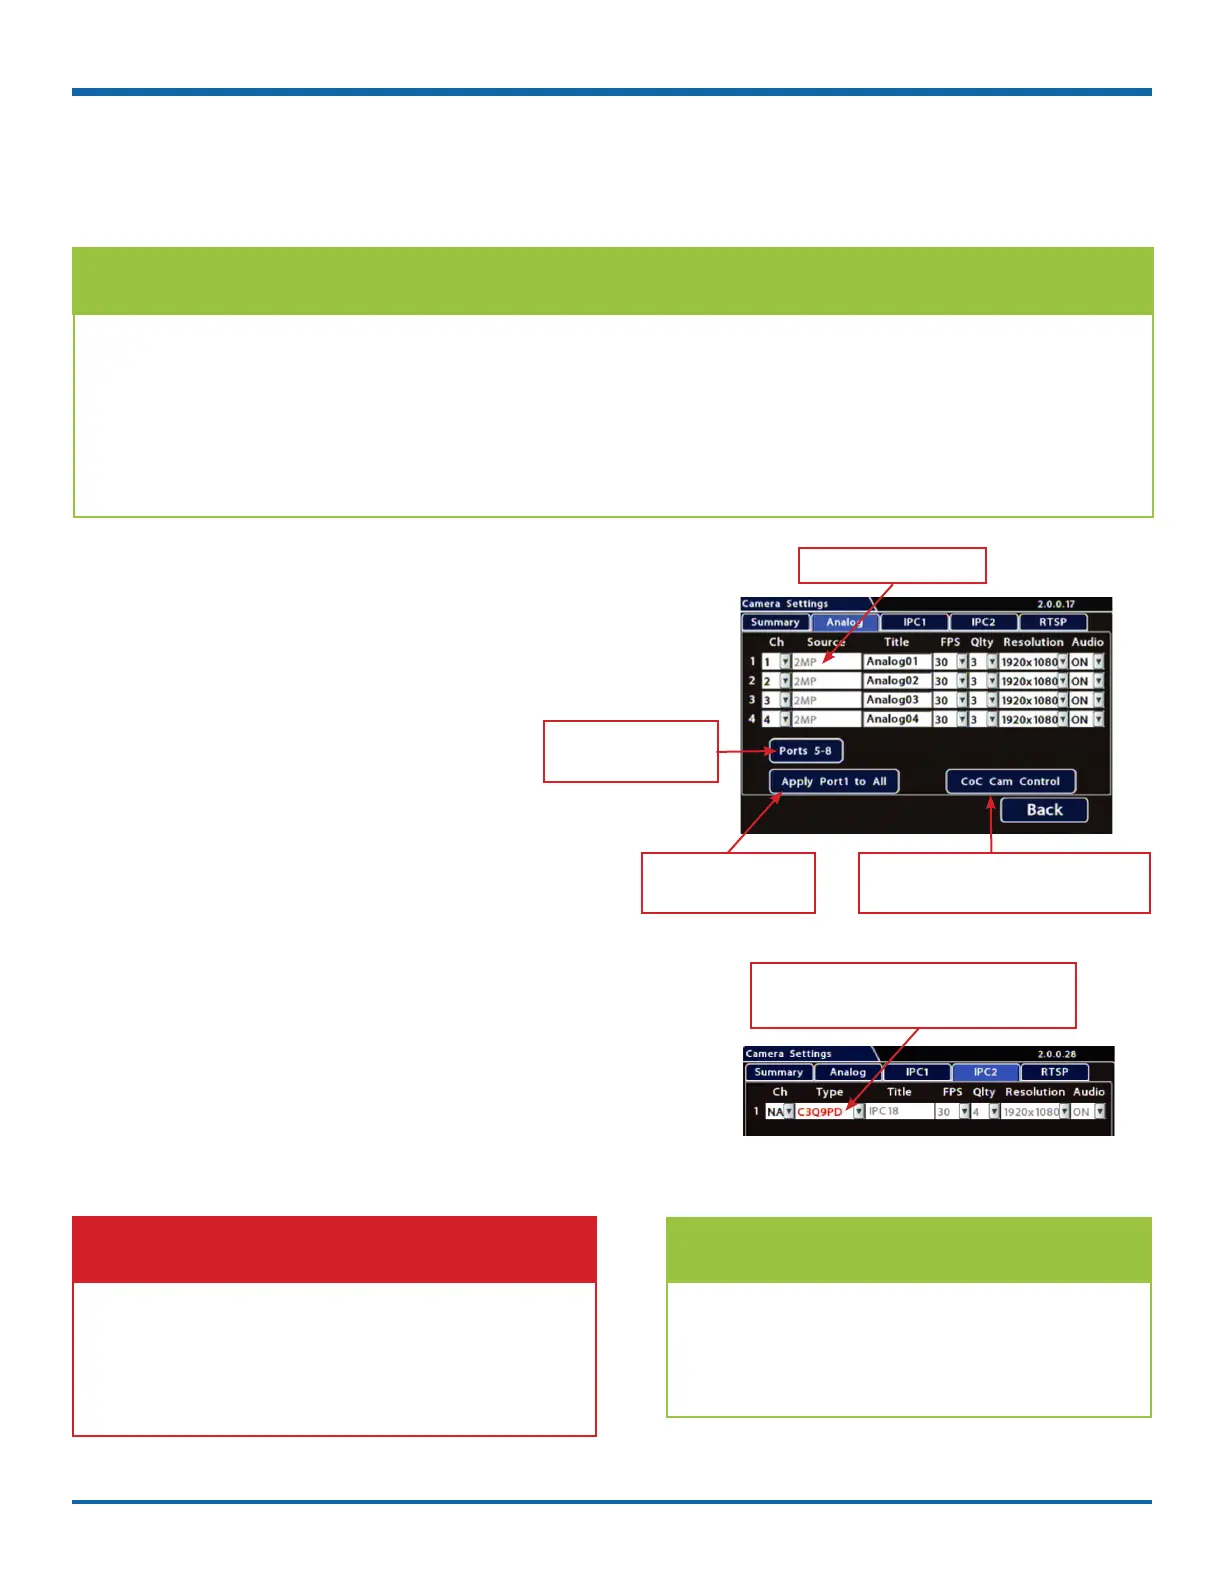
To congure analog cameras:
1. Click the Analog tab.
2. Set up cameras as required
(for details, see "Camera Settings - Menu
Options" on page 46).
3. Click Back to save Camera settings.
To congure a supported IP camera:
1. Click the IPC1 or IPC 2 tab.
2. If the entry in the Type column is red, select the
appropriate camera model from the dropdown
menu.
3. Use the Ch dropdown menu to select a logical
channel (denes the display location in live and
playback grid views).
4. Set up the camera as required
(for details, see "Camera Settings - Menu
Options" on page 46).
5. Click Back to save Camera settings.
Conguring Video Sources
TIP: Camera Settings - IPC1/2 and RTSP Tabs
The IPC1, IPC2, and RTSP tabs are only available if the DVR has been congured for an IP camera or RTSP
video source (including a companion DVR such as the TH4C).
Congure an IP camera connected to HD Cam Expansion port 1 on the IPC1 tab. Congure an IP camera
connected to HD Cam Expansion port 2 on the IPC2 tab. Congure a companion DVR on the RTSP tab.
For more information, see "IP Cameras and RTSP Video Sources" in "Recording Settings" on page 52.
Select Record Camera to display Camera Settings.
Analog camera resolution
Click to work with the
dened set of camera
channels
Click to apply settings
selected for Channel 1 to
all cameras.
Click to adjust settings for analog cameras
with CoC (Control over Coax - for more infor-
mation, see the camera documentation).
Red font indicates a conict between this setting
and the camera detected by the DVR. Select the
appropriate camera from the dropdown menu.
IMPORTANT: Logical channel assignment
Do not assign logical channels 14-16.
Camera feeds with unassigned logical channels
(Ch set to NA) are not recorded by the DVR, and
will not appear in live or playback views.
TIP: Unsupported IP cameras
If your IP camera is not listed in the Type
menu, you may be able to congure it
as an RTSP device. Refer to the camera
documentation, or contact Technical Support.