Procedure
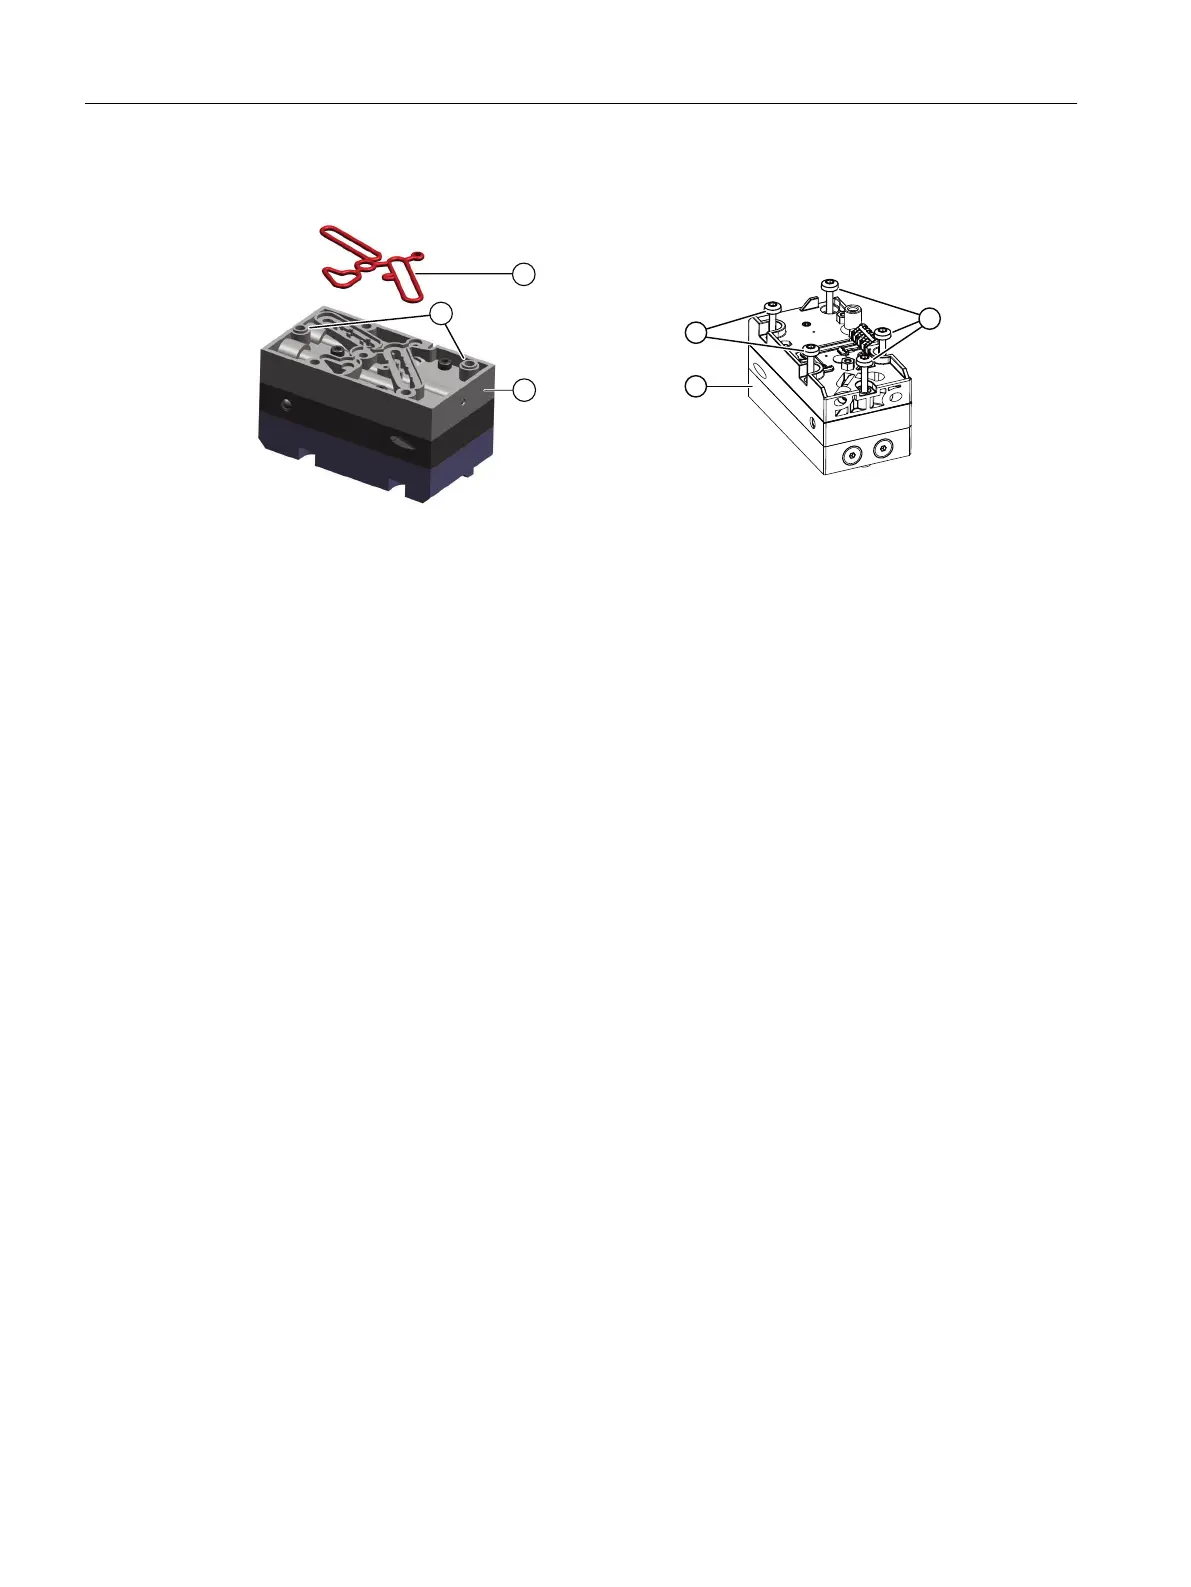
① Cord seal ③ Mounting screws
② Pneumatic block ④ Centering elements
Figure 11-1 Pneumatic block
Removing
1. Switch off the supply air PZ and depressurize the actuator.
2. Open the positioner as in the description depending on the device version:
– Opening the standard and and intrinsically safe version (Page 53)
– Opening the device version with "flameproof enclosure" (Page 56)
3. Remove the ribbon cable from the basic electronics.
4. Tighten the two fixing screws of the basic electronics.
5. Remove the basic electronics.
6. Remove the fixing screws ③ of the pneumatic block ②.
Four screws for the single-acting pneumatic block. Five screws for the double-acting
pneumatic block.
7. Remove the pneumatic block ② and the cord seal ①.
8. Blow the existing dirt from the surface on which the pneumatic block was placed.
Installation
1. Insert the new cord seal ① into the new pneumatic block ②.
2. Press the cord seal ① into the groove on the pneumatic block ② on all sides.
3. Place the new pneumatic block on the base plate.
Make sure that the pneumatic block engages with the centering elements ④ on the
baseplate.
4. Screw the supplied fixing screws ③ into the pneumatic block.
5. Tighten the fixing screws with a torque of 1.1 Nm.
6. Place the new basic electronics onto the four holders of the rack.
7. Tighten the two fixing screws of the basic electronics.
8. Tighten the fixing screws.
Service and maintenance
11.5 Replace pneumatic block
SIPART PS2 with PROFIBUS PA
246 Operating Instructions, 05/2019, A5E00127926-AC
 Loading...