Page 76 SIMPLEX 4100 EWIS
INSTALLATION MANUAL
Document No.: 4100-M011 March 1998 Issue 1.0
circuit board to ensure proper voltage and signals are present. If these signals and
voltages are incorrect, the printed circuit board is probably defective.
If the visual inspection of the panel was normal, and the voltages are correct, the
next step in sectionalisation is to test the return field wires from the peripheral
devices. This is the next section to troubleshoot because proper voltage terminals
are accessible which allows these checks to be made quickly. Check for incorrect
voltage or signal with voltmeter. If an incorrect reading is observed, you know the
defective printed circuit board is the one you are testing.
If the voltage and signals are correct on the return field wiring, the next step is to
localise the trouble by swapping printed circuit boards of the same type. Perform the
following procedure to swap printed circuit boards:
1. Disconnect battery power.
2. Turn system power OFF (AC).
3. Remove the suspected printed circuit board from the motherboard.
4. Remove a printed circuit board of the same type from the system (when
available) or from branch stock.
5. Set the “good” printed circuit board address to match the white “address
label” on the motherboard (where the “bad” printed circuit card was
located). If a printed circuit board is swapped from within the system, set
the “bad” printed circuit board address to match the white “address label”
on the motherboard (where the “good” printed circuit board was located).
6. Install both printed circuit boards (“good” and “bad”).
7. Apply AC power to the system.
8. Apply DC power to the system.
9. “ACK” all abnormal conditions.
If the visual indications change, the problem is in the “bad” printed circuit board. If
the symptoms do not change, check inputs and outputs from the now “good” printed
circuit board.
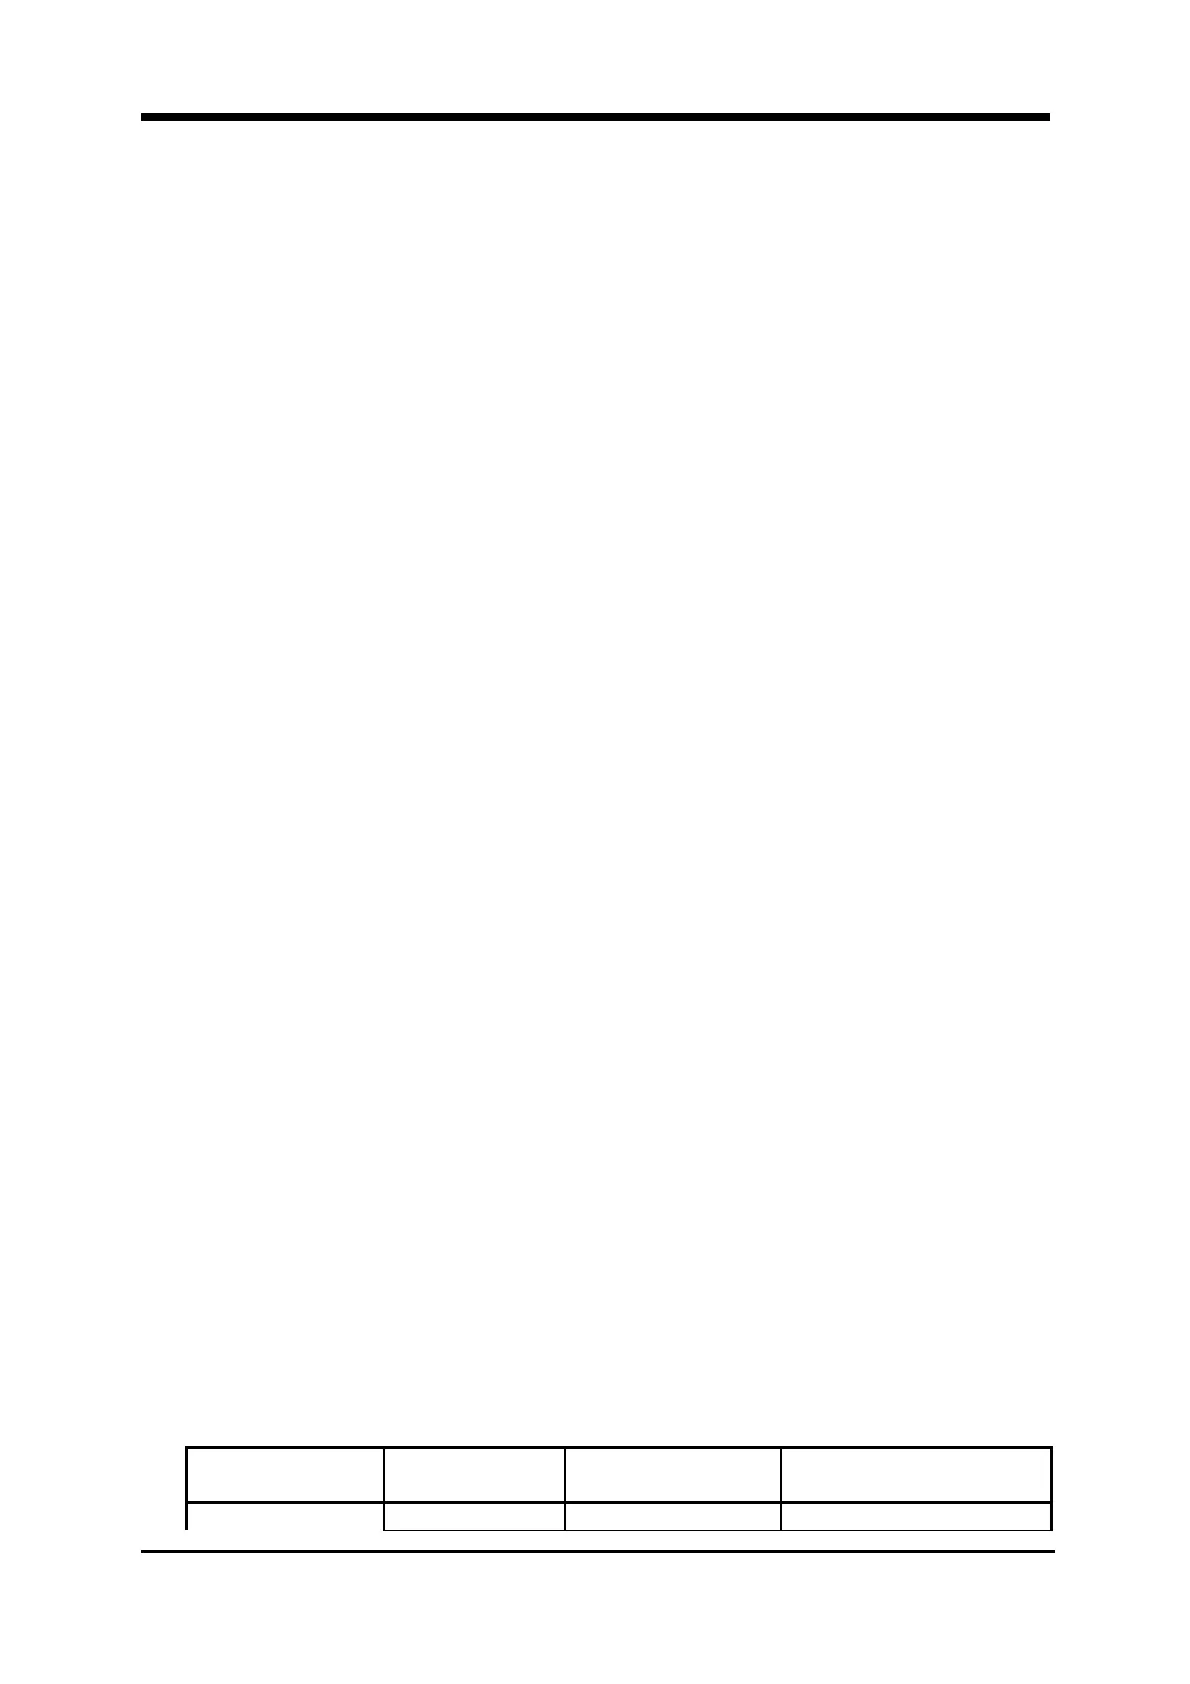
Voltages and signals on the terminals should match the Voltage Chart shown below.
Note the voltages given in the chart are with reference to the negative (-) of the 24V
power Supply. When field wiring is removed, remove and mark one wire at a time.
Ensure that the wiring is properly replaced to prevent additional fault indications.
Use the Voltage Chart as required.
Positive
Terminal
Negative
Terminal
28 VDC
3 VDC
Normal Circuit