Section 03 ENGINE
Sub-Section 08 (REWIND STARTER)
03-08-3
REMOVAL
Using a small screwdriver, extract rope knot from
starter grip
no. 15
. Cut rope close to knot. Tie a
knot near starter.
Remove screws
no. 3
and washers
no. 2
secur-
ing rewind starter
no. 1
to engine then remove re-
wind starter.
On fan cooled models with oil injection pump re-
move pump from rewind starter cover.
DISASSEMBLY
To remove rope from rewind starter mechanism :
– First remove locking ring
no. 12
, locking spring
no. 11
, circlip
no. 10
, pawl lock
no. 9
and pawl
no. 8
.
– Remove sheave
no. 5
from starter housing
no. 1
.
– Disengage key
no. 7
and pull out rope
no. 6
.
GENTLY TAP ON KEY
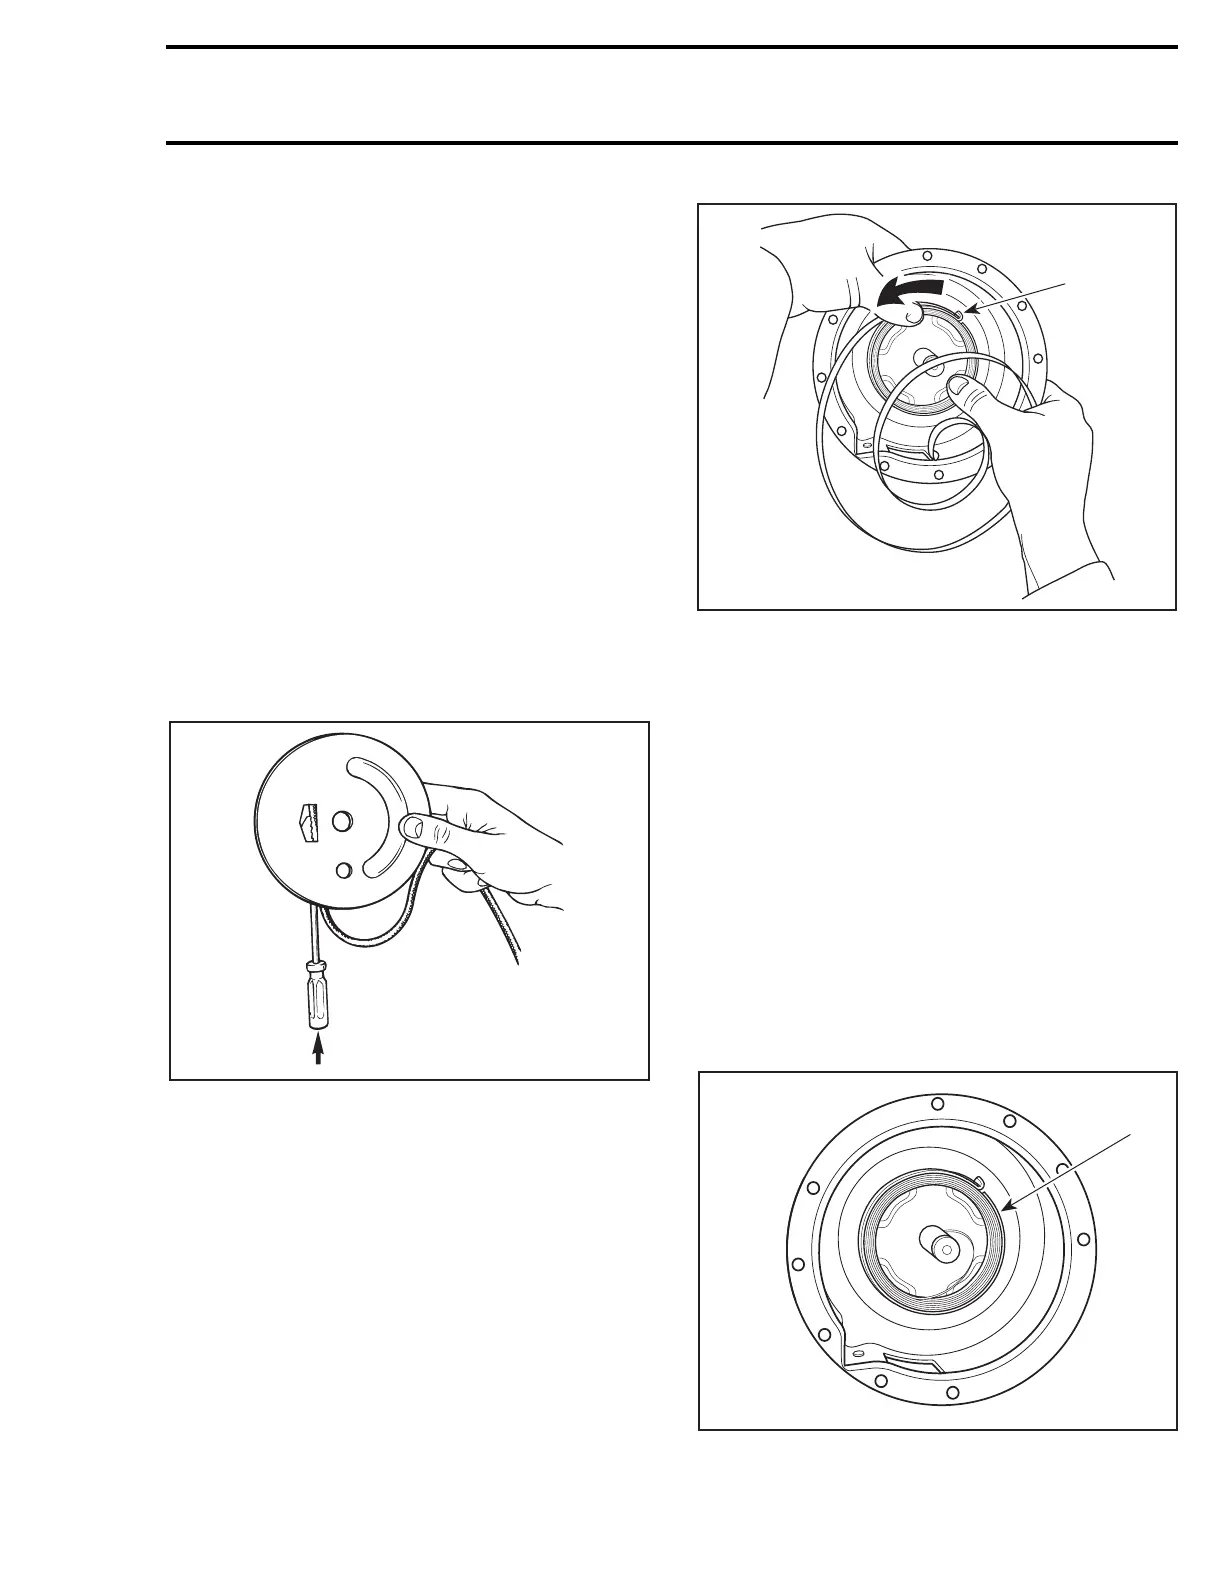
ASSEMBLY
At assembly, position spring
no. 4
outer end into
spring guide notch then wind the spring counter-
clockwise into guide.
WARNING : Since the spring is tightly
wound inside the guide it may fly out
when rewind is handled. Always handle with
care.
1. Outer end into guide notch
NOTE :
Due to dust accumulation, rewind
starter must be periodically cleaned, inspect-
ed and relubricated.
CAUTION : It is of the utmost importance
that the rewind starter spring(s) be lubri-
cated periodically using specific lubricants.
Otherwise, rewind starter component life will
be shortened and / or rewind starter will not
operate properly under very cold tempera-
tures.
Lubricate spring assembly with silicone com-
pound grease (P / N 420 8970 61) and position
into starter housing as illustrated.
CAUTION : This lubricant must NOT be
used on rewind starter locking spring as it
does not stay on under vibration.
1. Grease inside spring guide
A01C12A
;
A01C13A
1
A01C14A
1