Section 05 ELECTRICAL
Sub-Section 05 (BATTERY)
05-05-7
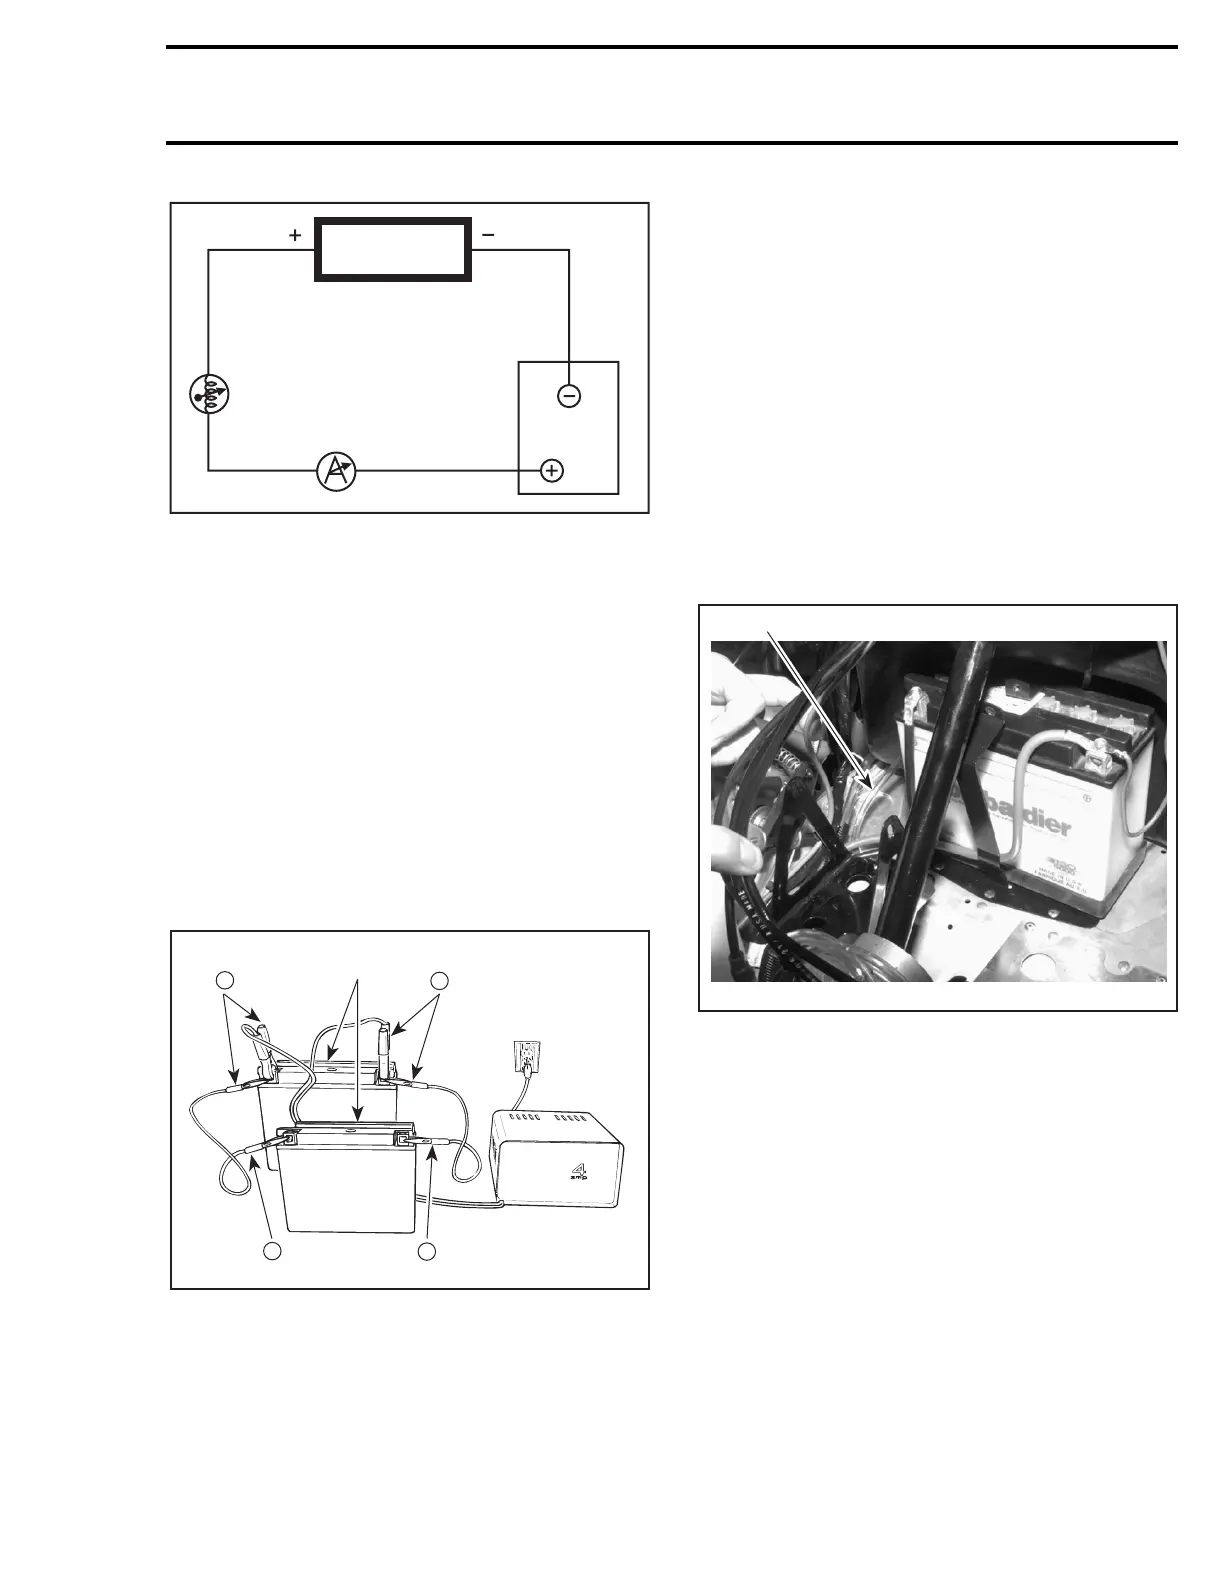
1. Charger
2. Rheostat 12
Ω
50W
3. Ammeter
4. Battery
For a service application and a permanent installa-
tion, both ammeter and rheostat can be built into
a small box adjacent to your charger.
CAUTION : Adequate ventilation MUST
be provided to cool the rheostat.
Charging 2 or More Batteries at a Time
Connect all positives together and use a charger
with a capacity (rated) equal to : number of battery
to be charged multiply by 2 A.
For example: charging five batteries at a time re-
quires a 10 A rated charger (5
×
2 A
=
10 A).
TYPICAL
1. 2 batteries = 4 A
INSTALLATION OF BATTERY
Ensure vent tube is properly installed on battery
elbow.
Connect vent tube to vehicle fitting on front
frame.
Route RED positive cable behind retaining strip
and connect it to positive battery terminal. Con-
nect RED wire (coming from ignition switch).
Connect BLACK negative cable LAST.
CAUTION : Negative battery terminal
should always be disconnected FIRST and
reconnected LAST.
Apply silicone dielectric grease (P / N 413 7017
00) on battery posts and connectors.
BATTERY CONNECTION
1. Vent tube on fitting
Ensure that vent tube is not kinked or blocked
then install protective boot over battery.
Close and fasten retaining strips.
Reinstall air silencer.
Fasten spark plug cables to fan housing.
Reinstall throttle cable to air silencer. See removal
illustration.
A00E0DA
1
2
3
4
A17E0PA
-
+
+
-
1
A03H1SA
1