Page 44 (Model J)
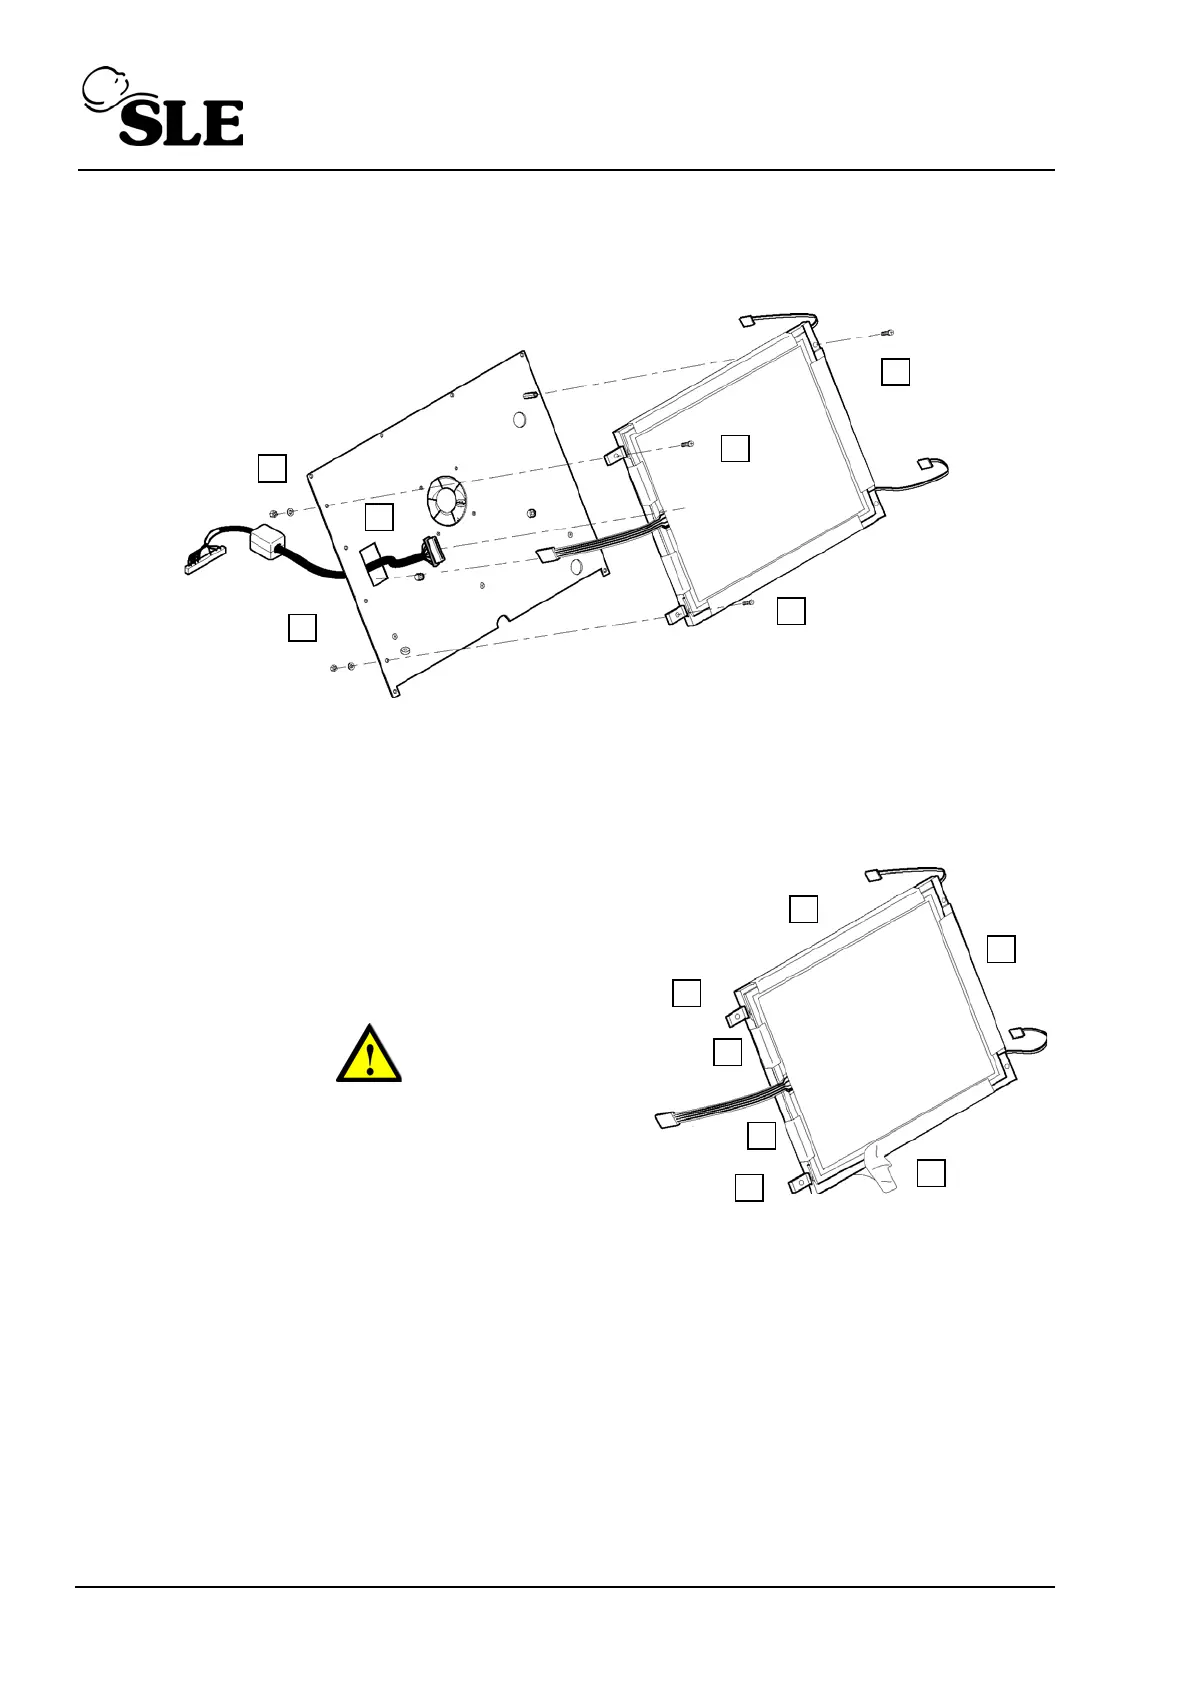
16. Remove the 2 nuts, washers (K) and screws (L) retaining the left hand side of the LCD /
touch screen assembly.
17. Separate the LCD / touch screen assembly from the mounting plate.
18. Disconnect the connecting cable (M) from the rear of the LCD assembly.
19. The LCD / touch screen assembly is now free.
20. To remove the touch screen, peel off the
adhesive tape (N).
21. Once the tape is removed the touch screen panel
scan be removed.
Warning: Do not touch the LCD screen with bare
hands. This is to prevent grease contamination
of the surface (i.e. finger prints).
22. With the touch screen removed the two LCD mounting blocks (O) can be removed as
access to their fixing screws is now possible.
23. Assembly is reversal of removal.
Setup: If the entire assembly or just the touch screen has been replaced the screen
calibration routine will have to be carried out.