4-60
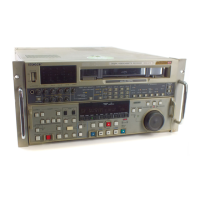
DNW-A75/A75P
RF ADJUST MODE
A11:EQUALIZER
Auto Adjust (Push SET)
ch RSLT ch RSLT
A1 B1
A2 B2
A5 B5
A6 B6
NA NB
ALL
*
1
2
3
Description of superimposed display
Ex. A11 : EQUALIZER
1 The display in this line changes. Each display and its
meaning are described below.
Auto Adjust(Push SET) : Press the SET button to
initiate the automatic
adjustment.
Insert SR5-1 : Insert an alignment tape.
Insert Blank Tape : Insert the tape on which
recording is possible.
Auto Tracking ... : Tracking is in an optimiza-
tion process.
Auto Adjusting ... : Automatic adjustment is in
progress.
Auto Adjust Complete : Automatic adjustment is
completed.
Auto Adjust Failure : Automatic adjustment fails.
Condition NG : Error condition defect.
2 To perform the automatic adjustment for single channel
(circuit), select a channel name using an * mark.
The adjustment result (OK, NG, or FAIL) will be
displayed on the right of the channel name.
“OK”: When the channel can be adjusted normally
“NG”: If the error condition of the channel is bad
“FAIL”: If the automatic adjustment fails
m
. “RSLT” indicates the result.
. “NA” indicates CNFA.
. “NB” indicates CNFB.
The adjustment data in each channel (circuit) is
displayed while pressing the STOP button except in
adjusting.
n
Do not press the STOP button in adjusting. If pressing
it in adjusting, the tape stops and the automatic
adjustment becomes impossible.
3 To perform the automatic adjustment for all channels
(circuit) at a time, select “ALL” using the * mark.
During the check, the adjustment result in each
channel is displayed in area 2.
After the automatic adjustment in all channels is
completed, the adjustment result (OK, NG, or FAIL)
will be displayed on the right of “ALL”.
“OK”: When all channels (circuits) are “OK”
“NG”: If both “NG” and “OK” occur in channels
“FAIL”: If one or more “FAIL” occur in channels
To execute the adjustment
(1) Insert the specified cassette tape.
m
. Be sure to use the specified alignment tape.
If the specified cassette tape is not used, the adjust-
ment cannot be properly performed even if the
message “Auto Adjust Complete” is displayed on
completing the adjustment. In A12 : REC CUR-
RENT menu, insert the tape that can be recorded by
Betacam SX format. In other menus, insert align-
ment tape SR5-1 (for 525/60 system) or SR5-1P (for
625/50 system).
. In A12 : REC CURRENT menu, execute this menu
under a REC INHIBIT indicator on the lower
control panel is off. If this indicator lights, the
cassette tape is automatically ejected.
This indicator lights when a REC inhibit plug on the
cassette tape is pushed or when a REC INHIBIT
switch on the subcontrol panel is set to ON.
. Take care that the tape transport mode does not
change during automatic adjustment.
Any adjustment cannot be properly performed in
modes other than tape transport that was set auto-
matically. Moreover, in modes other than tape
transport, the automatic adjustment cannot be
performed any longer or “FAIL” or “NG” is dis-
played as the adjustment result. Therefore, pay
attention to the transport start position of the tape so
that the end and beginning of the tape are not
detected during adjustment. The minimum tape
amount required for normal automatic adjustment is
shown in the table on the next page. However, the
tape amount increases or decreases when abnormali-
ty occurs.
4-2. TAPE Maintenance Mode (M0)
4-2-9. RF ADJUST Mode (A1)