5-13
DNW-A75/A75P
5-3. Video Head Tip Protrusion Check
5-3-1. Head Tip Protrusion Measurement
Preparations for VTR
1. Remove the top plate. (Refer to Section 2-3-1.)
2. Remove the plate MD assembly.
(Refer to Section 2-4.)
3. Remove the cassette compartment.
(Refer to Section 2-5.)
4. Remove the brush slip ring assembly.
(Refer to Section 5-3-2.)
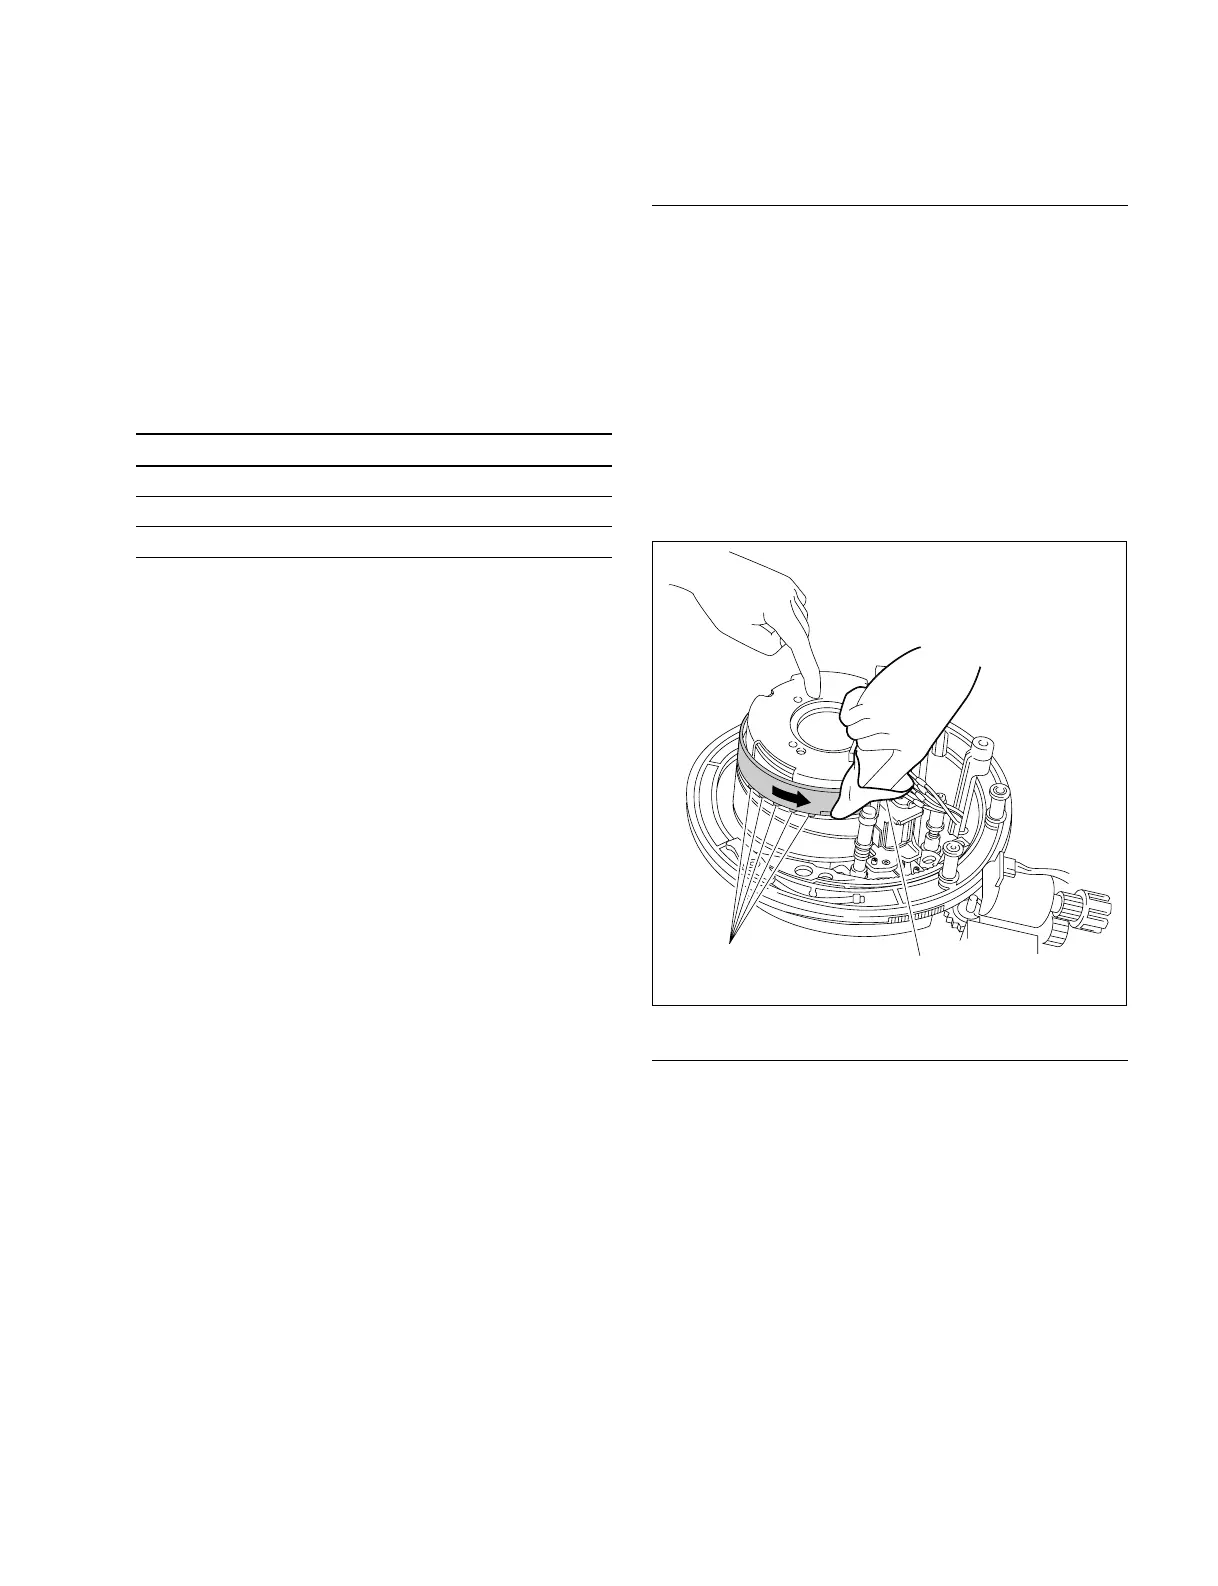
5. Clean the outer circumference and video heads of the
upper drum (shaded portions in Figure 1).
(Refer to Section 5-2-3 for the cleaning method.)
Figure 1. Cleaning of Drum
Preparations for Head Tip Protrusion
Measurement Gauge
This gauge is the precision equipment. Handle with care.
1. Loosen the adjustment screw fully (by turning it
counterclockwise).
2. Clean the probe, positioning flange, and portion
touching the drum of two legs. (Refer to Figure 3.)
n
Do not apply excessive force to the probe during
cleaning. If a deposit of µm order exists, measurement
cannot be performed accurately.
5-3. Video Head Tip Protrusion Check
When performing the periodic maintenance or inspection,
measure the tip protrusion of the video heads using a head
tip protrusion measurement gauge to check them for the
upper drum assembly replacement.
If the tip protrusion of all heads are satisfying the follow-
ing specification and more, it enables to recording and
playing back on the tape.
Head Specification
PB heads for Betacam/Betacam SP format 20 µm
PB heads for Betacam SX format 22 µm
REC heads for Betacam SX format 24 µm
If the tip protrusion of any one head is under the specifica-
tion, it is recommended that the upper drum assembly
should be replaced early before occurring the trouble at the
recording or playing back.
For the upper drum replacement, refer to Section 3-2 in the
maintenance manual part 2, volume-1.
Tools
. Cleaning cloth: 3-184-527-01
. Cleaning fluid: 9-919-537-01
. Head tip protrusion measurement gauge: J-6530-650-A
. Torque screwdriver (6 kg.cm) (JB-5251): J-6252-510-A
. Torque screwdriver’s bit (+2 mm, l = 75 mm):
J-6323-420-A
Video heads
Cleaning cloth