2-3
DNW-A75/A75P
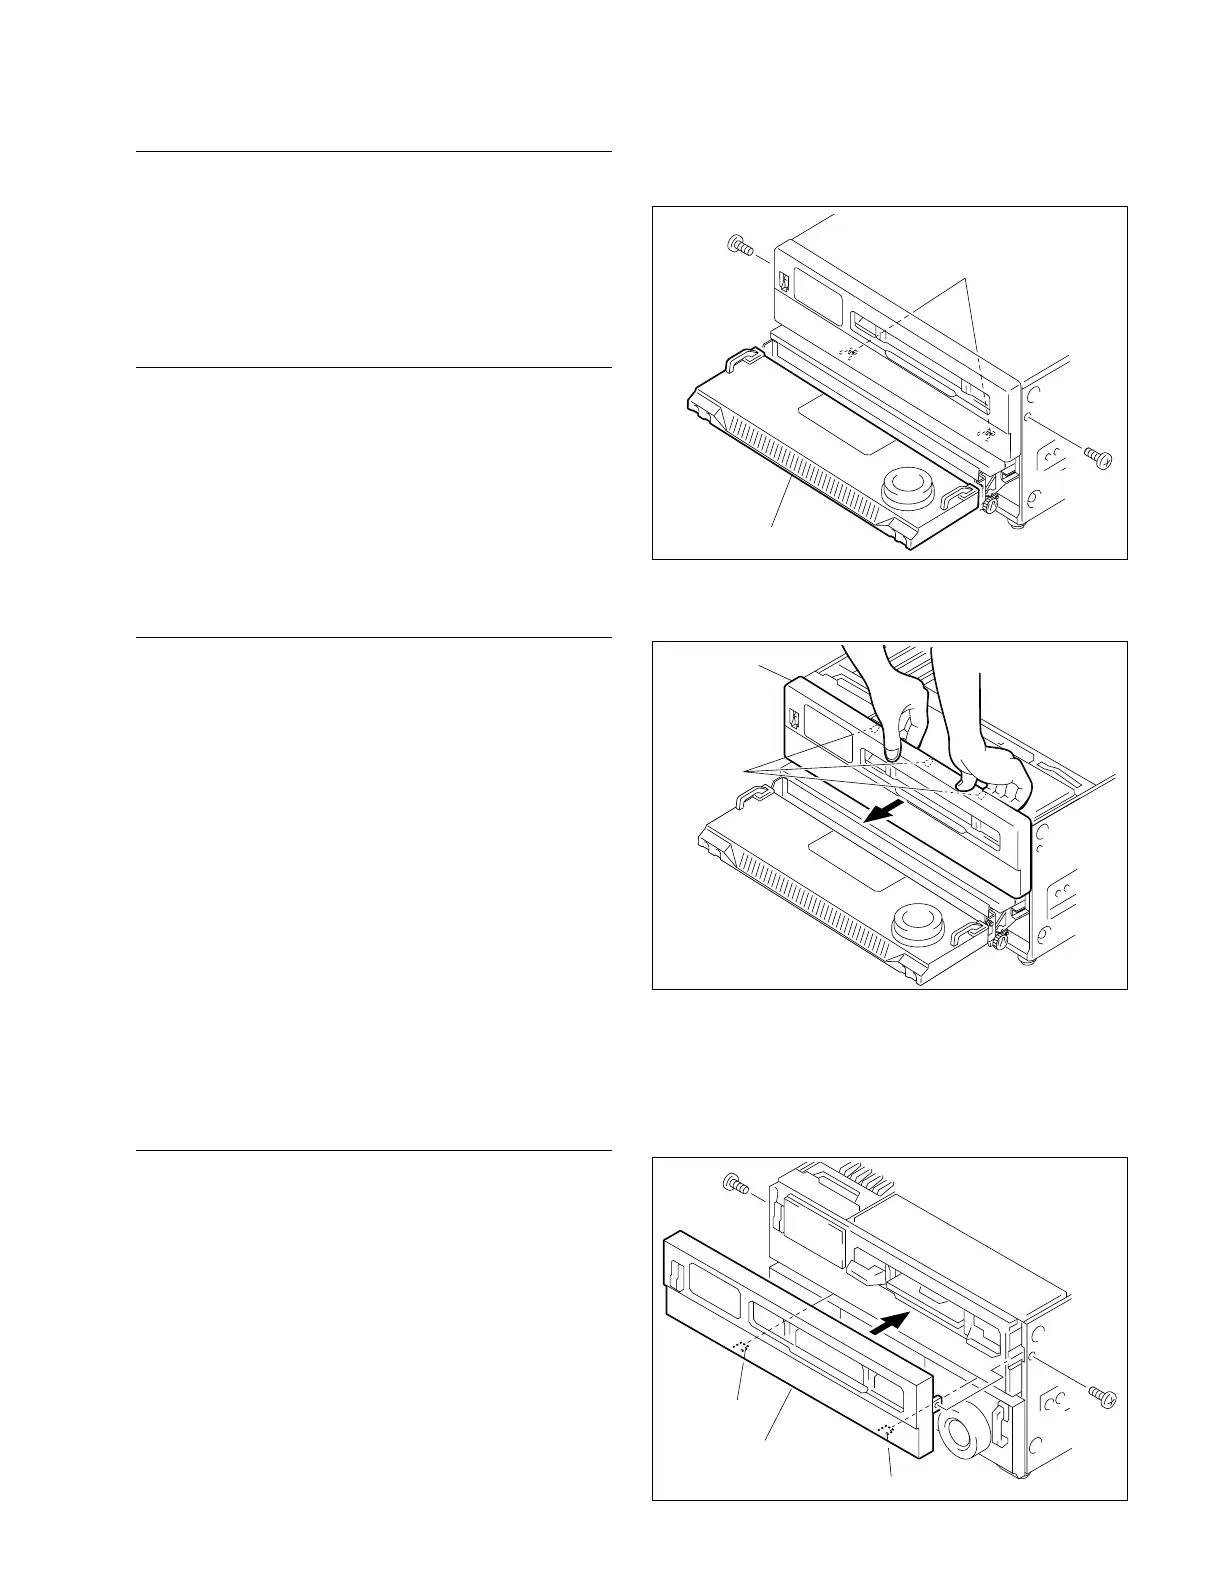
Upper control panel
Claws
BVTT3 x 6
BVTT3 x 6
Hook
Lower control panel
4. Unhook the two hooks at lower portion on the upper
control panel.
5. Unhook the claws at the upper control panel from the
chassis, and remove in the direction of the arrow.
When reattaching, install in the reverse order of removal.
n
Insert the hooks at the back of the panel into the convex
portions of the chassis, then install the panel in the chassis.
(Refer to the figure below.)
2-3. Removing/Reattaching Cabinet
Upper Lid
1. Loosen the three fixing screws.
2. Remove the upper lid by moving in the direction
indicated by the arrow.
When reattaching, install in the reverse order of removal.
Side Panels
(The right and left side panels are the same in procedure.)
1. Remove the four screws (BVTT3 x 6), and remove the
handle.
2. Remove the four screws (B4 x 6), and remove the side
panel.
When reattaching, install in the reverse order of removal.
Bottom Plate
n
With the handle attached, place the unit on its right side
panel down for removal and installation. Lend your hand
so that the lower handle does not hang down.
1. Remove the six screws (B4 x 6), and remove the
bottom plate.
When reattaching, install in the reverse order of removal.
2-3-2. Control Panels
n
Turn off the power and unplug the power cord before
removing/reattaching.
Upper Control Panel
1. Remove the upper lid. (Refer to Section 2-3-1.)
2. Remove the one screw each on the left and right sides.
3. Pull the lower control panel forward, then turn it
upward. (Operation side up)
BVTT3 x 6
BVTT3 x 6
Upper control panel
Hook
Hook