2-7
DNW-A75/A75P
Installation
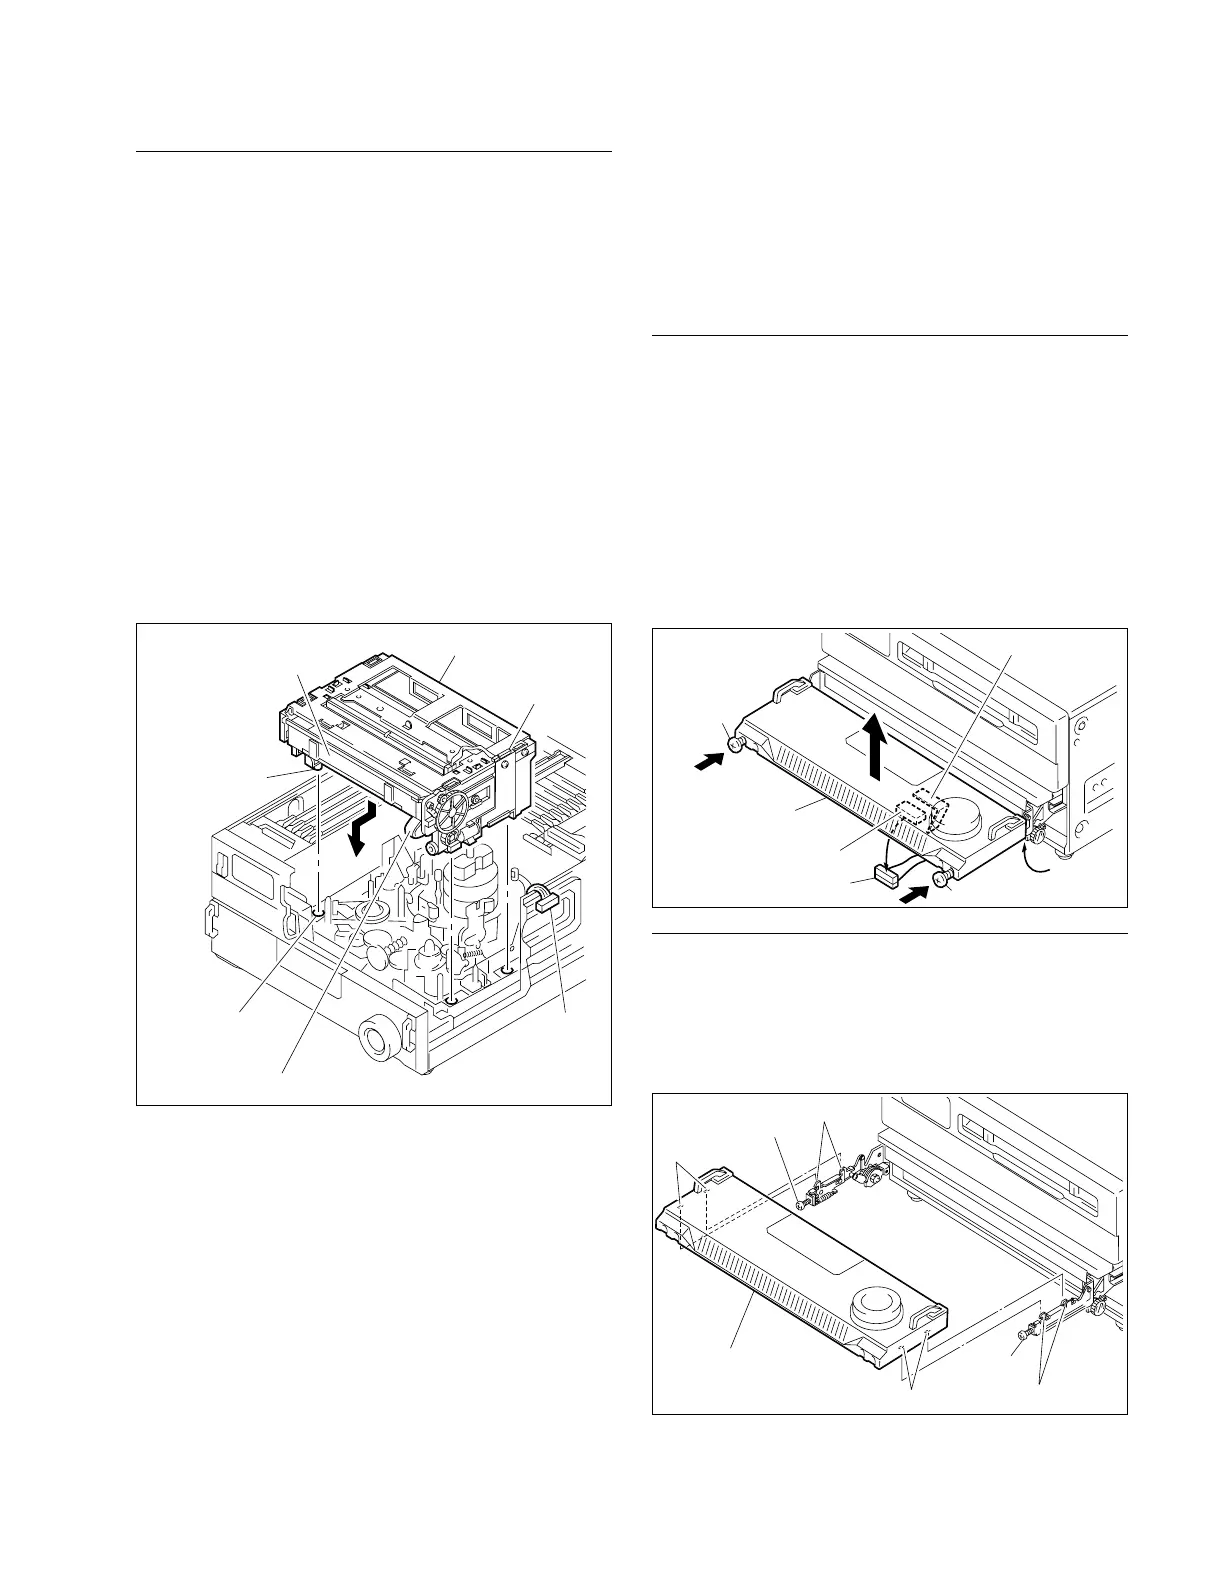
7. Place the cassette compartment into the unit in the
direction as shown in the figure (with the cassette lid
down).
m
. Being careful not to contact the gear on the right of
the cassette compartment with the chassis, slowly
insert the cassette compartment into the unit while
slightly sliding it back-and-forth.
. Never move the cassette compartment to the right
and left. If unnecessary force is applied to the right
and left, the gear or part may come off.
8. Press the portions C of the cassette compatment as
shown in the figure, and then fit the four positioning
legs into the four positioning holes in the mechanical
deck.
9. Connect the harness to the connector (CN930) on the
CL-29 board.
10. Reattach the cassette compartment bracket assembly.
11. Reattach the plate MD assembly and the upper lid.
2-6. Removing/Reattaching Lower
Control Panel Assembly
n
Turn off the power and unplug the power cord before
removing/reattaching.
Removal
1. Pull the lower control panel forward, then turn it
upward. (Operation side up)
2. Untie the flat cable from the clamp, then disconnect
the flat cable from the connector (CN145) on the back
of the lower control panel.
3. Loosen the two screws in bottom corners of the lower
control panel assembly until screw’s top are exposed
from the lack of the panel assembly.
4. Push the loosened screws in the direction indicated by
the arrow and raise the lower control panel assembly.
Installation
5. Set the notches of the panel assembly to the claws of
the arms and insert the panel assembly until making a
click sound.
6. Fix the lower control panel assembly with two screws.
7. Connect the flat cable to the connector (CN145), then
tie the cable with the clamp.
8. Return the lower control panel to 0d, then store.
2-5. Removing/Reattaching Cassette Compartment
2-6. Removing/Reattaching Lower Control Panel Assembly
CN930
C
C
Positioning hole
Flexible card wire/board
Harness
Positioning leg
Cassette lid
Cassette compartment
Lower control panel
assembly
Flat cable
B3 x 12
B3 x 12
Clamp
CN145
B3 x 12
B3 x 12
Claws
Claws
Notches
Lower control panel
assembly
Notches