4-67
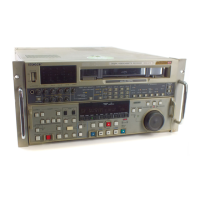
DNW-A75/A75P
The adjustment menus other than the submenus of A23 and
menu A24 are used for manual adjustment.
In the submenus of A23 and menu A24, automatic adjust-
ment (AUTO) or manual adjustment (MANUAL) can be
selected.
For the automatic adjustment, refer to the operation
example described in each menu.
To change the adjustment data manually
(1) When seeing on the superimposed display, turn the
search dial to set the * mark to the item to be adjusted.
When seeing in the time data display area, turn the
search dial to display the item to be adjusted.
(2) To increase or decrease the adjustment data, turn the
search dial while pressing the JOG button.
To execute the automatic adjustment
(1) When seeing on the superimposed display, turn the
search dial to set the * mark to “MANUAL”.
When seeing in the time data display area, turn the
search dial to display “MANUAL”.
(2) Turn the search dial in FORWARD (2) direction
while pressing the JOG button to display a message
“Auto (Push SET Button)” on the superimposed
display or a message “PUSH SET” in the time data
display area.
(3) Press the SET button once to initiate the automatic
adjustment.
. Only the display on the superimposed display
changes as described below. The displayed data
value also changes.
Auto adjusting .. : Automatic adjustment is in
progress.
Auto Adjust Complete : Automatic adjustment is
completed.
Auto Adjust Failure : Automatic adjustment
fails.
To return the adjustment data to the former state
Execute ALL DATA PREVIOUS in A2F : NV-RAM
CONTROL menu.
n
The current adjustment data can not return to the former
saved data after executing SAVE ALL DATA ADJUST
DATA.
To save the adjustment data
Execute SAVE ALL ADJUST DATA in A2F : NV-RAM
CONTROL menu.
A20 : VPR VR
In 525/60 System In 625/50 System
This menu is used to adjust the reference signal and analog
video output systems on the VPR-47 board. In 525/60 and
625/50 systems, the displayed adjustment items differ.
The adjustment item below must be adjusted in both 525/
60 and 625/50 systems.
Adjustment item Description
REF 1ST FLD DET First-field detection timing of
reference signal
VIDEO 1/2 LEVEL Composite video output (1/2) level
VIDEO 3 LEVEL Composite video output (3) level
Y OUTPUT LEVEL Component video Y output level
R-Y OUTPUT LEVEL Component video R-Y output level
B-Y OUTPUT LEVEL Component video B-Y output level
INT 4FSC FREQ Free-running frequency of internal
reference signal 4fsc
The adjustment item below is used exclusively for the
525/60 system.
Adjustment item Description
B-CAM R-Y OUT LEVEL R-Y output (Betacam) level
B-CAM B-Y OUT LEVEL B-Y output (Betacam) level
4-2. TAPE Maintenance Mode (M0)
4-2-10. AUDIO/VIDEO ADJUST Mode (A2)
AUDIO/VIDEO ADJUST MODE
A20:VPR VR
REF 1ST FLD DET 80
VIDEO 1/2 LEVEL 80
VIDEO 3 LEVEL 80
Y OUTPUT LEVEL 80
R-Y OUTPUT LEVEL 80
B-Y OUTPUT LEVEL 80
B-CAM R-Y OUT LEVEL 80
B-CAM B-Y OUT LEVEL 80
INT 4FSC FREQ 80
*
AUDIO/VIDEO ADJUST MODE
A20:VPR VR
REF 1ST FLD DET 80
VIDEO 1/2 LEVEL 80
VIDEO 3 LEVEL 80
Y OUTPUT LEVEL 80
R-Y OUTPUT LEVEL 80
B-Y OUTPUT LEVEL 80
INT 4FSC FREQ 80
*