2-18
DSR-70/70P
PTP 3x8
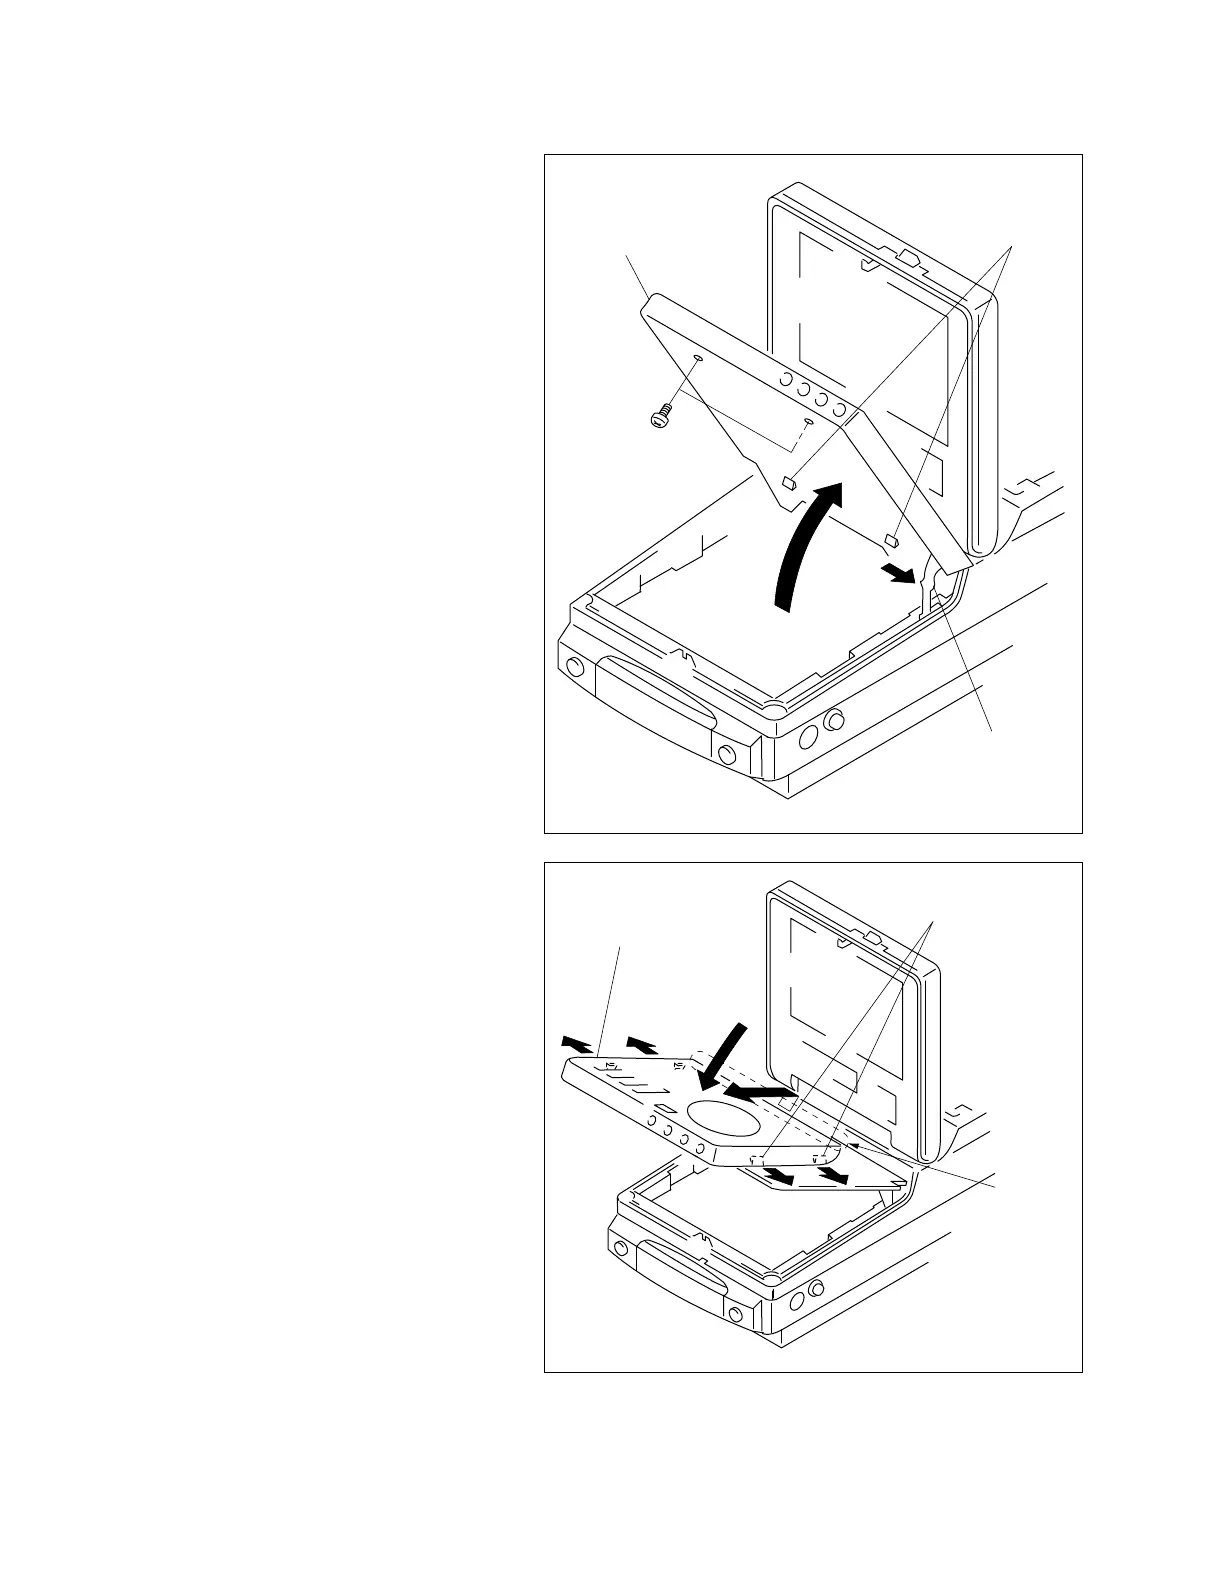
A
B
Lock arm
Control panel assembly
Two claws
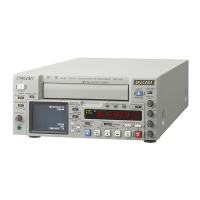
A
B
C
D
B
C
Rear block
Control panel assembly
Claw
4. While pushing the lock arm slightly with your
fingers in the direction of arrow A, open the
control panel assembly in the direction of arrow
B.
5. Remove the two screws, and release the two
claws of the control panel assembly.
6. Close the control panel assembly halfway in the
direction of arrow A, and open the claws in the
direction of arrows B and C. Raise up the rear of
the control panel assembly and remove the
control panel assembly in the direction of arrow
D.
7. Attach the control panel assembly by reversing
the removal procedure.



 To Next Page