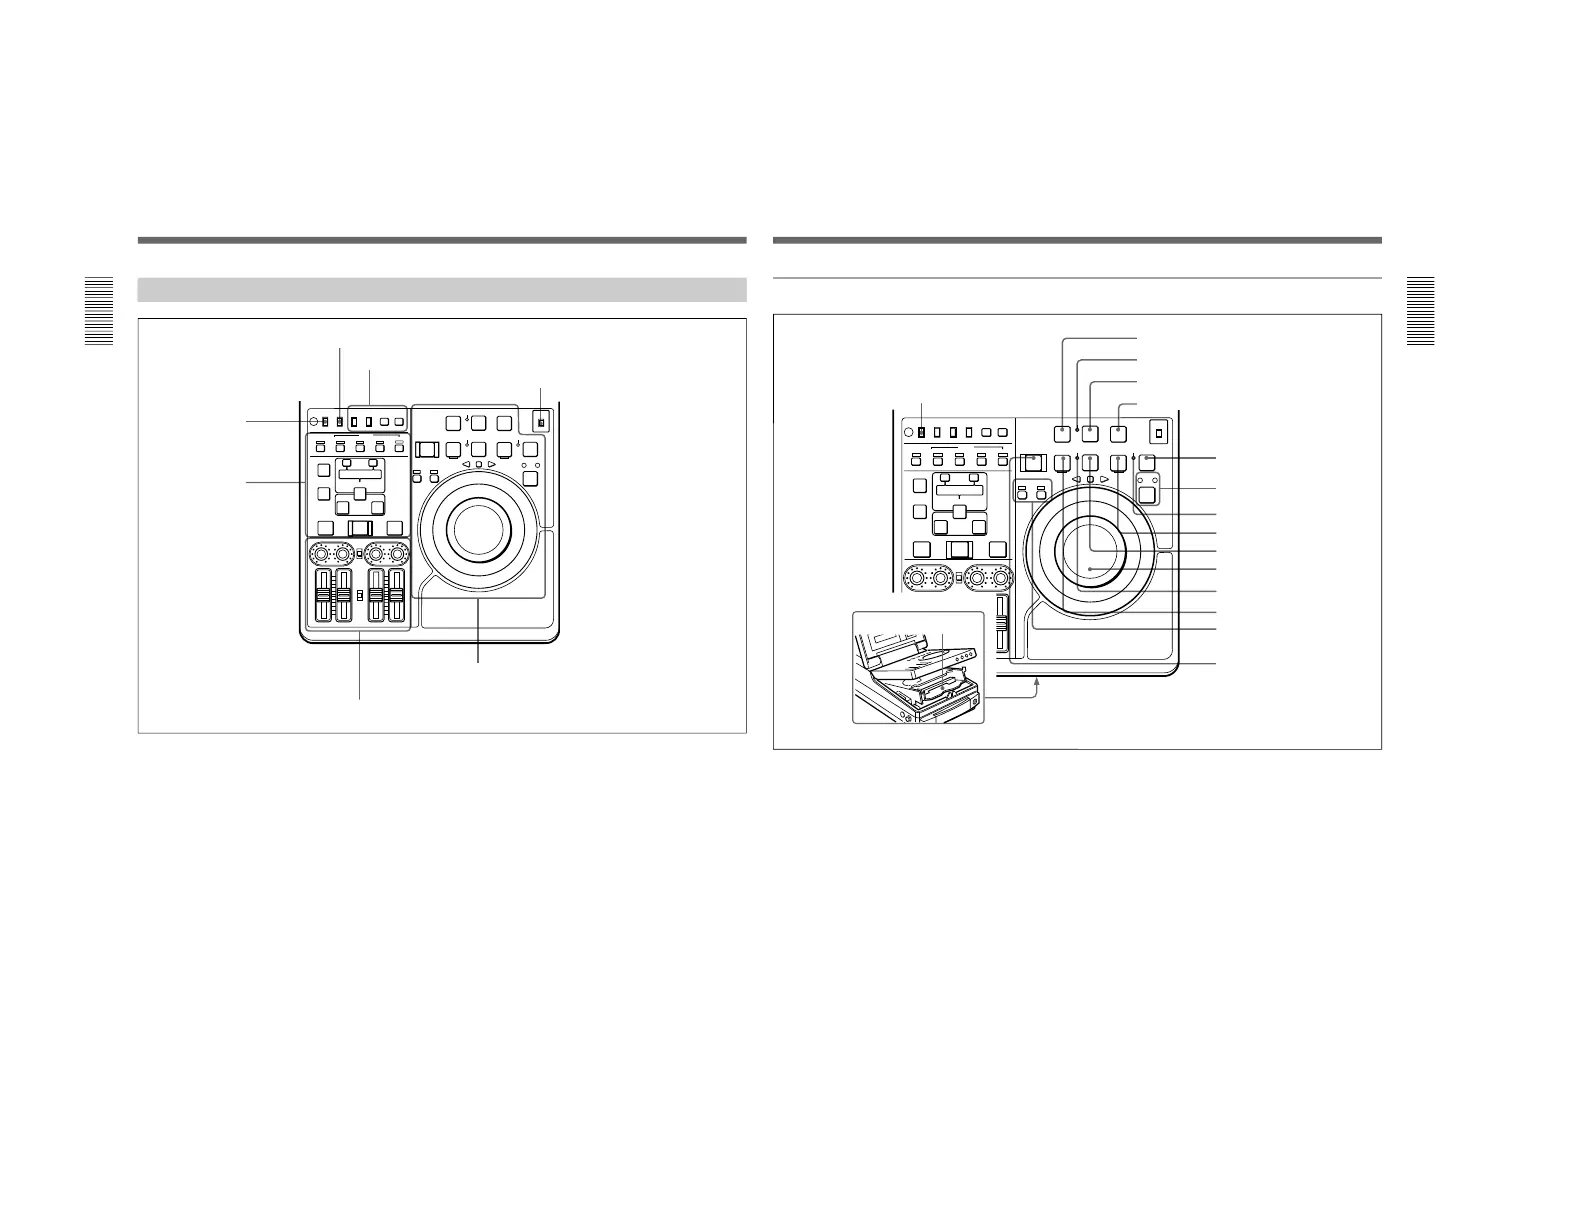
Tape transport section (see page 17)
Audio control section (see page 21)
Editing section
(see page 20)
Timecode, character and setup menu
section (see page 19)
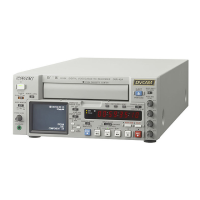
REC INHI switch (tape
transport section)
REMOTE/LOCAL switch (see below)
METER switch (see “Display Panel” on page 14)
REMOTE/LOCAL switch
Selects the source for control of this unit. When two
DSR-70/70P units are connected, set this switch on the
player to REMOTE.
REMOTE: This unit is controlled from the device
connected to the REMOTE connector. In this
case, all VCR operations using this unit’s control
panel are disabled except the STOP and EJECT
buttons.
When combining two DSR-70/70P units as a pair
of recorder and player, set the REMOTE/LOCAL
switch of the player to REMOTE.
LOCAL: This unit is controlled from the control
panel. Normally set the switch to this position.
When the REMOTE is selected, you can determine which
tape transport control buttons on the control panel are
enabled. See setup menu item 006 on page 102.
Chapter 1 Overview
Chapter 1 Overview
17
1 PREROLL button
Press to run the tape up to the preroll point (located in
advance of the IN point by the amount of the preroll
time). You can set the preroll time using setup menu
item 001 (page 102). You can set the state of the unit
at the end of preroll by using setup menu item 401
(page 108).
By pressing this button at the same time as the IN/
OUT or AUDIO IN buttons in the editing section, you
can search for a timecode set in advance and stop at
that position. (The tape is cued up to the preset
timecode position.)
2 REC INHI (recording inhibit) indicator
Lights under the following situations.
•Set the REC INHI switch !∞ to ON.
•Set the REC/SAVE switch on the cassette to SAVE.
When the REC INHI switch !∞ is in the OFF position, then
it is possible to make the REC INHI indicator flash in this
state. For details, see setup menu item 107 on page 106.
3 REC/SEQ (recording/sequence) button
Press together with the PLAY button 9 to start
recording.
When two DSR-70/70P units are combined, this button
allows you to perform sequential recording from one
unit to another.
For details, see “Sequential Recording Using Two Units”
on page 80.
To monitor E-E mode
You can monitor input signals in E-E mode by
pressing this button from stop mode. The button lights
when pressed. To return to the original picture, press
the STOP button 5. You can view E-E video during
playback, search, fast forward, and rewind by pressing
this button.
The E-E video continues for as long as the button is
kept pressed.
Tape transport section