Handling Casettes
Chapter 3 Editing
44
Chapter 3 Editing
Notes on using cassettes
• Before storing the cassette, rewind the tape to the beginning and be sure
to put the cassette in its storage case, preferably on end instead of flat on
its side. The storage case of a DVCAM cassette is specially designed to
ensure a long-period storage of the tape.
Storing a cassette in any other condition (not rewound, out of its case,
etc.) may cause the video and audio contents to become damaged over
time.
• If the cassette memory connector (contact point) becomes dirty,
connection problems may occur and cause a loss of functions. Remove
away any dust or dirt from this area before using the cassette.
• If the cassette is dropped on the floor or otherwise receives a hard impact,
the tape may become slackened and may not record and/or play back
correctly.
For instructions on removing tape slack, see below.
Preventing accidental erasure
Set the REC/SAVE switch on the cassette to SAVE to prevent accidental
erasure of recorded contents.
To enable re-recording
Set the cassette’s REC/SAVE switch to REC.
If you insert a cassette into the unit when this switch is set to SAVE, the
unit will not record when you press the PLAY button while holding down
the REC/SEQ button.
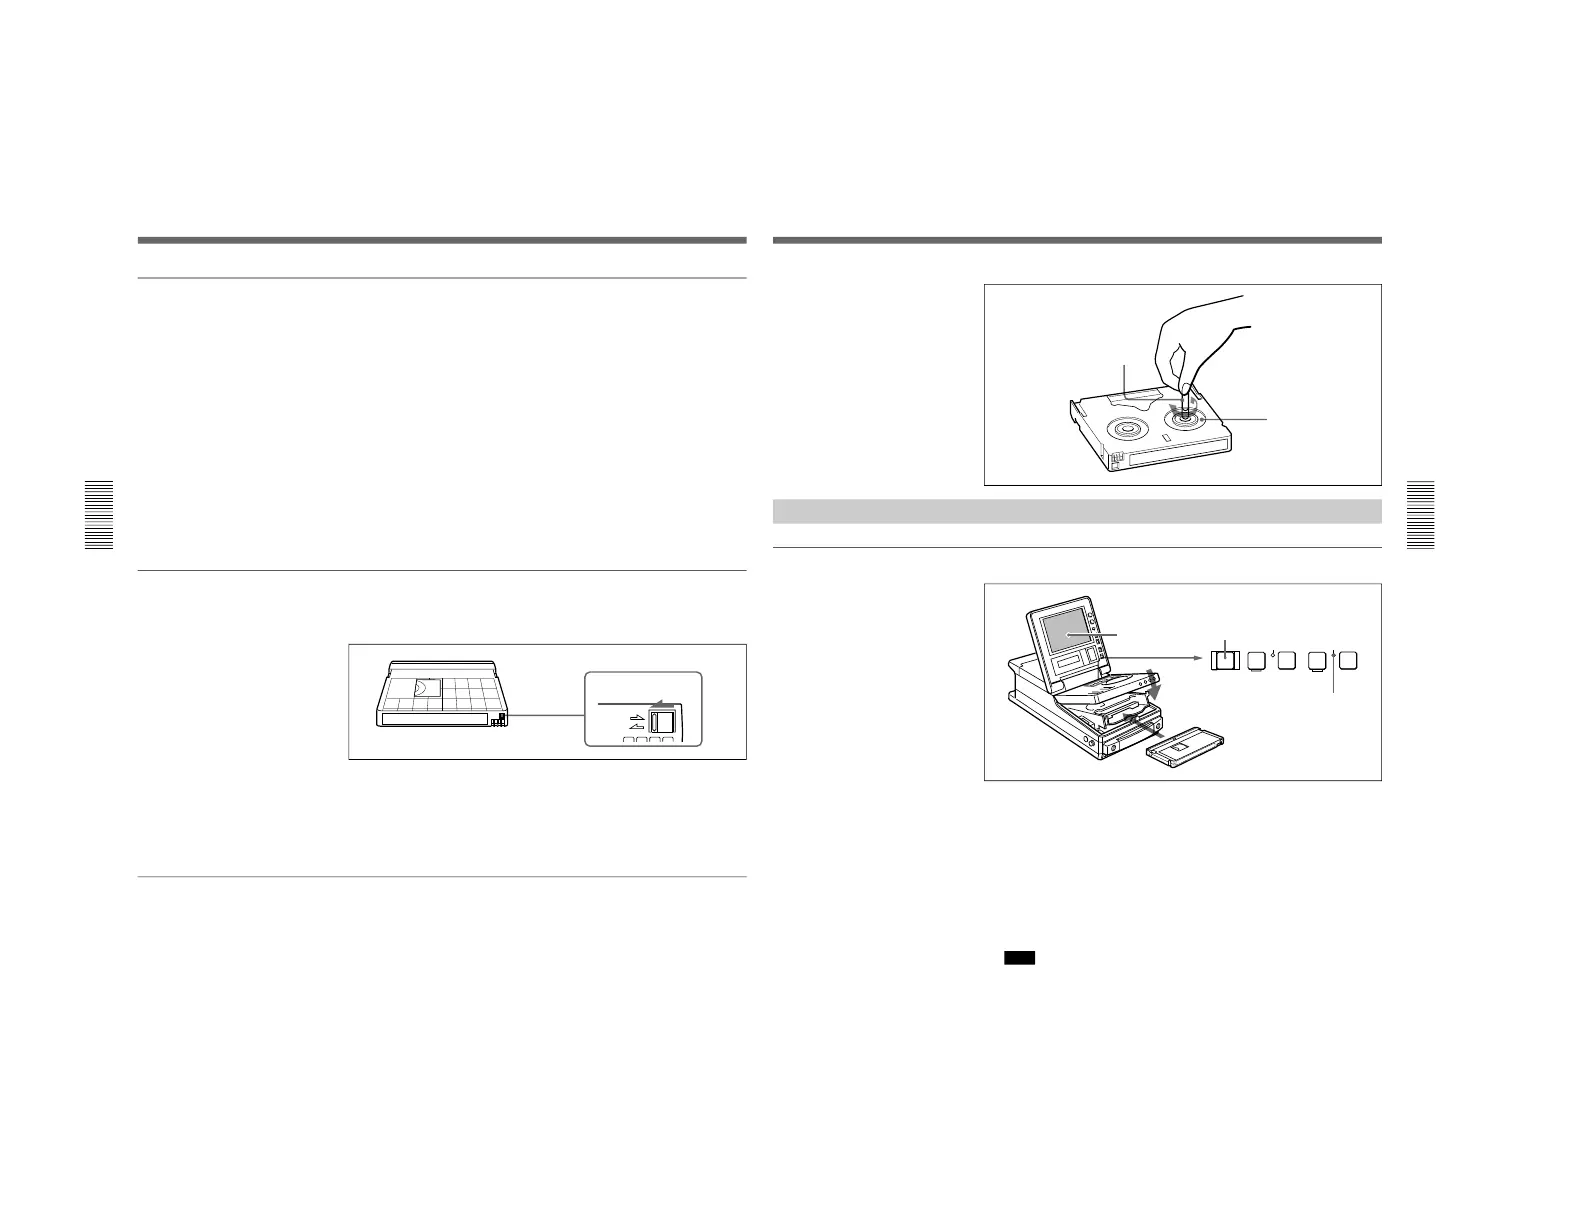
Checking the tape for slack
Using a paper clip or a similar object, turn the reel gently in the direction
shown by the arrow. If the reel does not move, there is no slack. Insert the
cassette into the cassette compartment, and after about 10 seconds take it
out.
Chapter 3 Editing
Chapter 3 Editing
45
Loading/Ejecting Cassettes
To load a cassette
1
With the unit powered on, press the EJECT button.
The control panel lifts up and the cassette compartment opens.
2
Load a cassette in the direction shown in the figure.
The message “CASSETTE OUT” displayed on the LCD monitor
changes to “TAPE UNTHREAD”.
Note
If the message on the LCD monitor does not change to “TAPE
UNTHREAD”, redo the cassette insertion procedure.
3
Close the control panel. (You should hear a click.)
The STANDBY indicator lights.
Reel
Paper clip, etc.