Chapter 5 Special Editing and Recording/Playback
82
Chapter 5 Special Editing and Recording/Playback
Two-Input Switched Video
Recording (Optional DSBK-180/
180P Required)
With the optional DSBK-180/180P Dual Video Input
Board installed, you can record, switching between the
video signals output by two cameras. (Audio signals
are not switched.)
For equipment/signal connections and basic settings, see the
section “Connections for Two-Input Switched Video
Recording” on page 123.
To select display mode
In the video settings page (see page 72) of the sub
LCD menu, select how to display the pictures from the
two cameras on the LCD monitor of this unit.
For information about sub LCD menu operations, see the
section “Sub LCD Menu Basic Operations” on page 68.
Picture to be recorded
When two-picture display mode is selected, the picture
to be recorded is determined as follows.
•When picture-in-picture display is selected:
The larger picture is recorded.
•When two-picture display other than picture-in-
picture is selected:
The picture displayed on the left (shown in a red
frame) is recorded.
Recording
Recording procedure
Perform the following procedure.
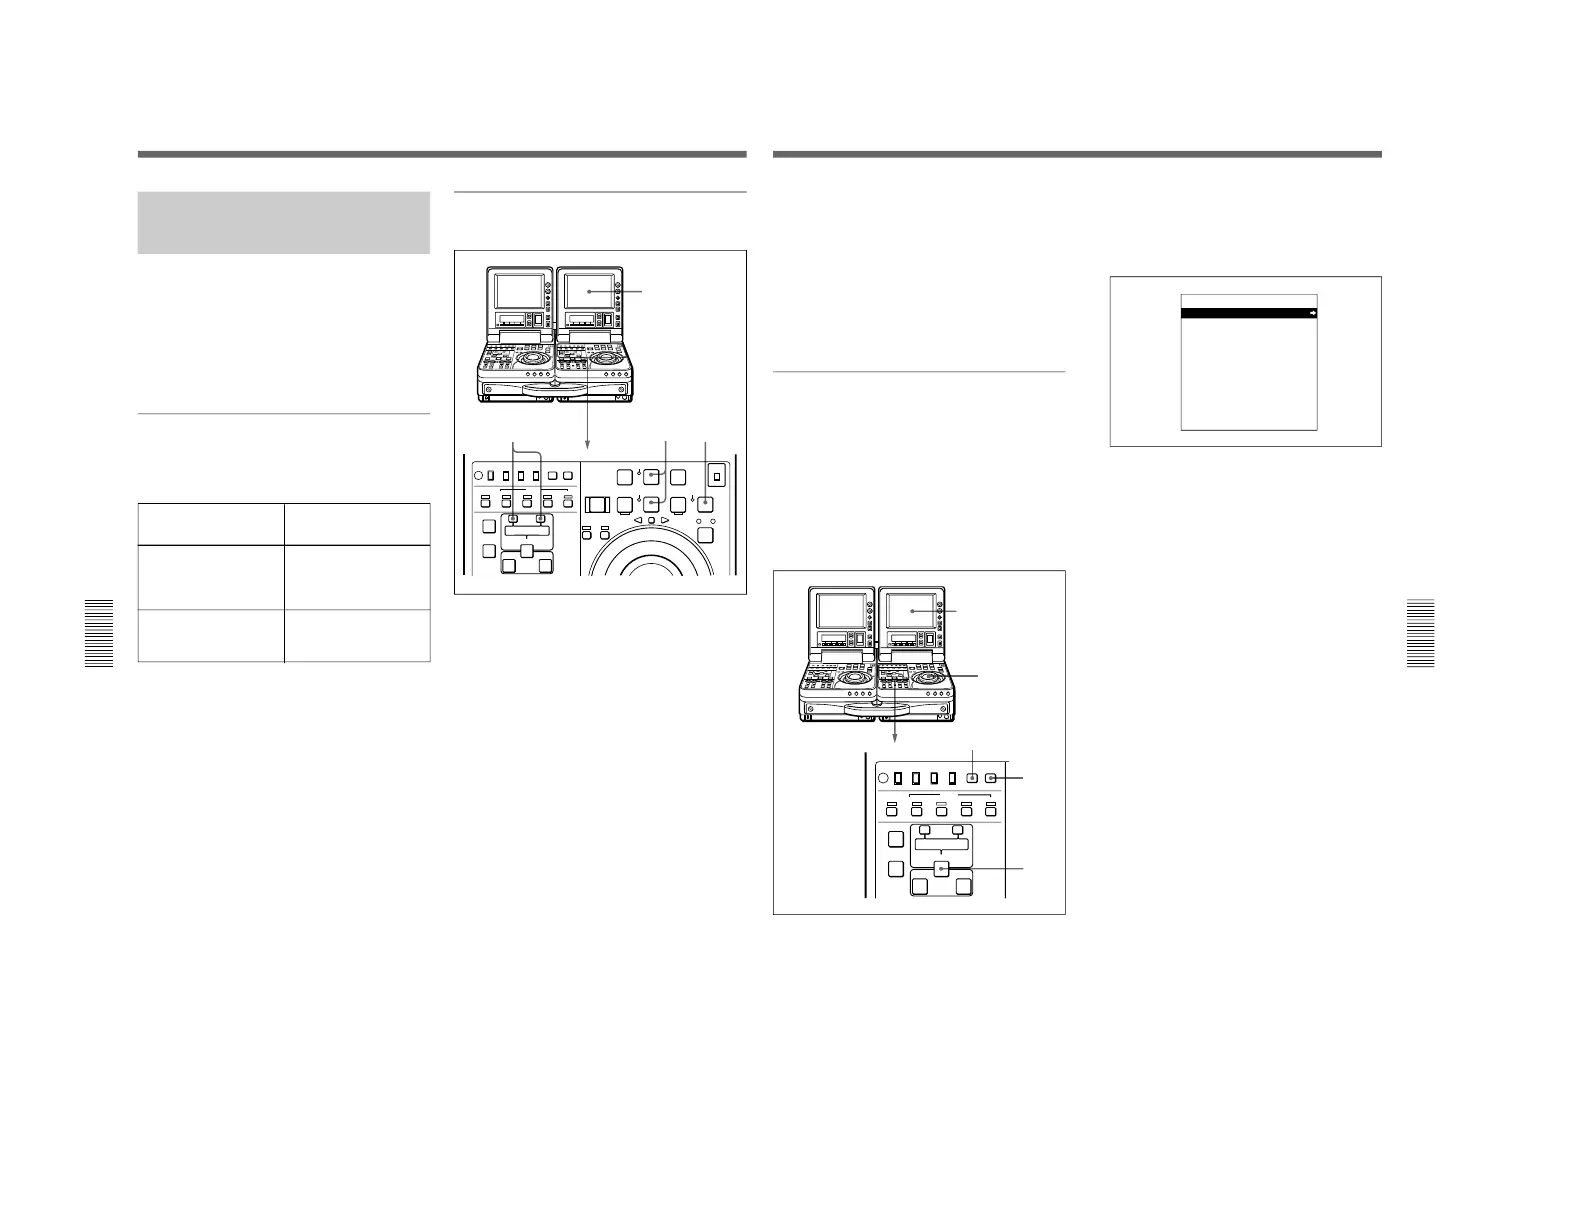
1
Holding down the +/MARK button, press the –/
LIST button.
Each press of the –/LIST button switches the
display on the LCD monitor.
2
Make sure that there is no picture discontinuity
when the display is switched.
If the picture is deformed at the switching of
display
Adjust the output video signal phases between the
two cameras.
For the phase adjustment procedure, see the next
section.
3
When the picture to start recording with is
displayed, hold down the REC/SEQ button and
press the PLAY button.
Recording starts.
LCD monitor
Selections to be made
Corresponding sub LCD
menu items (in the video
settings page)
Whether to display two input
pictures at the same time
and, if to display two
pictures, how to arrange
them.
PP MODE
If picture-in-picture display is
selected with the menu item
PP MODE, size and position
of the smaller picture.
PP SIZE and PP POSI.
Chapter 5 Special Editing and Recording/Playback
Chapter 5 Special Editing and Recording/Playback
83
4
While watching the LCD monitor display, when
you wish to switch the display, hold down the +/
MARK button and press the –/LIST button.
The display on the LCD monitor as well as the
picture being recorded is switched.
5
To stop recording, press the STOP button.
Recording stops.
To adjust the output video signal phases
When long cables are used to connect two cameras to
this unit, a slight shift in phase between the video
signals input from the two cameras may result. When
the phase shift is of a significant magnitude, you can
detect it as a picture discontinuity on the LCD monitor
at the switch between the signals from the two
cameras.
To align the phases of the video signals from the two
cameras, adjust the phase of the output video signal
from one of the two cameras as follows.
LCD monitor
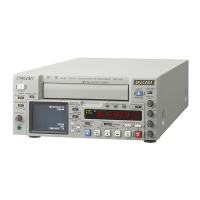
1
Holding down the ENTRY/SHIFT button, press
the MENU button.
The SYSTEM MENU screen appears on the LCD
monitor.
2
Using the jog/shuttle dial, select the VIDEO
PHASE CHECK item on the SYSTEM MENU
screen, then press the SET button.
The pictures from the two cameras are alternately
displayed on the LCD monitor (switched 30 times
per second (DSR-70)/24 times per second (DSR-
70P)).
3
If the text displayed on the LCD monitor jitters,
adjust the H PHASE (horizontal phase) of one of
the two cameras until the text stops jittering.
(Luminance signal phase adjustment)
(Continued)



 To Next Page