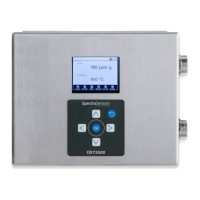
Oxygen Analyzer
2–2 4900002239 rev. G 3-4-16
Installing the Analyzer
Installing the analyzer is relatively easy requiring only a few steps that, when
carefully followed, will ensure proper mounting and connection. This section
includes information regarding:
• Hardware and Tools for Installation
• Mounting the Analyzer
• Connecting Electrical Power to the Analyzer
• Connecting the Analog Outputs/Analog Inputs
Required Basic Equipment
The following are the basic requirements for installing and operating the
OXY5500:
• OXY5500 oxygen instrument
• Flow-through Tee fitting with probe
• Flow-through Tee fitting for temperature probe and pressure sensor
(pressure sensor is optional)
Hardware and Tools for Installation
Depending on the particular configuration of accessories and options ordered,
you may need the following hardware and tools to complete the installation
process.
Hardware:
• 1/4” (6 mm) Unistrut
®
(or equivalent) bolts and spring nuts
• Stainless steel tubing (SpectraSensors recommends using 1/4”
(6.4 mm) O.D. x 0.035” (0.889 mm) wall thickness, seamless
stainless steel tubing)
• 3/4” conduit or appropriate M20 x Ex e M20 cable gland
• 1/4” (6 mm) x 1-1/2” (38.1 mm) machine screws and nuts (for wall
mounting)
Tools:
• Drill and bits
• Tape measure
• Level
• Pencil
• Screw driver (Phillips)
 Loading...