108
Removal
1.
Remove
(h
e cylinder head as described
in
Ihis
chapler.
2. Remove the camshaft dri
ve
cha
in
guide (Figure
1
51
).
3.
Remove the cylinder head gasket and the
locating dowel
s.
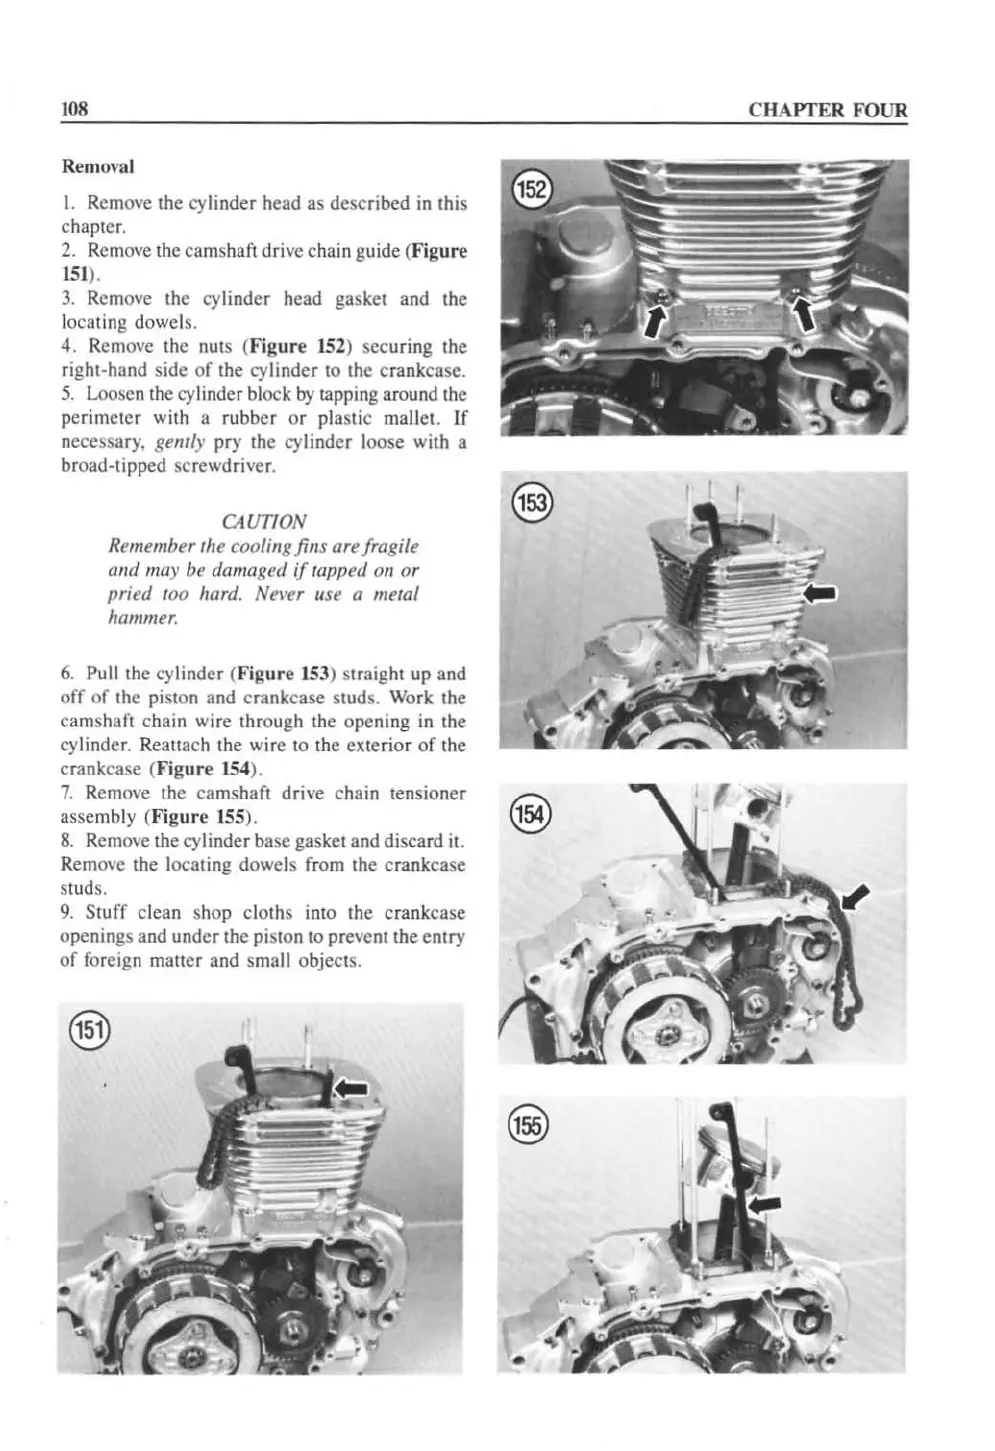
4. Remove the
nut
s (
Figure
152
) securing
Ihe
ri
ght-hand side
of
the
cy
linder to the crankcase.
5.
Loosen
th
e cylinder
bl
ock
by
tapping around the
perimeter with a rubber or plastic mallet. If
necessar
y.
gemly pry the cylinder loose with a
broad-tipped screwdri
ve
r.
CAUTION
Remember
th
e cooling fins
are/
ra
gile
{/lui
ma
y
be
damaged
if
rappe(J on
or
p
ri
ed too liard. Never use a metal
hllmmer.
6.
Pull the
cy
linder (
Figure
153
)
st
raight up a
nd
off
of
the
pislon
and
crank
cas
e stud
s.
Work
the
ca
mshaft chain wire through
the
opening in
(he
cy
linde
r.
Reattach the
wi
re to the
eX
lcrior
of
the
crankcase (
Figure
154).
7.
Remove the camshaft drive chain tensioner
assembly (Fig
ure
155
). @
8.
Rem
ove
the cylinder base gasket and disca
rd
it.
Rem
ove the locating dowels from the crankcase
stud
s.
9.
Stuff clean shop cloths into
th
e crankcase
openings a
nd
under the piston to preve
nt
the entry
of foreign matter and small objects.
•
CHAPTE
R FOUR
 Loading...


