36
even
give
you
money
for
iI.
Never
drain the
oi
l onto
the
ground nor pl
ace
it in your household trash.
\.
Stan
the engine and let
it
reach operating
temperalUre; 15·20 minutes
of
siop-aod-go riding
is usually sufficient.
2. Tu rn the engine
off
and place the bike
on
level
ground on the sidcstand.
3.
Place a drain pan under the left-hand side
of
lhe
crankcase and remove the
17
mm drain
pl
ug
(F
ig-
u
re
22). Remove the dipstick/oil filler cap
(F
ig-
ure
23
); this wi
ll
speed up the flow
of
oi
l.
®
CHA
PT
ER
THRE
E
4. Inspect the sealing washer on the crankcase
drain p
lu
g. Replace it
if
its condition
is
in doubt.
5.
Insta
ll
the drain plug and sealing washer and
tighten to the torque specification listed
in
T
abl
e 5.
6.
Move the drain pan
under
the right-hand
crankcase cover.
WARNING
Protect
yo"r
hands from the exhausl
header pipe.
The
f!.fha"st
system will
be HOT and is very close 10
Ihe
oi/jif-
ter
cOI'er.
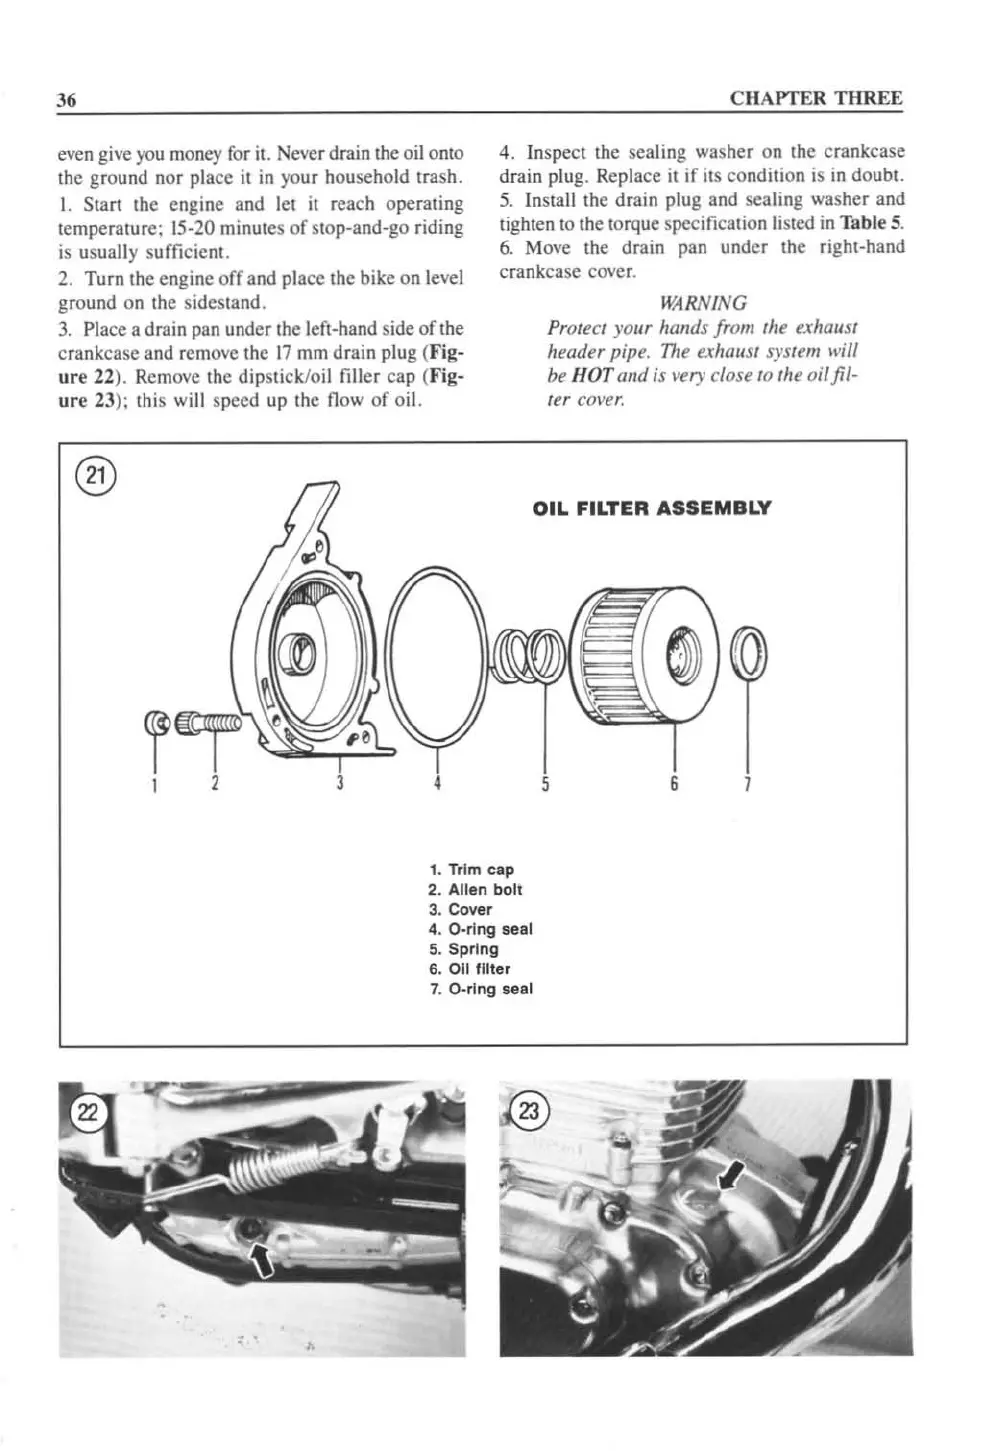
OIL
FILTER
ASSEMBLY
6 )
1. Trim cap
2. Allen
boll
3. C
ov
er
4. O-ring seal
5.
Spring
6. Oil
filter
7. O-r
ing
seal
, .
 Loading...


