Rack Mounting the XL-GPS
• In F73 – Alarm Control / Status(page95), check that the GPS PRI is OK and is
ALARM ENABLED.
• Press the STATUS key. “LOCKED GPS PRI” should appear on the front panel
display without an asterisk. If an asterisk appears, it means that a reference source
is not available.
To troubleshoot a problematic Antenna installation, recheck the physical location of the
antenna, the cabling, and the configuration settings described in this manual.
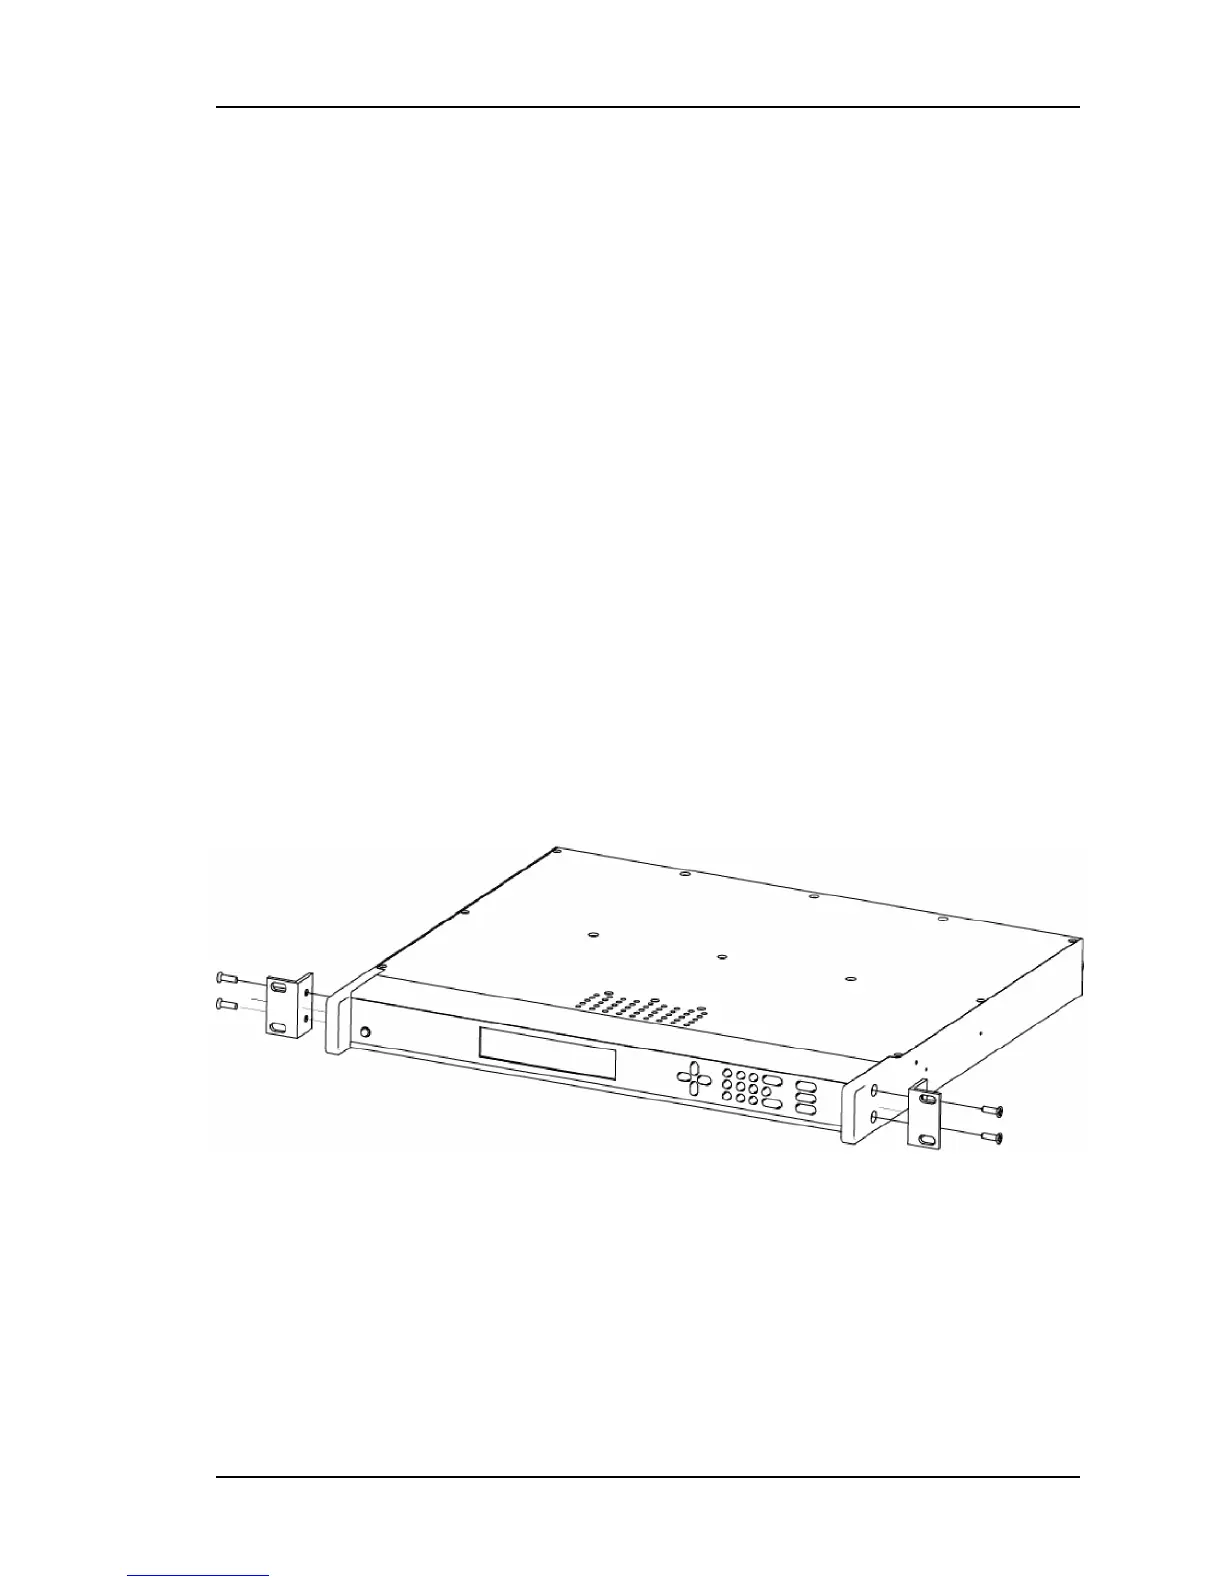
Rack Mounting the XL-GPS
The XL-GPS comes with the following parts needed to mount the XL-GPS securely in any
EIA standard 19-inch (48.26-cm) rack:
• 2 mounting brackets
• 4 flat-head, Phillips screws
Have the following items ready and available:
• The appropriate AC or DC power source to connect to the XL-GPS’s power supply.
• A #2 size Phillips bit screwdriver
To rack mount the XL-GPS:
• Unscrew the four phillips-head screws from the front end of the side panels.
• Use the same screws to attach the rack mount brackets, as shown.
• Tighten the screws using a #2 size Phillips screwdriver.
• Position the XL-GPS in any EIA Standard 19-inch (48.26 cm) rack system, and line up
holes in the brackets with the holes in the rack.
• Secure the brackets to the rack using rack mount screws.
098-00116-000 Rev. A............................... Page 33 of 221
 Loading...