13.9 Acquisition of the dynamic, photopic, mesopic pupillometry
Figure 40
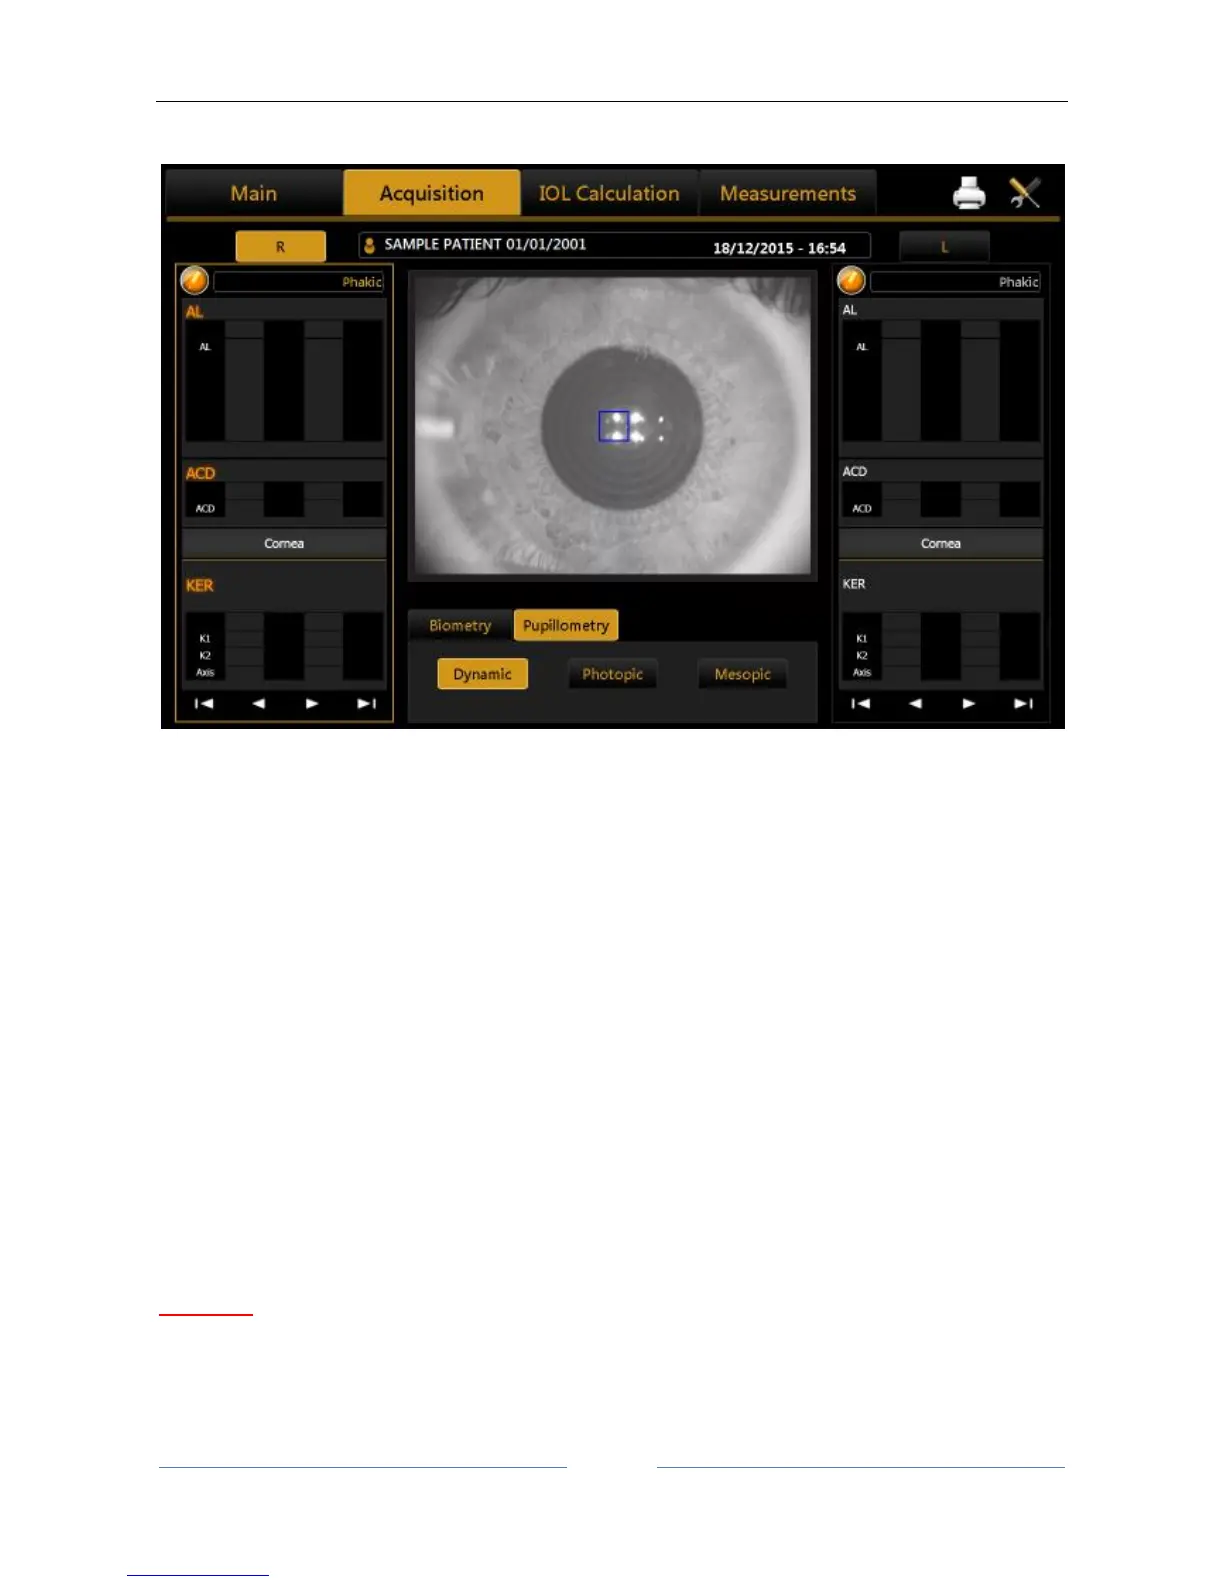
By selecting this mode, the acquisition environment shown in Figure 40 appears on the screen.
In order to acquire the pupillometry, first of all you need to center the blue rectangle, which is overlaid in the
image on the reflection of the four LEDs, as shown in Figure 41.
Press the joystick button to start the acquisition and press the button again to stop the acquisition.
As already mentioned in the introductory paragraphs, three types of acquisition can be performed:
- Dynamic pupillometry
- Photopic controlled light conditions (Photopic)
- Mesopic controlled light conditions (Mesopic)
In the case of the dynamic pupillometry, recording of the state of the pupil is started, first in mesopic
conditions, then photopic and then mesopic again. The data on the diameters measured are recorded and
shown in the "Measurement" section.
For the dynamic acquisition, a sequence of images is recorded and allows you to "review" the evolution of
the pupil through the various different light conditions to which it is subjected. In the pupillometry acquisition
in static controlled light conditions: photopic and mesopic, certain frames are saved, which you can display
by scrolling the associated gallery in the Pupil Measurements section.
WARNING: With blue eyes, acquisition of pupillometry in mesopic lighting conditions can be difficult to
accomplish. In this case, we suggest acquiring the mesopic data through dynamic pupillometry.