WheelMotors
g412077
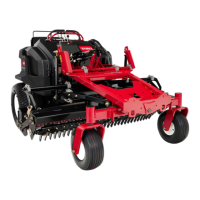
Figure53
(rightsidewheelmotorshown)
1.Elbowtting(2each)5.Elbowtting
2.Wheelmotor
6.Capscrew(4each)
3.Flangenut(4each)
7.Brakelink
4.Flangenut
8.Capscrew
Ifwheelmotorhubremovalisnecessary(toreplacethedrivestudsforexample);
refertotheHydro-GearHGM-H™SeriesMotorServiceandRepairManual
for
hubremovalandinstallationinformation.
IMPORTANT
Ifthewheelmotorisreplacedinpartorinwhole,thetractioncontrol
linkagerequiresadjustmentbeforereturningthemachinetoservice;
refertoAdjustingtheTractionSpeed(page5–41).
RemovingtheWheelMotor
RefertoFigure53forthisprocedure.
1.Removetherearwheel;refertoRemovingandInstallingtheRearWheels
(page7–5).
2.Removethefastenerssecuringthebrakelinktothebrakeactuator.
3.ReadandadheretotheinformationprovidedinGeneralPrecautionsfor
RemovingandInstallingtheHydraulicSystemComponents(page5–46).
4.Cleantheareaaroundthehydraulictubeandttingconnectionsthen
disconnectorremovethehydraulictubesfromthewheelmotor.Caporplug
thedisconnectedhydraulictubesandttingstopreventhydraulicsystem
contamination.
5.Supportthewheelmotorandremovethefastenerssecuringthewheelmotor
totheframe,thenremovethewheelmotorfromthemachine.
6.Ifnecessary,removethehydraulicttingsfromthemotor.Recordthe
locationsandorientationsofthettingsforassemblypurposes.
7.RemoveanddiscardalltheO-ringsfromthehydraulictubes,andttings
thatweredisconnectedorremoved.
FieldPro®6040
Page5–71
HydraulicSystem:ServiceandRepairs
22267SLRevA
 Loading...