InstallingtheFlowMeter
1.Aligntheowmetertothereduceradapterattheleft
sprayvalvewiththearrowoftheowmeterpointing
right(Figure53).
Figure53
1.Arrow
4.Gasket
2.Flowmeter
5.Reduceradapter(left
sprayvalve)
3.Flangeclamp
2.Assembletheowmetertothereduceradapterwith
thegasketandangeclamp(Figure53)thatyou
removedinstep2and3ofRemovingtheFlowMeter
fromtheValveManifolds(page12).
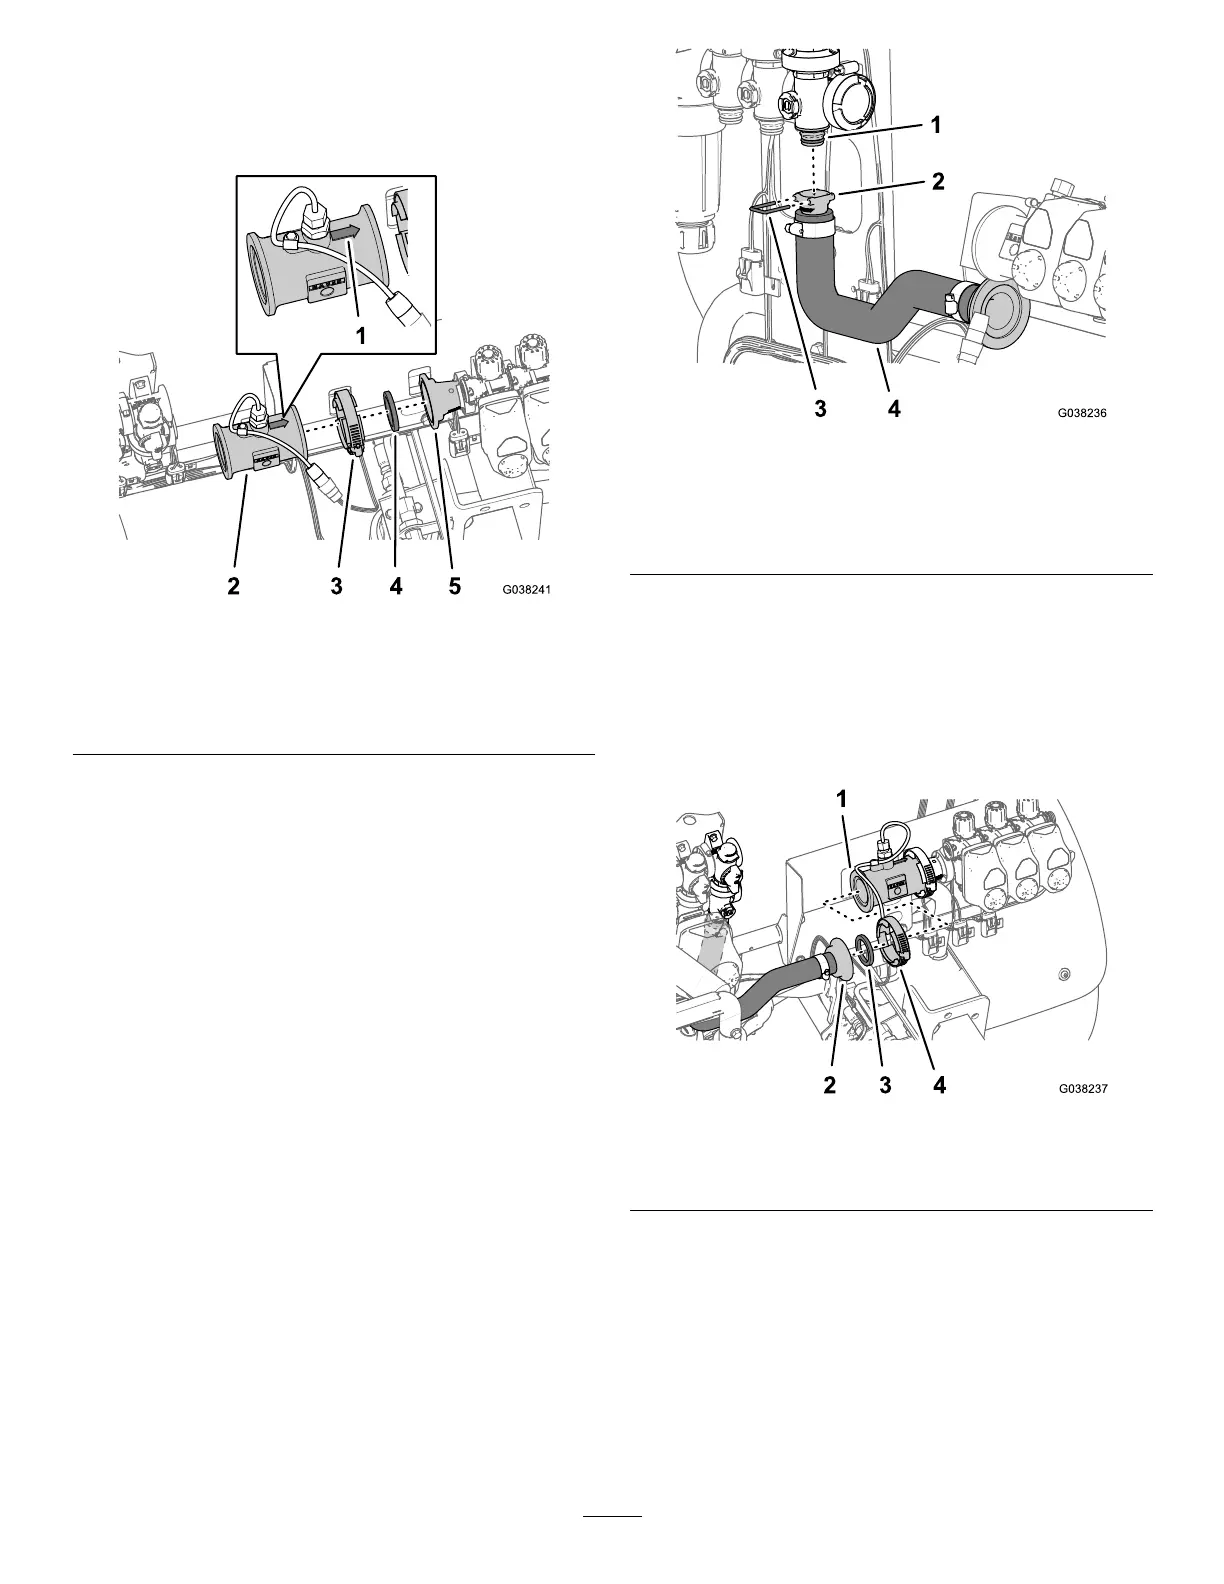
3.Assemblequick-connectttingoftheow-meterhose
withthequick-connectttingatthemaster-sprayvalve
(Figure54).
Figure54
1.Quick-connecttting
(master-sprayvalve)
3.Retainer
2.Quick-connecttting
(ow-meterhose)
4.Flow-meterhose
4.Securethehosettingtothevalvettingwiththe
retainer(Figure54)thatisprovidedwiththeow-meter
hose.
5.Alignthebarbedangettingoftheow-meterhose
andthegasketthatyouremovedinstep3ofRemoving
theFlowMeterfromtheValveManifolds(page12)
withtheangeattheinletoftheowmeter(Figure55).
Figure55
1.Flange(owmeter)3.Gasket
2.Barbedangetting
4.Flangeclamp
6.Securetheow-meterhosetotheowmeterwith
aclamp(Figure55)thatyouremovedinstep1of
RemovingtheFlowMeterfromtheValveManifolds
(page12)
26

 Loading...


