2
Disconnectingthe
Pressure-SenseTube
NoPartsRequired
Procedure
1.Pressinthecollarforthetubecouplerintheendcap
oftherightboom-sectionvalve(Figure5).
Figure5
1.Ported-captting(endof
therightboom-section
valve)
3.Pressure-sensetube
2.Tubecoupler
2.Pullthepressure-sensetubeforthedashgaugeoutof
thetubecoupler(Figure5).
3
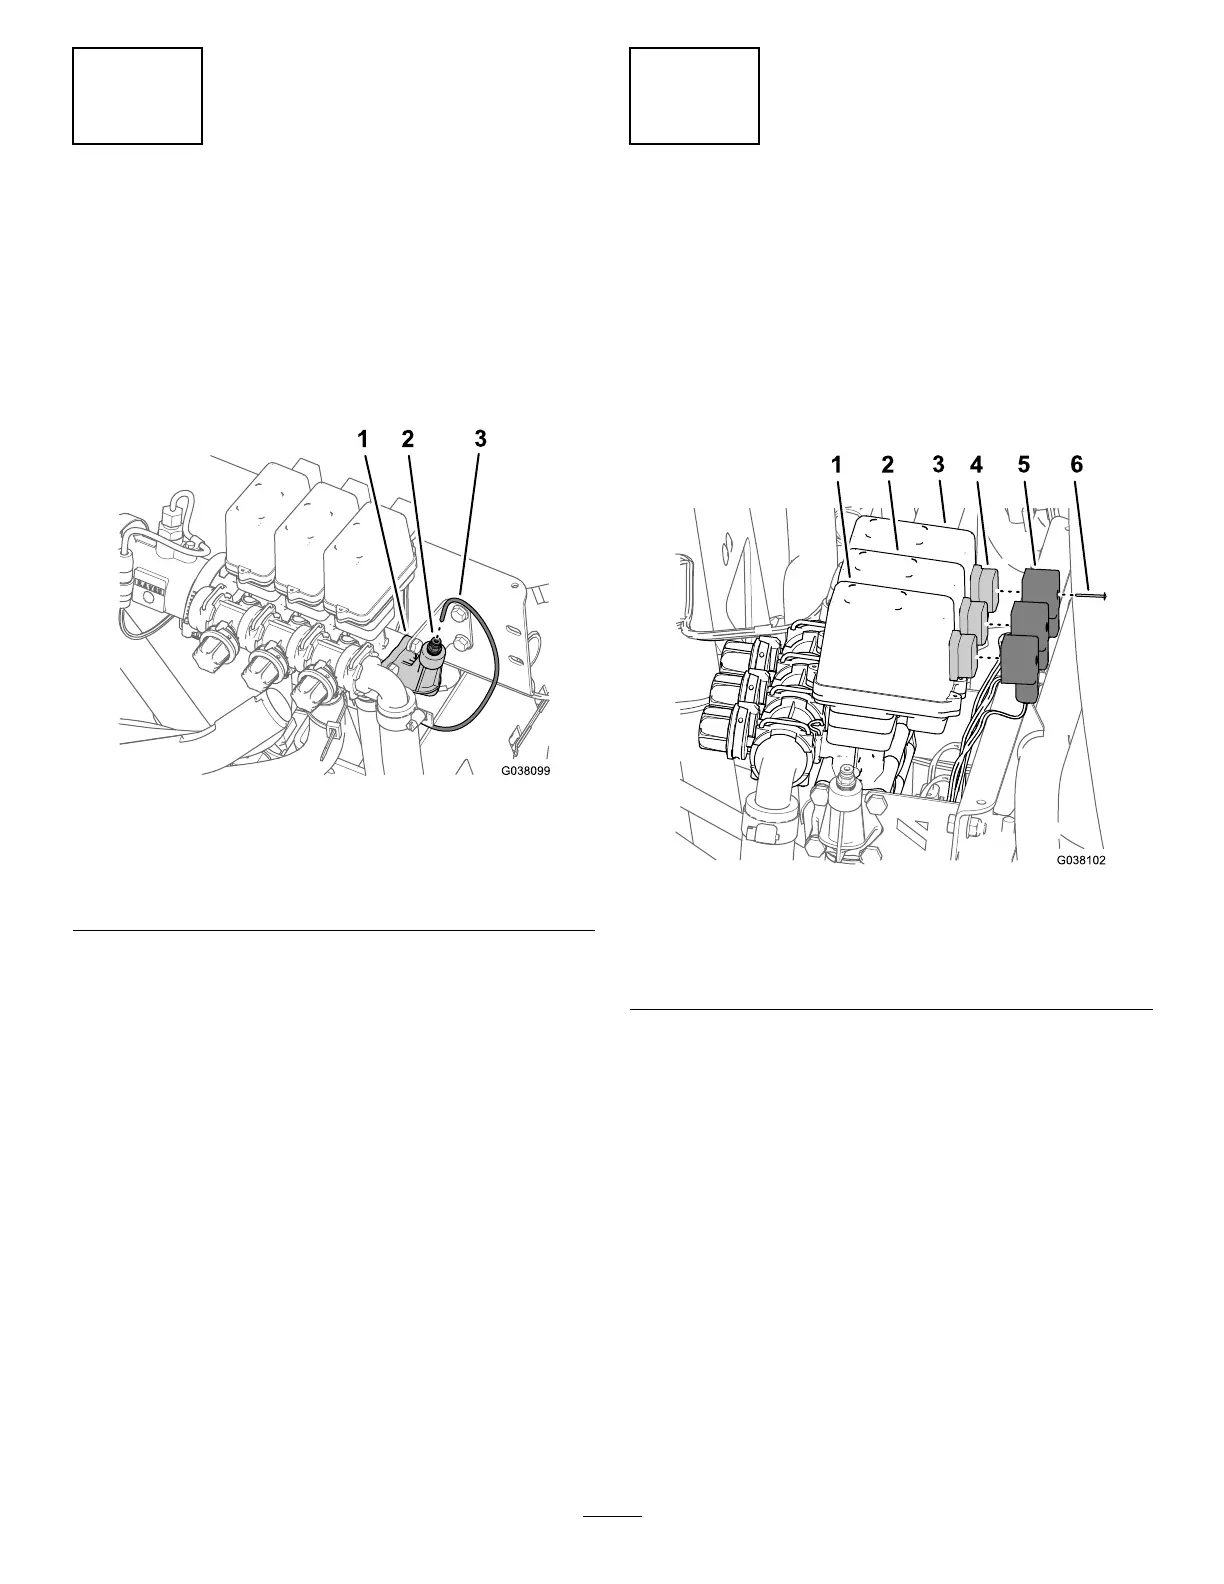
DisconnectingtheWire
HarnessfromtheValves
NoPartsRequired
Procedure
1.Removethescrewthatsecuresthe3-contactconnector
ofthewireharnesslabeledRIGHTSPRAYV ALVEfrom
rightsprayvalve(Figure6).
Figure6
1.Rightsprayvalve
4.Spray-valveconnector
2.Centersprayvalve
5.3-contactconnector
3.Leftsprayvalve6.Screw
2.Removethe3-contactconnectorofthewireharness
fromthesprayvalve(Figure6).
3.Repeatsteps1and2forthe3-contactconnectorsof
thewireharnesslabeledCENTERSPRAYV ALVEand
LEFTSPRAYV ALVE.
4.Removethescrewthatsecuresthe3-contactconnector
ofthewireharnesslabeledMASTERSPRAYVALVEfrom
rightmastersprayvalve(Figure7).
7