AssemblingtheValveActuatortothe
ManifoldValve
Performthisprocedureifyouremovedthevalveactuator(s)
toinstallthehoseassembliesontothemanifoldvalve(s).
1.Alignvalveactuatorthatyouidentiedinstep1of
RemovingtheValveActuators(page25)withthe
manifoldvalvepositionshowninFigure51.
2.Securethevalveactuatortothemanifoldvalvewiththe
retainerthatyouremovedinstep2ofRemovingthe
ValveActuators(page25).
11
ConnectingtheWiring
HarnesstotheValves
NoPartsRequired
ConnectingtheElectricalConnectors
fortheSectionValve
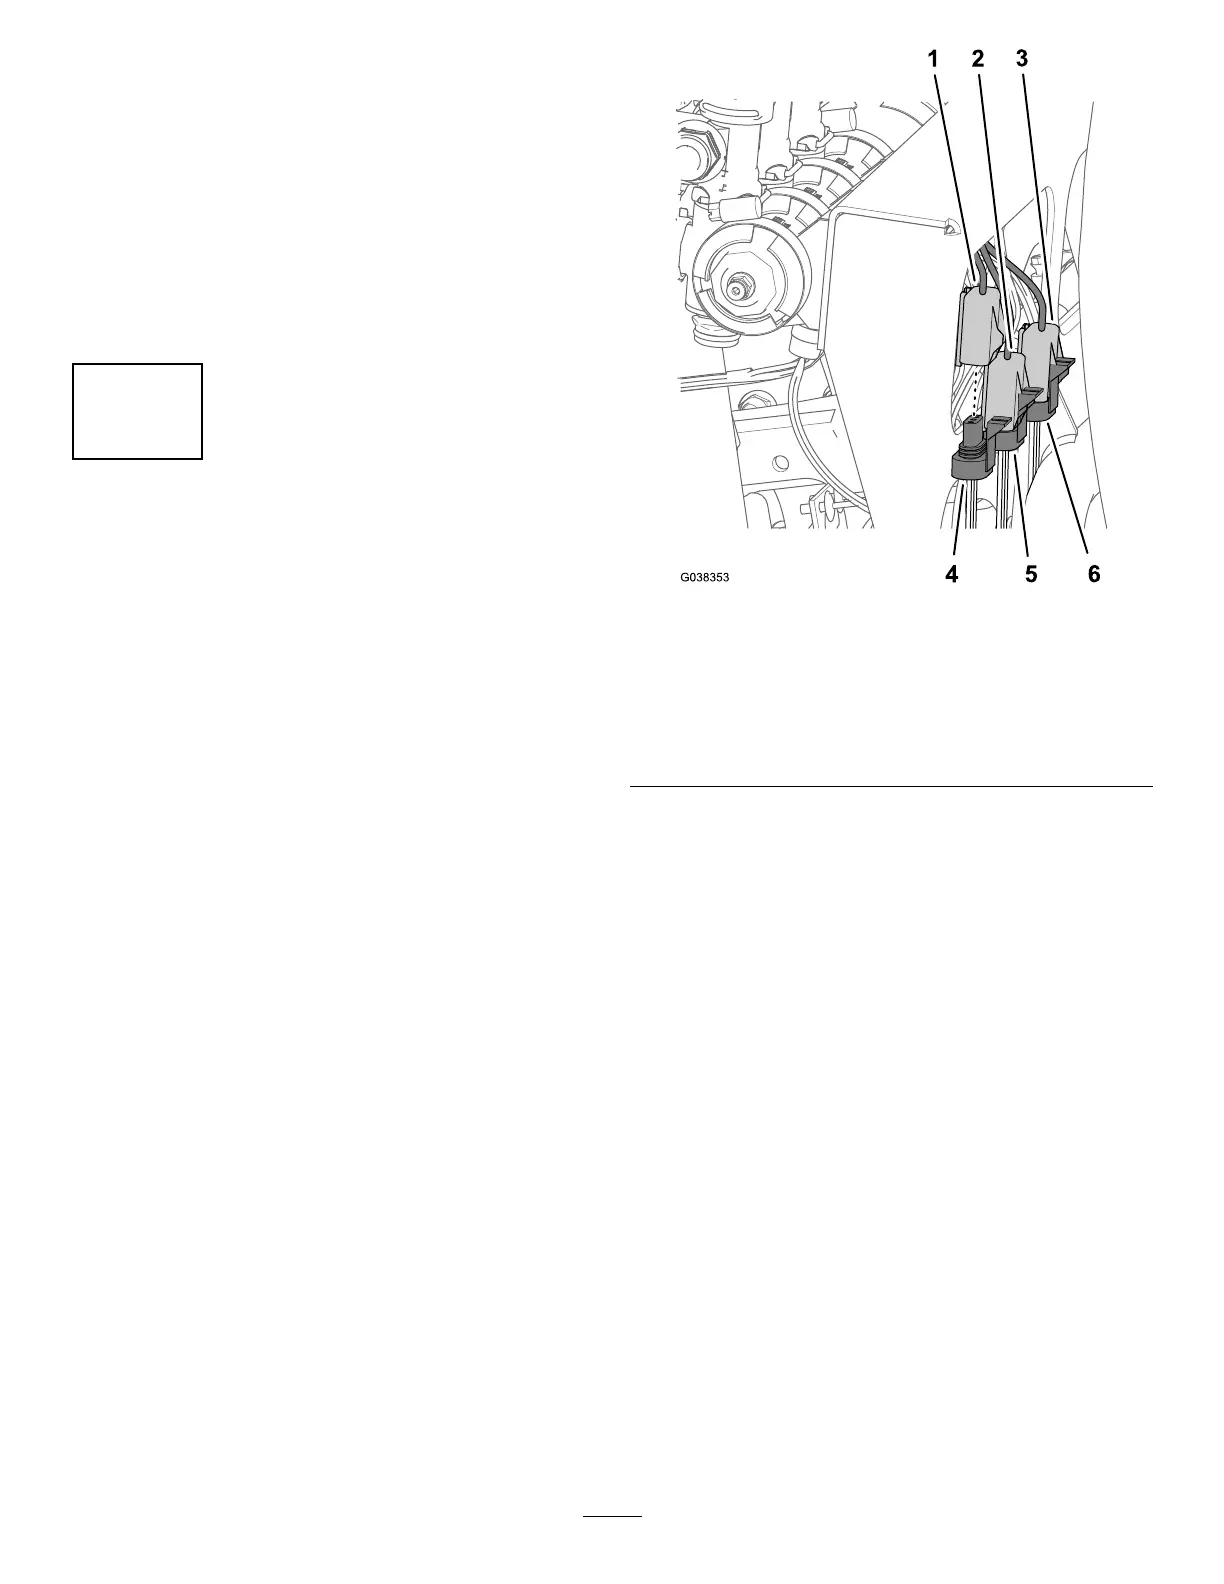
1.Connectthe3-pinvalveharnesslabeledLEFTSPRAY
VALVEintothe3-socketconnectorfortheleftspray
valve(Figure56).
Figure56
1.3-socketvalveharness
(rightsprayvalve)
4.3-pinvalveharness(right
sprayvalve)
2.3-socketvalveharness
(centersprayvalve)
5.3-pinvalveharness
(centersprayvalve)
3.3-socketvalveharness
(leftsprayvalve)
6.3-pinvalveharness(left
sprayvalve)
2.Connectthe3-pinvalveharnesslabeledCENTERSPRAY
VALVEintothe3-socketconnectorforthecenterspray
valve(Figure56).
3.Connectthe3-pinvalveharnesslabeledRIGHTSPRAY
VALVEintothe3-socketconnectorfortherightspray
valve(Figure56).
27

 Loading...


