Figure63
1.Agitation-nozzleassembly
3.90°quick-connecttting
2.Retainer
4.Quick-connecttting
(agitationthrottlevalve)
14
InstallingtheReturnHose,
AgitationSupplyHose,and
BypassHose
Partsneededforthisprocedure:
1
Returnhose—2.5x72cm(1x27-7/8inches)
1
Agitationsupplyhose—2.5x72cm(1x28-1/4inches)
1
Bypasshose—2.5x110cm(1x43-1/2
inches)—machineswithouttheoptionalspraywand
orelectrichosereelkit
InstallingtheReturnHose
1.Assemblethequick-connecttting(straightbarbed)of
thereturnhose—2.5x71cm(1x27-7/8inches)onto
thequickcouplingoftheratevalvewiththeretainer
(small)thatissuppliedwiththehose(Figure64).
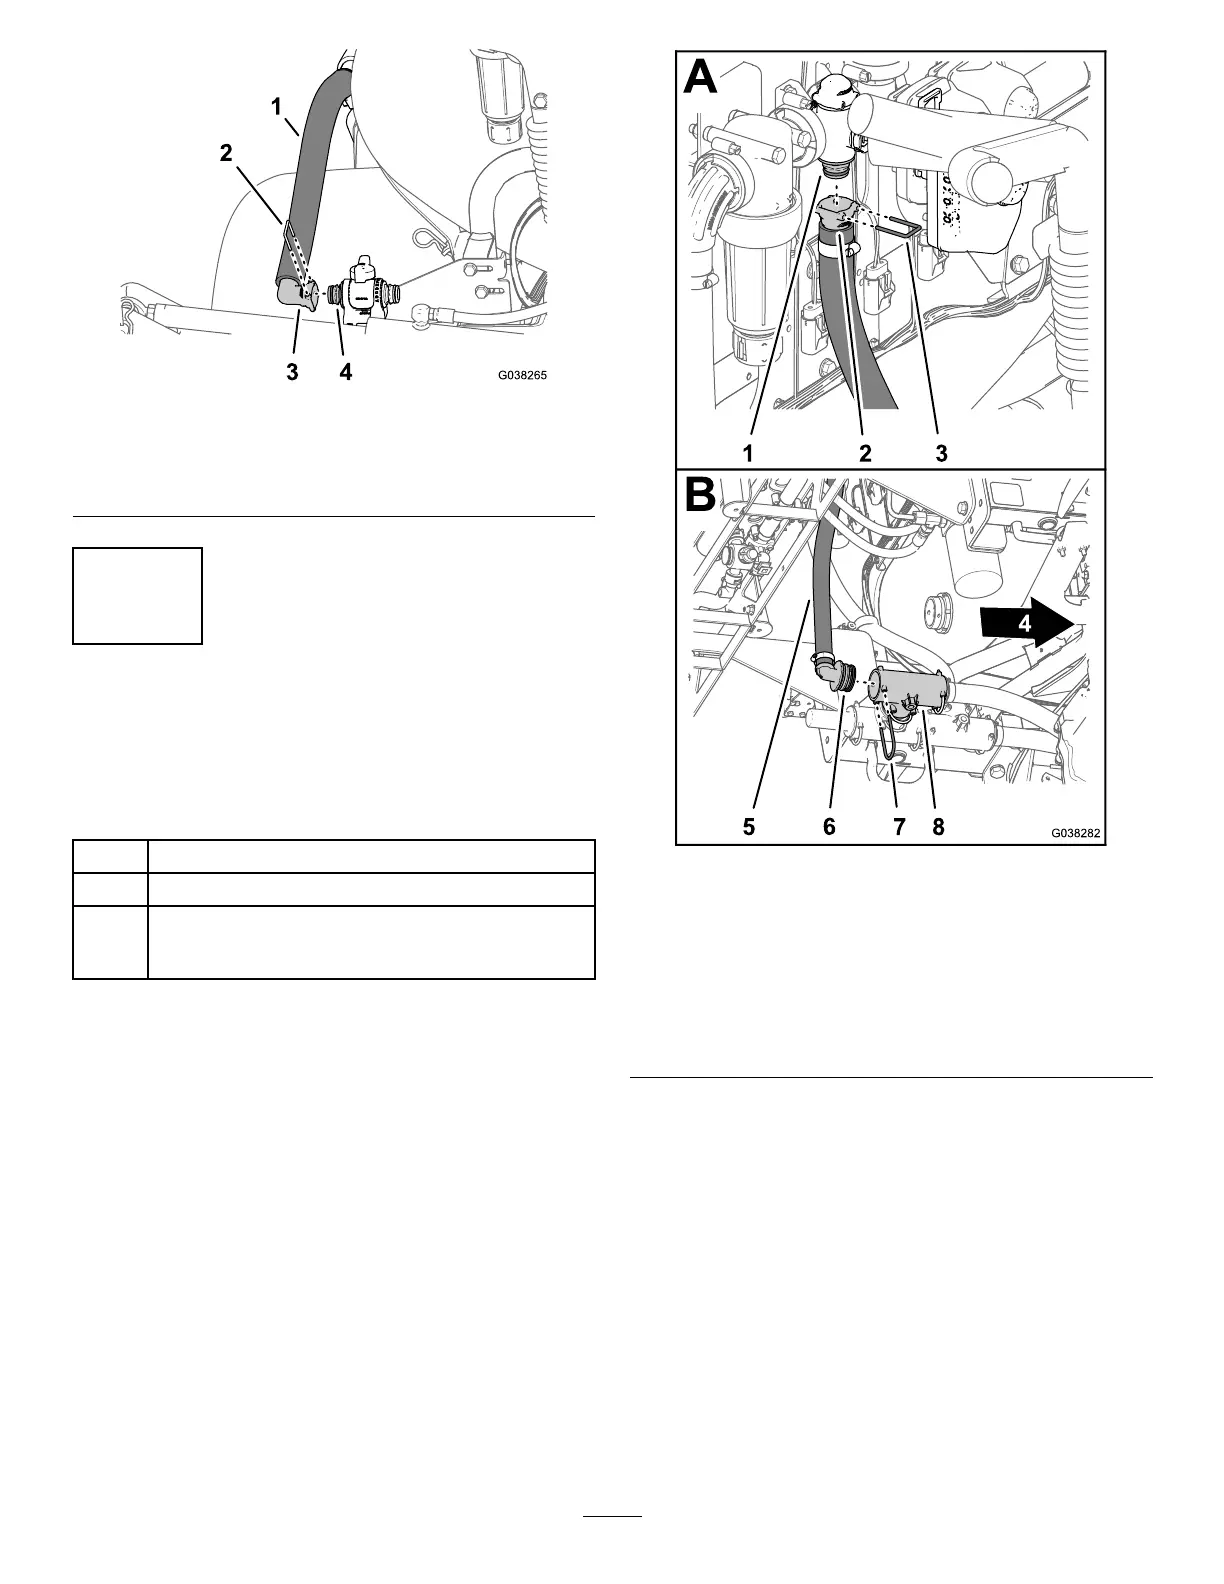
Figure64
1.Quick-connecttting(rate
controlvalve)
5.Returnhose—2.5x71cm
(1x27-7/8inches)
2.Quick-connecttting
(straightbarbed—return
hose)
6.90°barbedtting
3.Retainer(small)7.Retainer(large)
4.Frontofthemachine8.T-tting(inboard)
2.RoutethereturnhosedownandtowardtheT-tting
locatedinboardofthepressure-reliefvalveasshown
inFigure65.
31

 Loading...


