1.3. ASSEMBLY SETUP AND PREPARATION
This document guides you through the complete assembly of the 2023 Turbo Levo SL Carbon frame bicycles.
TURBO LEVO SL COMP CARBON
TURBO LEVO SL EXPERT CARBON
TURBO LEVO SL PRO CARBON
TURBO LEVO SL SW CARBON
TURBO LEVO SL SW CARBON FRMSET
TURBO LEVO SL SW LTD
TOOLS REQUIRED
Stable repair stand
Hex keys: 2.5 mm, 3 mm, 4 mm, 5 mm, 6 mm, 8 mm
Torx keys: T8, T10, T25, T30
Cable routing tools
Torque wrenches covering 0.8-50 Nm.
High-quality grease
High-quality carbon assembly paste
Loctite 603
Loctite 242
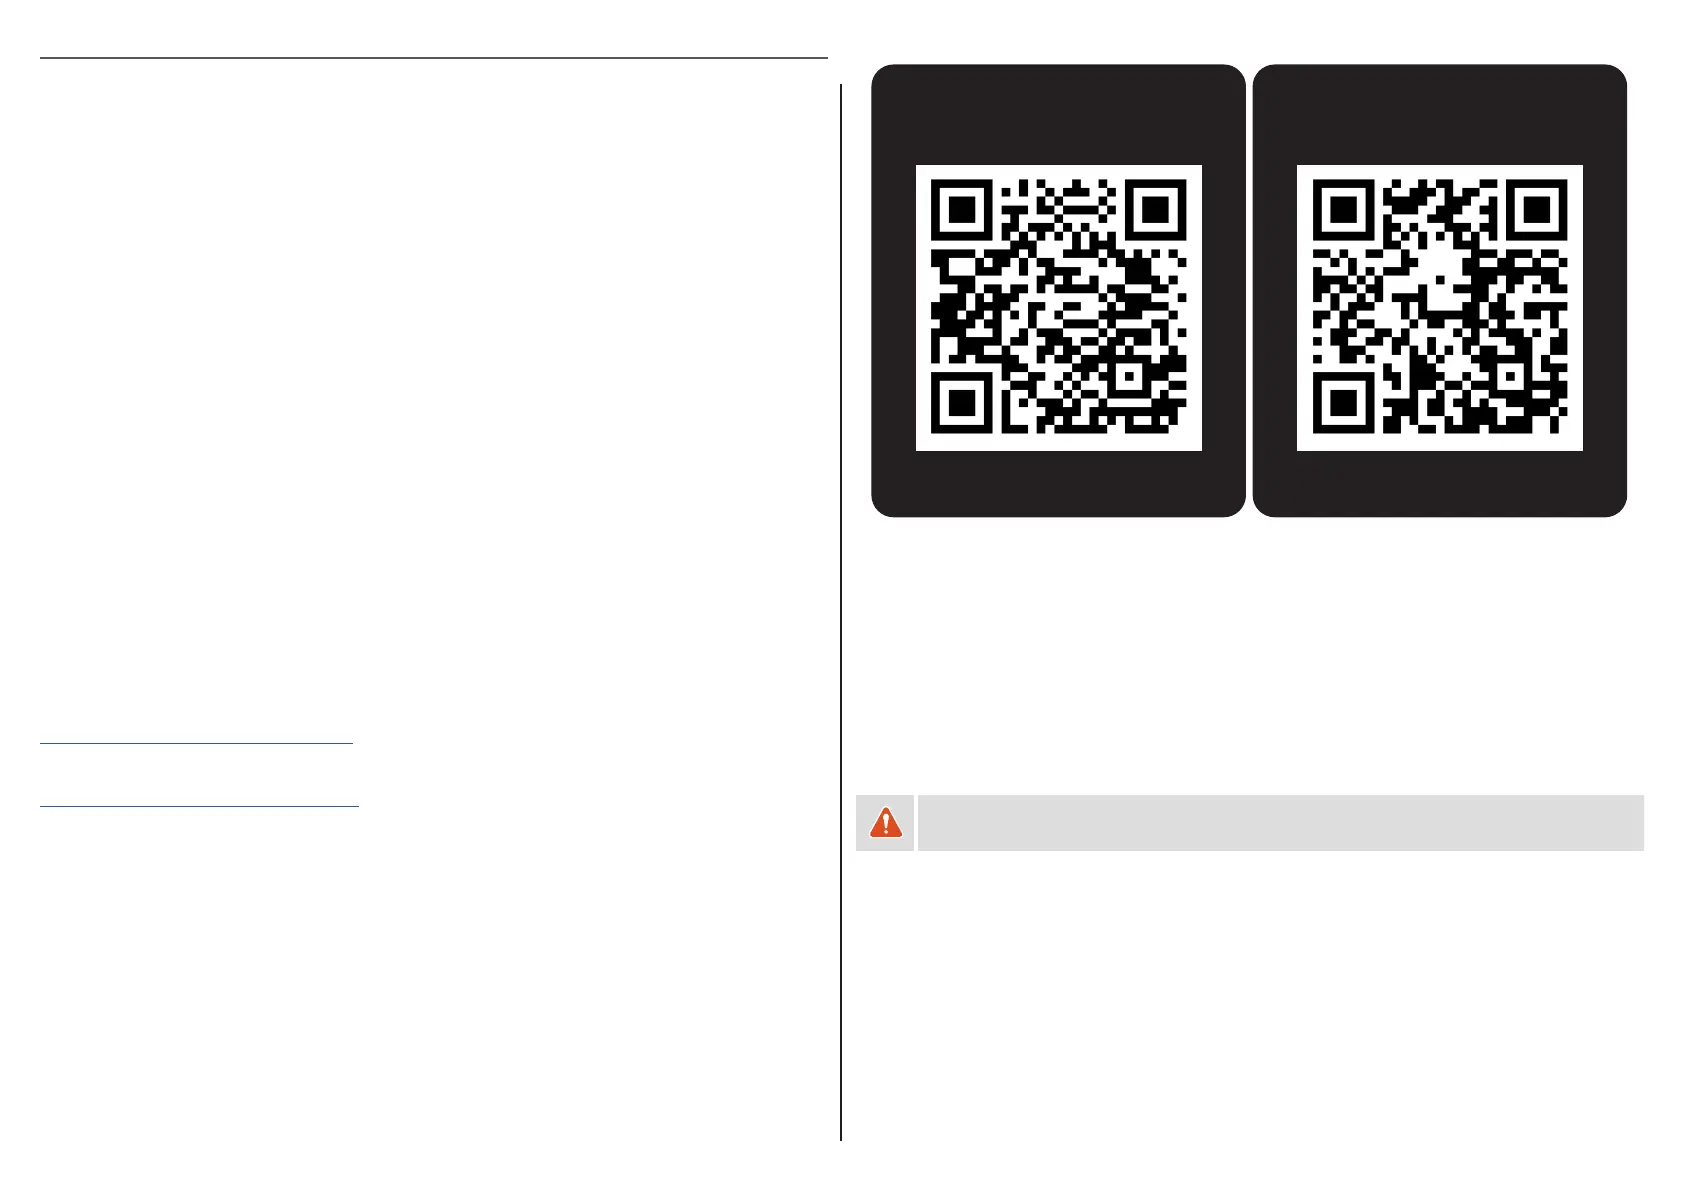
ASSEMBLY GUIDE VIDEOS
To access video content relating to the assembly process of the Turbo Levo SL Carbon, click on the links below to
go directly to the assembly video.
Use your smartphone camera to scan the QR codes on the opposite page.
You can also manually enter the web addresses below.
COMPLETE ASSEMBLY GUIDE VIDEO
https://vimeo.com/706376453/01fd3163c2
MOTOR AND BATTERY ASSEMBLY GUIDE VIDEO
https://vimeo.com/788453392/a945eb33bf
ASSEMBLY GUIDE VIDEOS QR CODE
Use your smartphone camera to scan the QR code to access the assembly instruction videos of the 2023
Turbo Levo SL Carbon.
Open the camera app on your phone.
Focus the camera on the QR code by gently tapping the code.
Follow the instructions on the screen to complete the action.
COMPLETE BUILD
ASSEMBLY GUIDE
SCAN ME
MOTOR AND BATTERY
ASSEMBLY GUIDE
SCAN ME
PREPARATION
The build starts with a bare 2023 Turbo Levo SL Carbon frame with no components assembled.
To build the Turbo Levo SL, it is essential to follow the order of operations as outlined in this guide.
Modifying the order of assembly will result in a longer build process.
Specific procedures are different for carbon and alloy frames. Follow the appropriate steps in the assembly guide
relating to your frame type.
Insert a standard 30.9 mm seatpost into the tube, then use a 4 mm hex bit to torque the seatpost clamp to 6.2
Nm / 55 in-lbf.
Place the bicycle frame into a stable repair stand.
WARNING: Do not clamp the carbon frame.