Label thermostat
Label the thermostat, where suitable, with the channel numbers they
are to control, for example, #02, #03. For a system with several room
controllers, add the ID of each room controller, for example, 1.02,
1.03, 2.02, 2.03.
If an external sensor is connected, add information about sensor type
when applicable.
Available thermostat and sensor combinations:
• Room temperature
• Room and floor temperature
• Room and outdoor temperature
• Remote sensor temperature
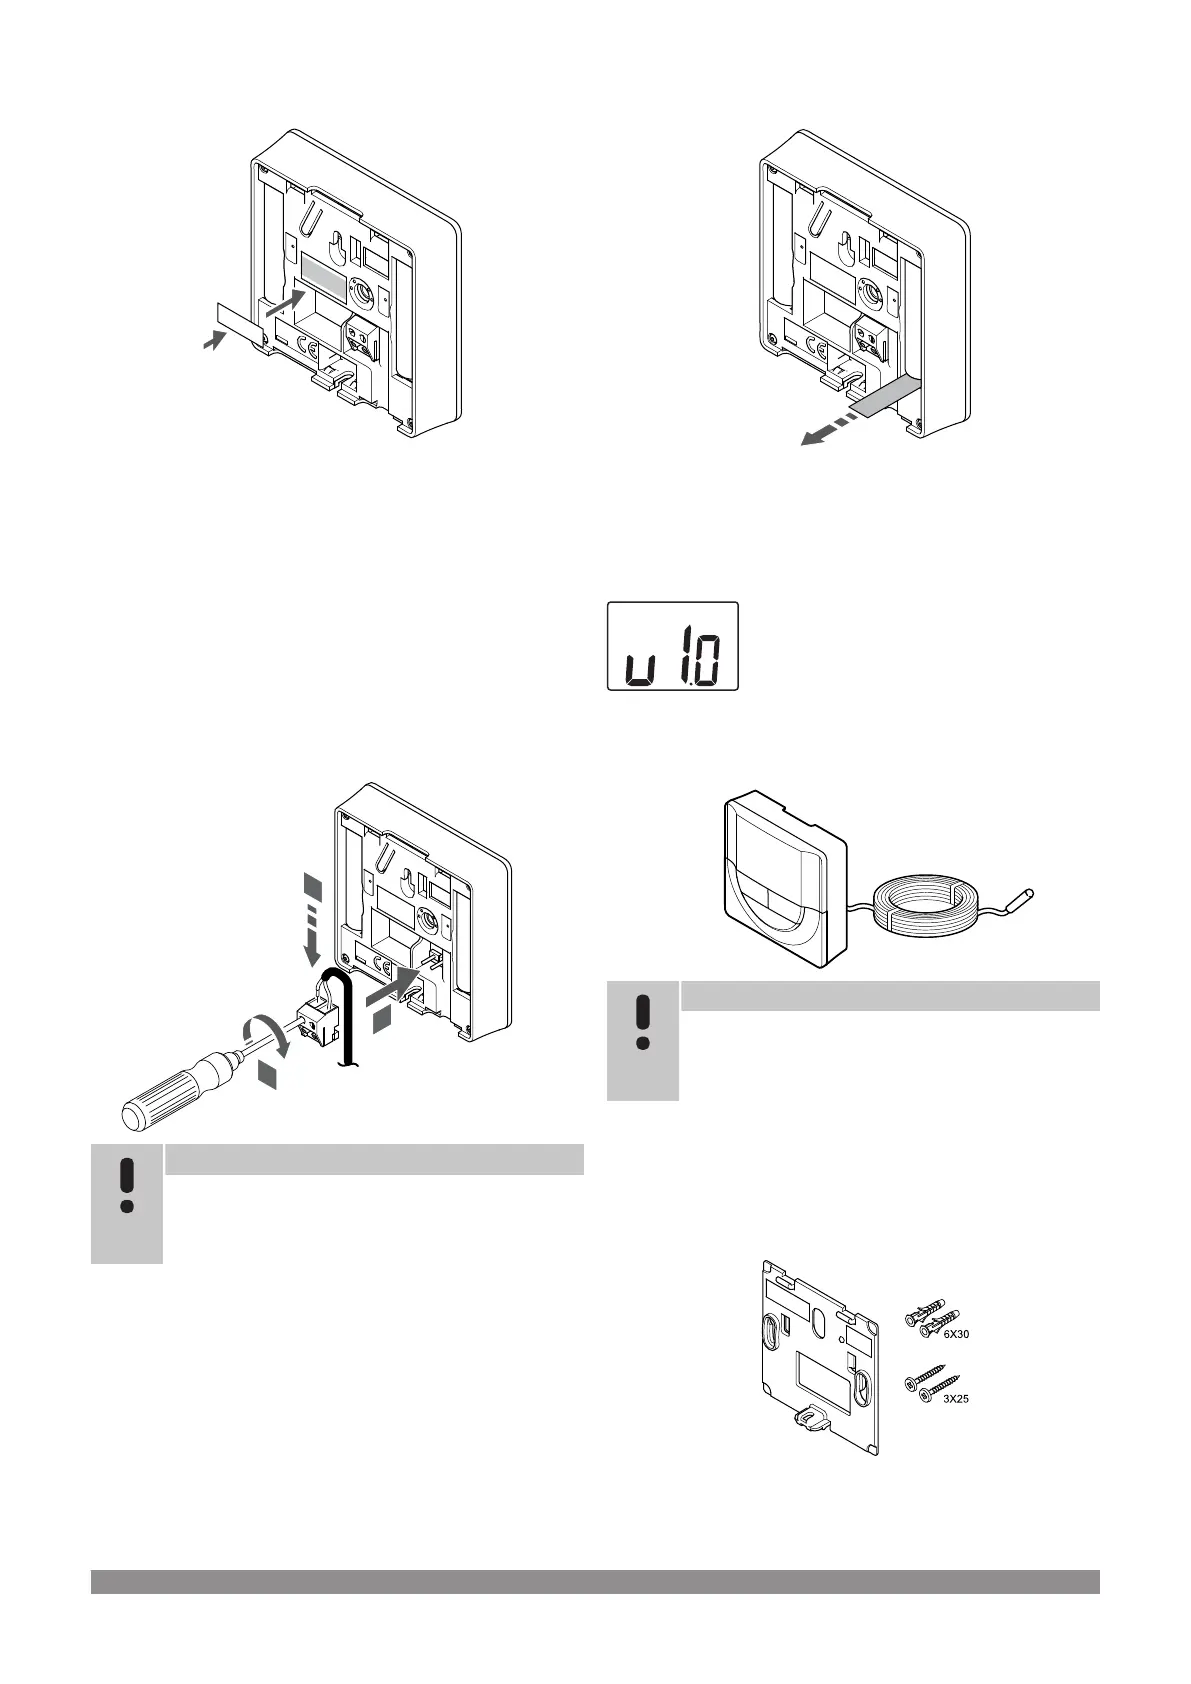
Connect external sensor to thermostat
Note
For accurate temperature: attach the outdoor sensor to
the north side of the building where it is unlikely to be
exposed to direct sunlight. Do not place it close to doors,
windows, or air outlets.
1. Insert the two wires from the sensor cable (non polarized) into
the removable connector.
2. Tighten the screws fixing the wires in the connector.
3. Insert the connector on the input pegs on the thermostat.
The external temperature sensor input can be used for either a floor,
outdoor or remote temperature sensor. Use the software on the
thermostat to select a control mode which corresponds to the use of
the sensor and thermostat.
Start the thermostat
Remove the plastic transportation strips from the batteries to start the
thermostat.
The thermostat use two alkaline 1.5 V AAA batteries which provides
about 2 years of battery life, as long as it is positioned within radio
range of the room controller. Ensure that the batteries are correctly
inserted in the thermostat.
Current software version is displayed during power up.
Select thermostat control mode
Note
If no button on the thermostat is pressed for about
8 seconds, while in a submenu, the current values will be
saved and the software exits to the settings menu. About
about 60 seconds later, it exits to run mode.
If an external sensor is connected to the thermostat, a control mode
must be selected to accommodate the extra functionality of the
sensor.
See 04 Control mode, Page 93, for how to change the setting.
Attach thermostat to the wall
The thermostat is delivered in a kit with screws, wall plugs, and a wall
bracket, presenting several options of attaching the thermostat to the
wall.
42
|
Uponor Smatrix Wave PULSE
|
Installation and operation manual

 Loading...