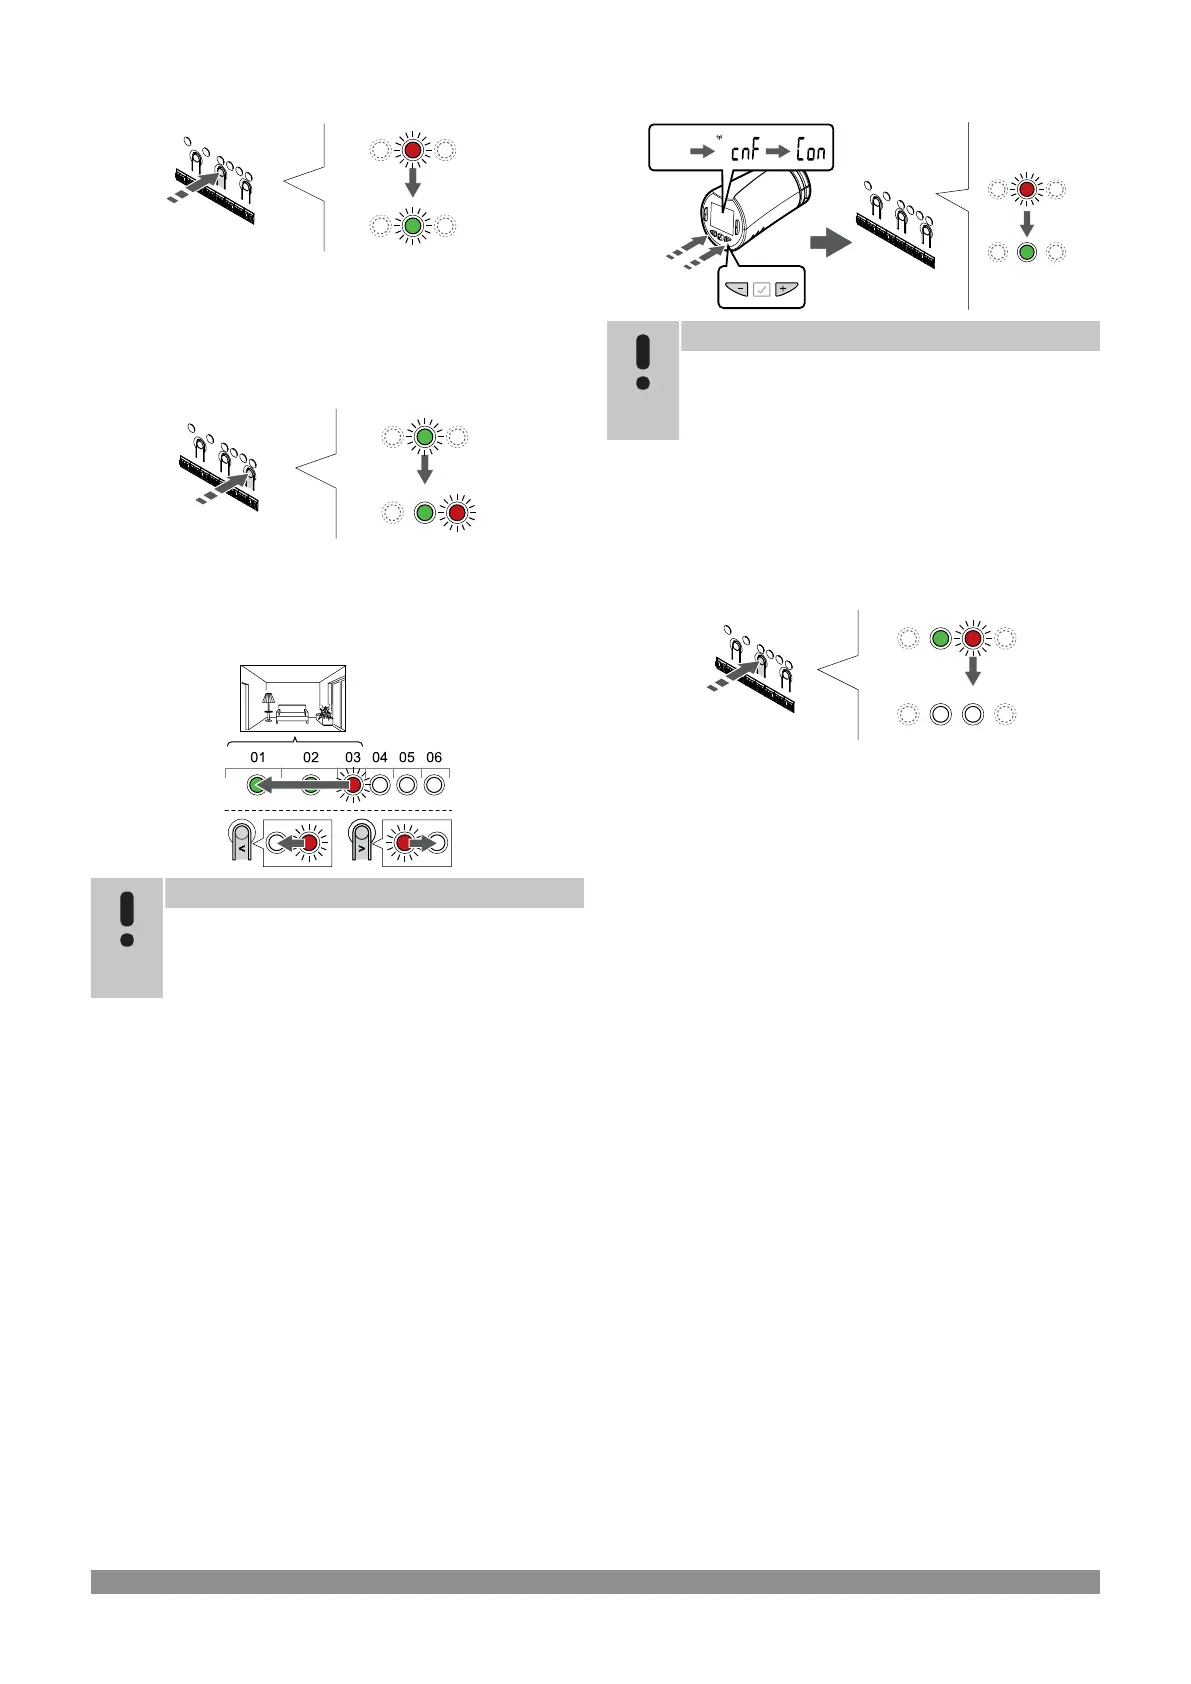
3. Lock room channel
Press the OK button to select the channel for registration. The LED
for the selected channel starts flashing green.
Repeat selecting channels until a sufficient number of channels for
the room are created.
4. Create a virtual room
Press and hold the > button on the room controller until the selected
channels light up green and the next in line starts flashing red. A
channel without a thermostat has been created.
5. Select channel for thermostatic head
Note
If the text --- is shown in the thermostatic head display
the registration failed. Repeat steps 6 through 7 and try
the next channel in line, in case two other thermostatic
heads already has been registered to the current one.
Use buttons < or > to move the pointer (LED flashes red) to the first
channel of the room (green LED). The LED flashed red and green.
If the first channel is full, move the pointer to the next channel in line.
6. Register thermostatic head
Note
If the text --- is shown in the thermostatic head display
the registration failed. Repeat steps 6 through 7 and try
the next channel in line, in case two other thermostatic
heads already has been registered to the current one.
Press and hold both - and + buttons on the thermostatic head until
the text CnF(configure) and a communication icon is displayed.
The text Con is shown in the display, and the selected channel LED
in the room controller turns fixed green, when the registration is
complete.
7. Exit registration mode
Press and hold the OK button on the room controller until the green
LEDs turn off to end registration and return to run mode.
To register an additional thermostatic head, exit registration mode
and repeat the registration process.
To unregister already registered thermostats, see Unregister room
controller channels, Page 77.
Uponor Smatrix Wave PULSE
|
Installation and operation manual
|
59

 Loading...