Installation and electrical connection en
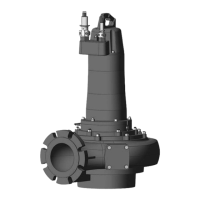
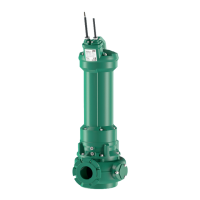
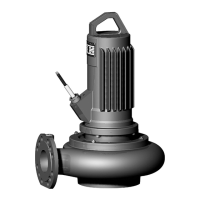
Installation and operating instructions Wilo Motor FK 17.1, FK 202, FK 34, FK 42 + EMU FA, Rexa SUPRA, Rexa SOLID 167
2. Carefully and slowly reach into the hydraulics housing through the pressure port
and rotate the impeller.
6.4.2.2 Checking the oil in the motor
compartment
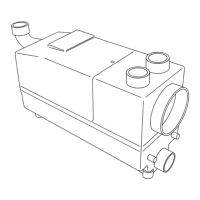
Motor FK 17.1
Fig.4: Motor compartment: Check the oil
+/- Fill/drain the oil in the motor compartment
‡ Pump is not installed.
‡ Pump is not connected to the mains.
‡ Protective equipment has been put on.
1. Place the pump on a firm surface in a vertical position.WARNING!Risk of hands
being crushed. Ensure that the pump cannot fall over or slip away!
2. Position a suitable tank to collect the operating fluid.
3. Unscrew screw plug and allow the operating fluid to drain out.
4. Check the operating fluid:
⇒ If the operating fluid is clear, reuse operating fluid.
⇒ If the operating fluid is contaminated (black), fill with new operating fluid. Dis-
pose of operating fluid in accordance with the local regulations!
⇒ Notify the customer service if the operating fluid contains swarf!
5. Pour the operating fluid in through the opening.
⇒ Comply with the specifications for operating fluid type and quantity. When re-
cycling the operating fluid, check the quantity and if required adjust it.
6. Clean the screw plug, replace the seal ring and screw it back in. Max. tightening
torque: 8Nm (5.9ft·lb)!
Motors FK 202, FK 34, FK 42
Fig.5: Motor compartment: Check the oil
E Venting
+ Fill the oil in the motor compartment
- Drain the oil in the motor compartment
‡ Pump is not installed.
‡ Pump is not connected to the mains.
‡ Protective equipment has been put on.
1. Place the pump on a firm surface in a vertical position.WARNING!Risk of hands
being crushed. Ensure that the pump cannot fall over or slip away!
2. Position a suitable tank to collect the operating fluid.
3. Unscrew the screw plug (E).
4. Unscrew the screw plug (+).
5. Unscrew screw plug (-) and drain the operating fluid. If a shut-off ball cock is in-
stalled on the outlet opening, open the shut-off ball cock.
6. Check the operating fluid:
⇒ If the operating fluid is clear, reuse operating fluid.
⇒ If the operating fluid is contaminated (black), fill with new operating fluid. Dis-
pose of operating fluid in accordance with the local regulations!
⇒ Notify the customer service if the operating fluid contains swarf!
7. If a shut-off ball cock is installed on the outlet opening, close the shut-off ball
cock.
8. Clean the screw plug (-), replace the seal ring and screw it back in. Max. tightening
torque: 8Nm (5.9ft·lb)!
9. Pour the new operating fluid in through the hole for the screw plug (+).
⇒ Comply with the specifications for operating fluid type and quantity. When re-
cycling the operating fluid, check the quantity and if required adjust it.
10.Clean the screw plug (+) and (E), replace the seal ring and screw it back in. Max.
tightening torque: 8Nm (5.9ft·lb)!
 Loading...