Sawmill Alignment
Routine Alignment Procedure
Sawmill Alignment 60HDdoc102619 7-3
7
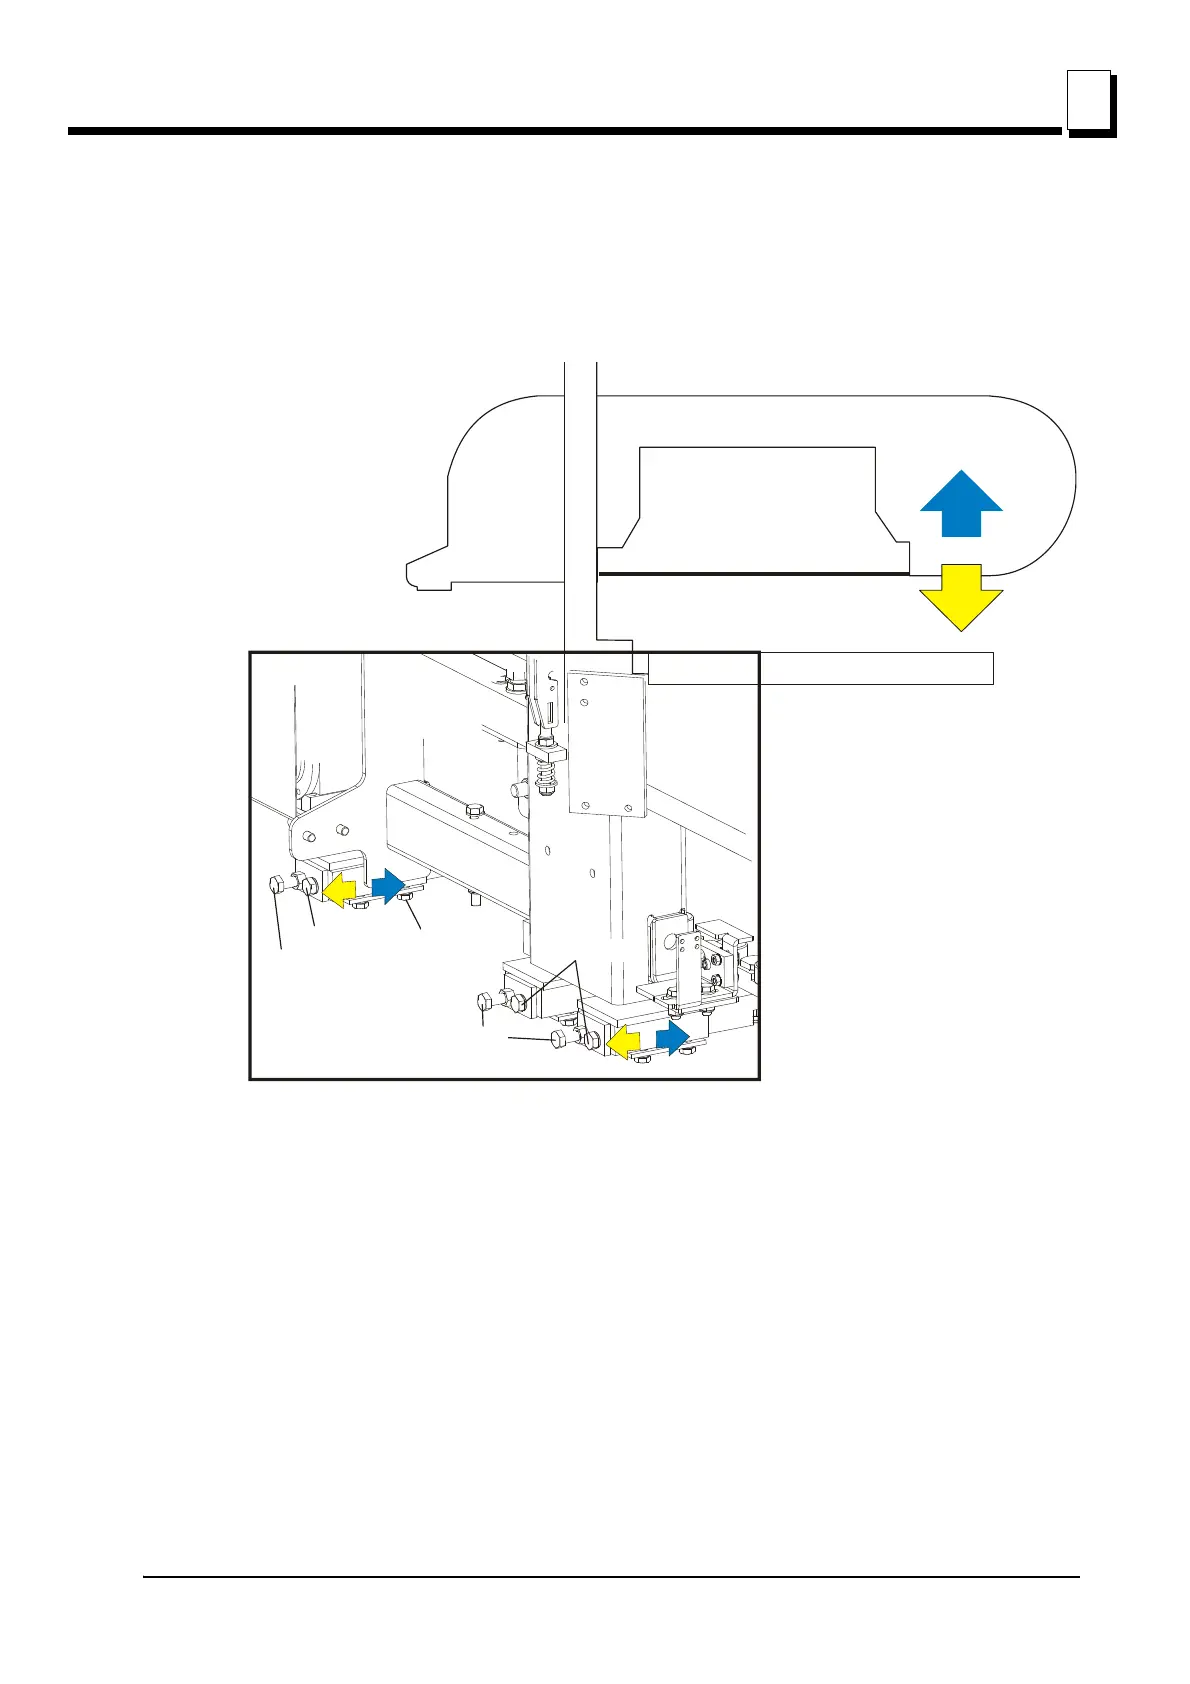
See Figure 7-2. To adjust the saw head tilt, use the bolts located at the bottom of the saw head mast.
Loosen the three sets of four retaining plate bolts. To raise the outside of the saw head, back the stop
bolts out, then tighten the adjustment bolts. To lower the outside of the saw head, loosen the
adjustment bolts and tighten the stop bolts. Recheck the measurement from the blade to the bed
rails and adjust the stop bolts and adjustment bolts until the outside of the saw head is 1/26" (1mm)
higher than the inside. Retighten the retaining plate bolts.
FIG. 7-2
Stop Bolt
DETAIL OF LOWER TRACK ROLLER ASSEMBLY
Stop Bolt
Adjustment Bolt
Retaining
Plate Bolts
Tighten adjustment
bolts to raise saw head;
Loosen adjustment
bolts to lower saw head
Adjustment Bolt
Stop Bolt
Stop Bolt
Adjustment Bolt
Adjustment Bolt
Retaining
Plate Bolts
Tighten adjustment
bolts to raise saw head;
Loosen adjustment bolts
to lower saw head
DETAIL OF LOWER TRACK ROLLER ASSEMBLY

 Loading...